This is a comprehensive look at setting up a Melges 15 sailboat from PARTS delivery to putting on the SAILS to GO RACE. Yes. It’s LONG. We made the video because the other videos skipped over details that were, in fact, important to us. We included timings below so that you can skip to the section of interest.
Ed Furry – Sail22.com – helped with several of the videos and continues to put out videos with some nice upgrades that you might consider. He has a YT channel here where he posts other new upgrade ideas available from him.

If you want to learn more about why Melges Performance Sailboats introduced the Melges 15, see our interview with Eddie here.
Melges’ Eddie Cox created a nice video that does a quick run through of assembling a Melges 15 here.
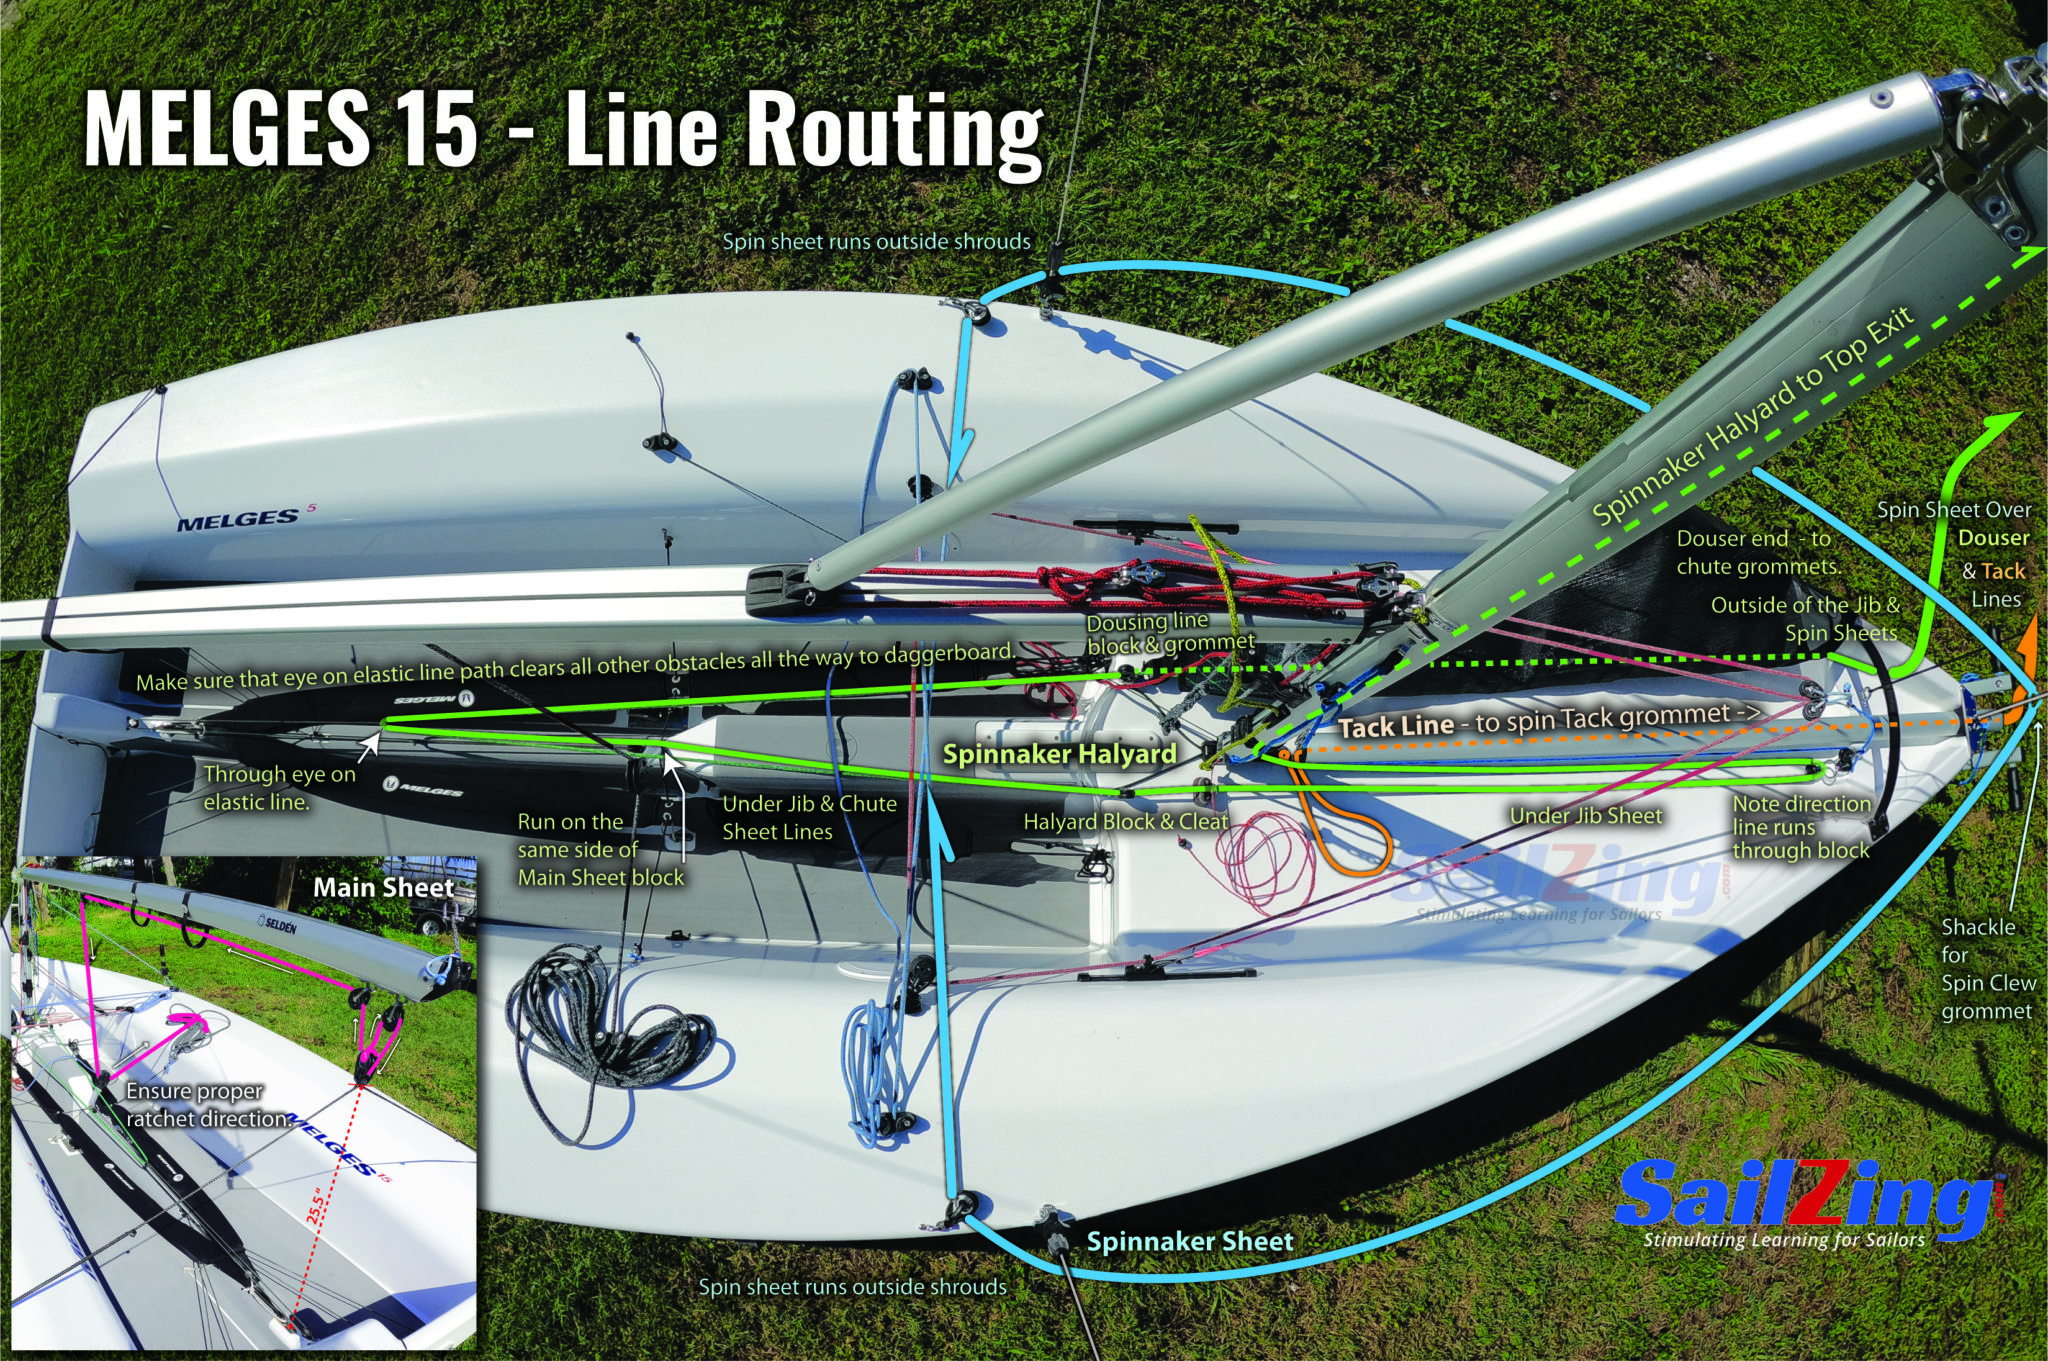
Line Routing Diagram
DOWNLOAD: We created a Line Routing Diagram for you to print and use. There is a lower resolution one below and a super high resolution one in PDF form.
Melges 15 Assembly Video
Play by Play Steps with Links
00:00:48 Melges 15 Parts
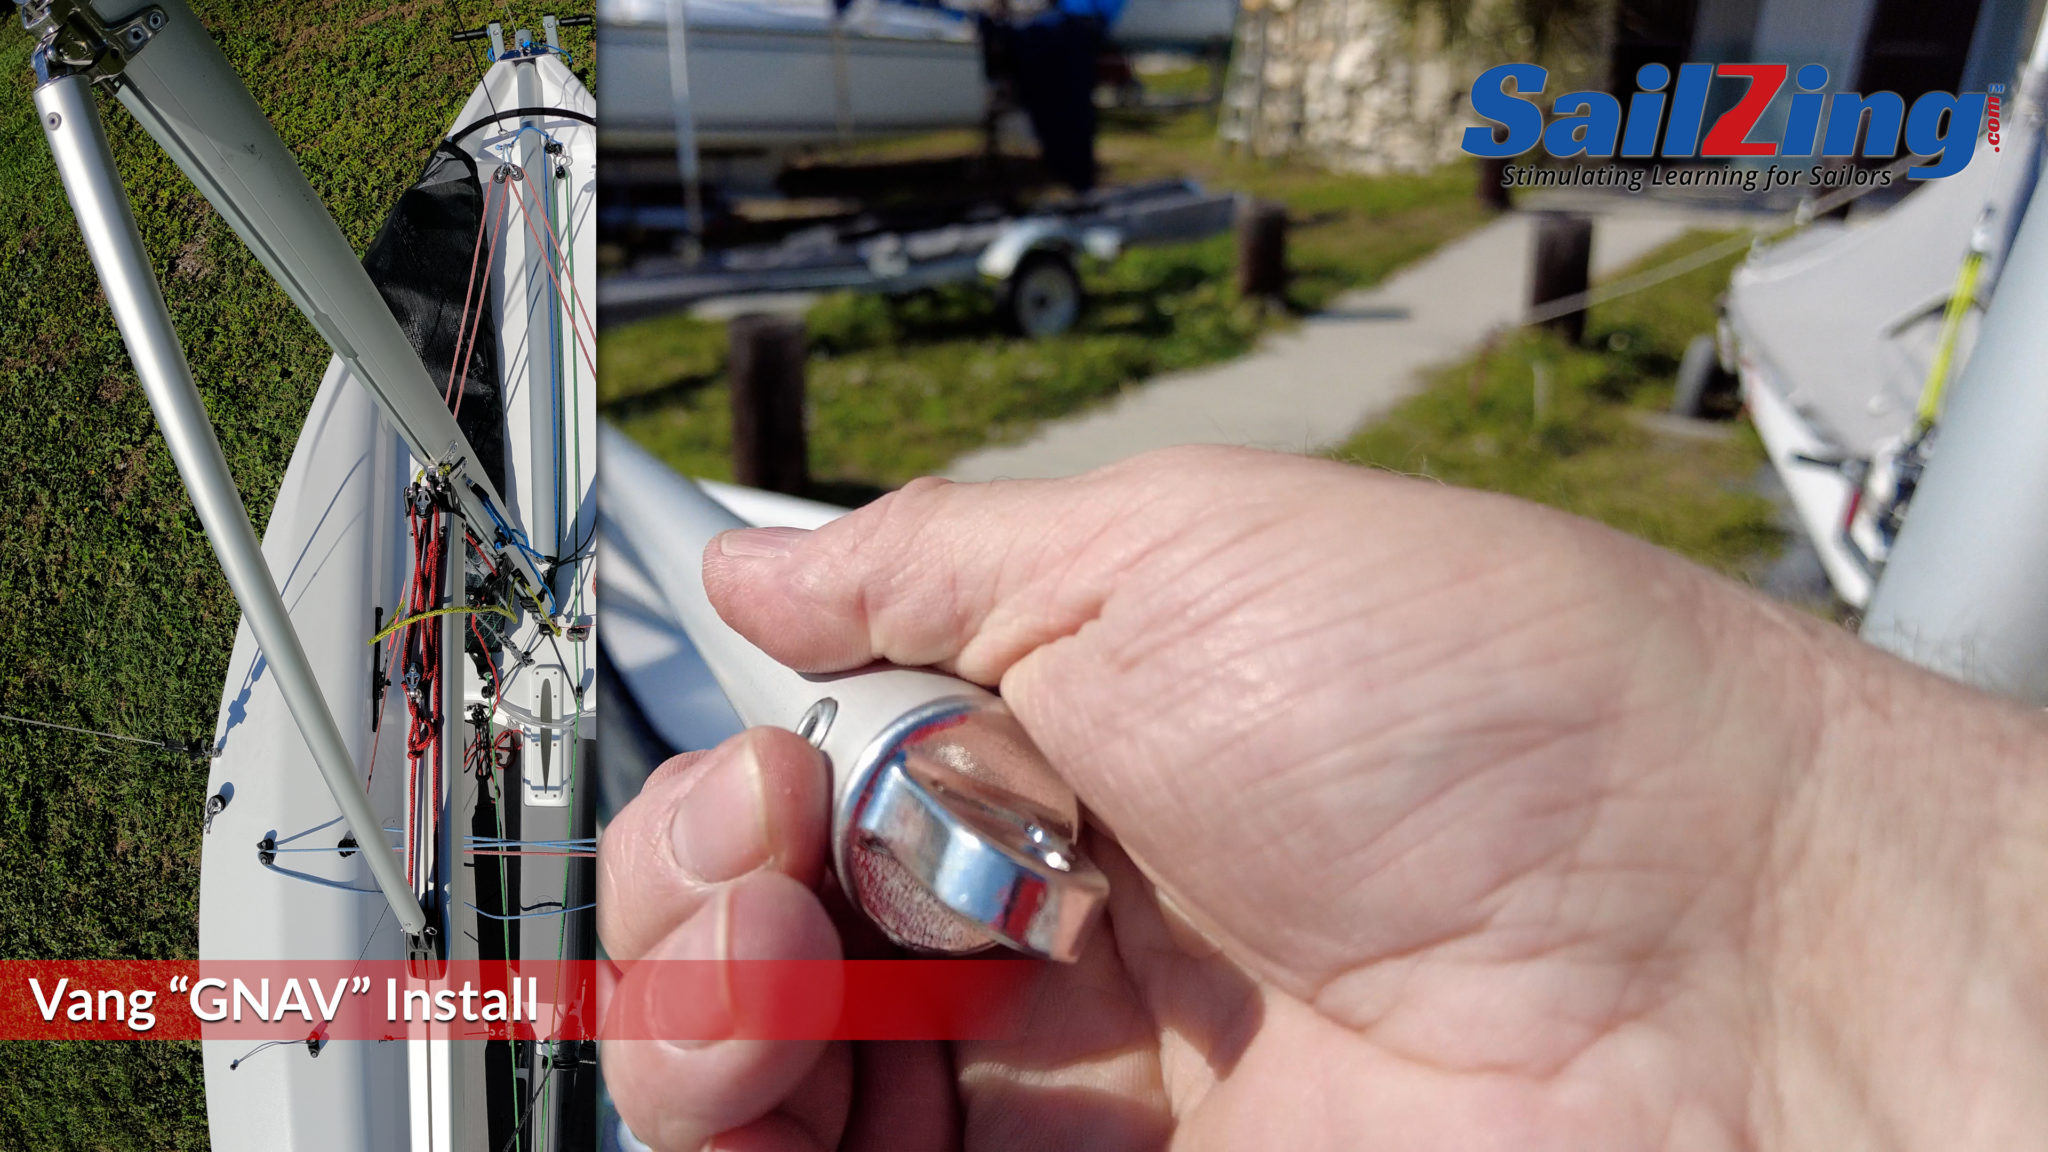
- Vang / GNAV Tube
- Boom
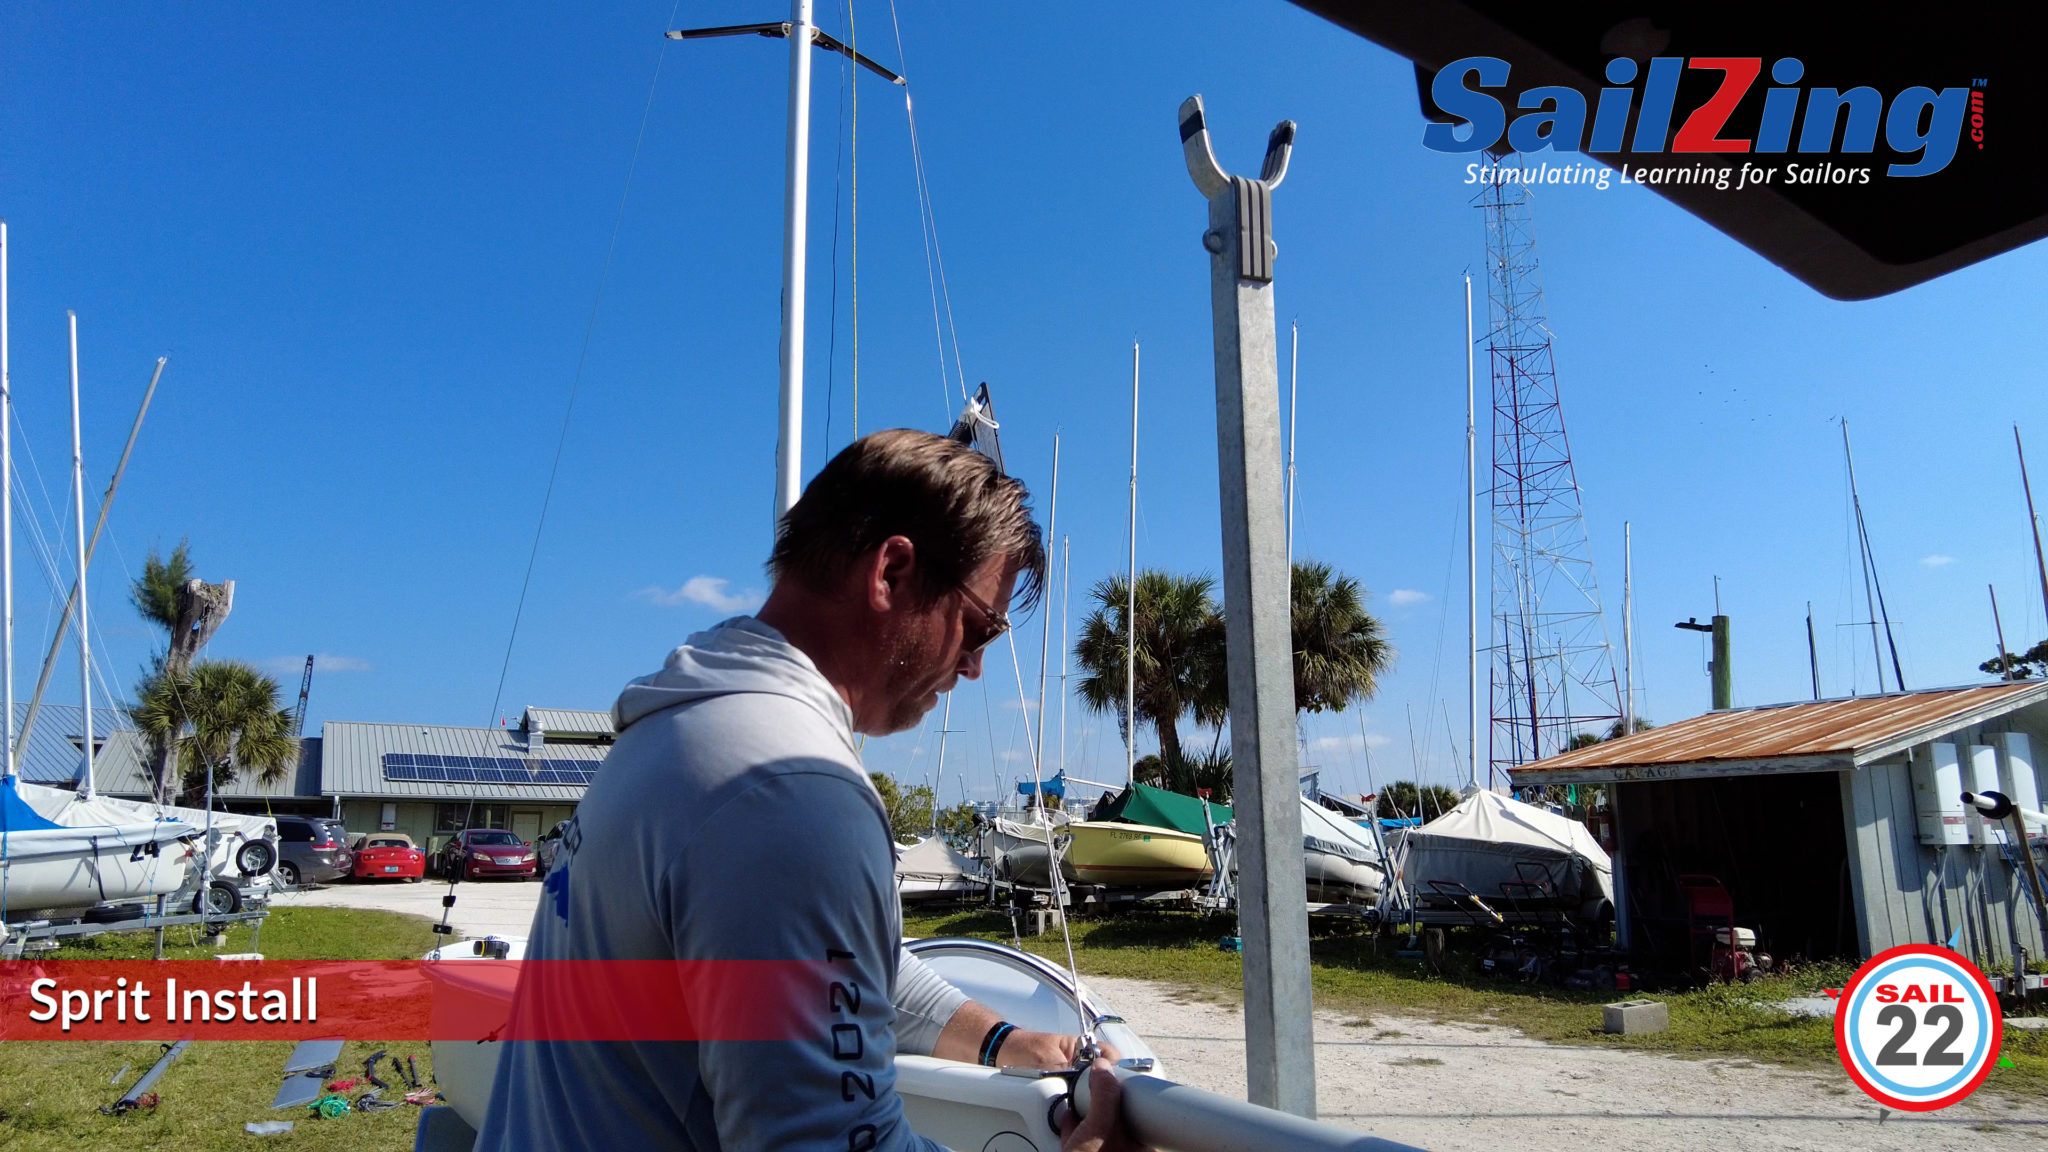
- Sprit – May come pre-installed in bow.
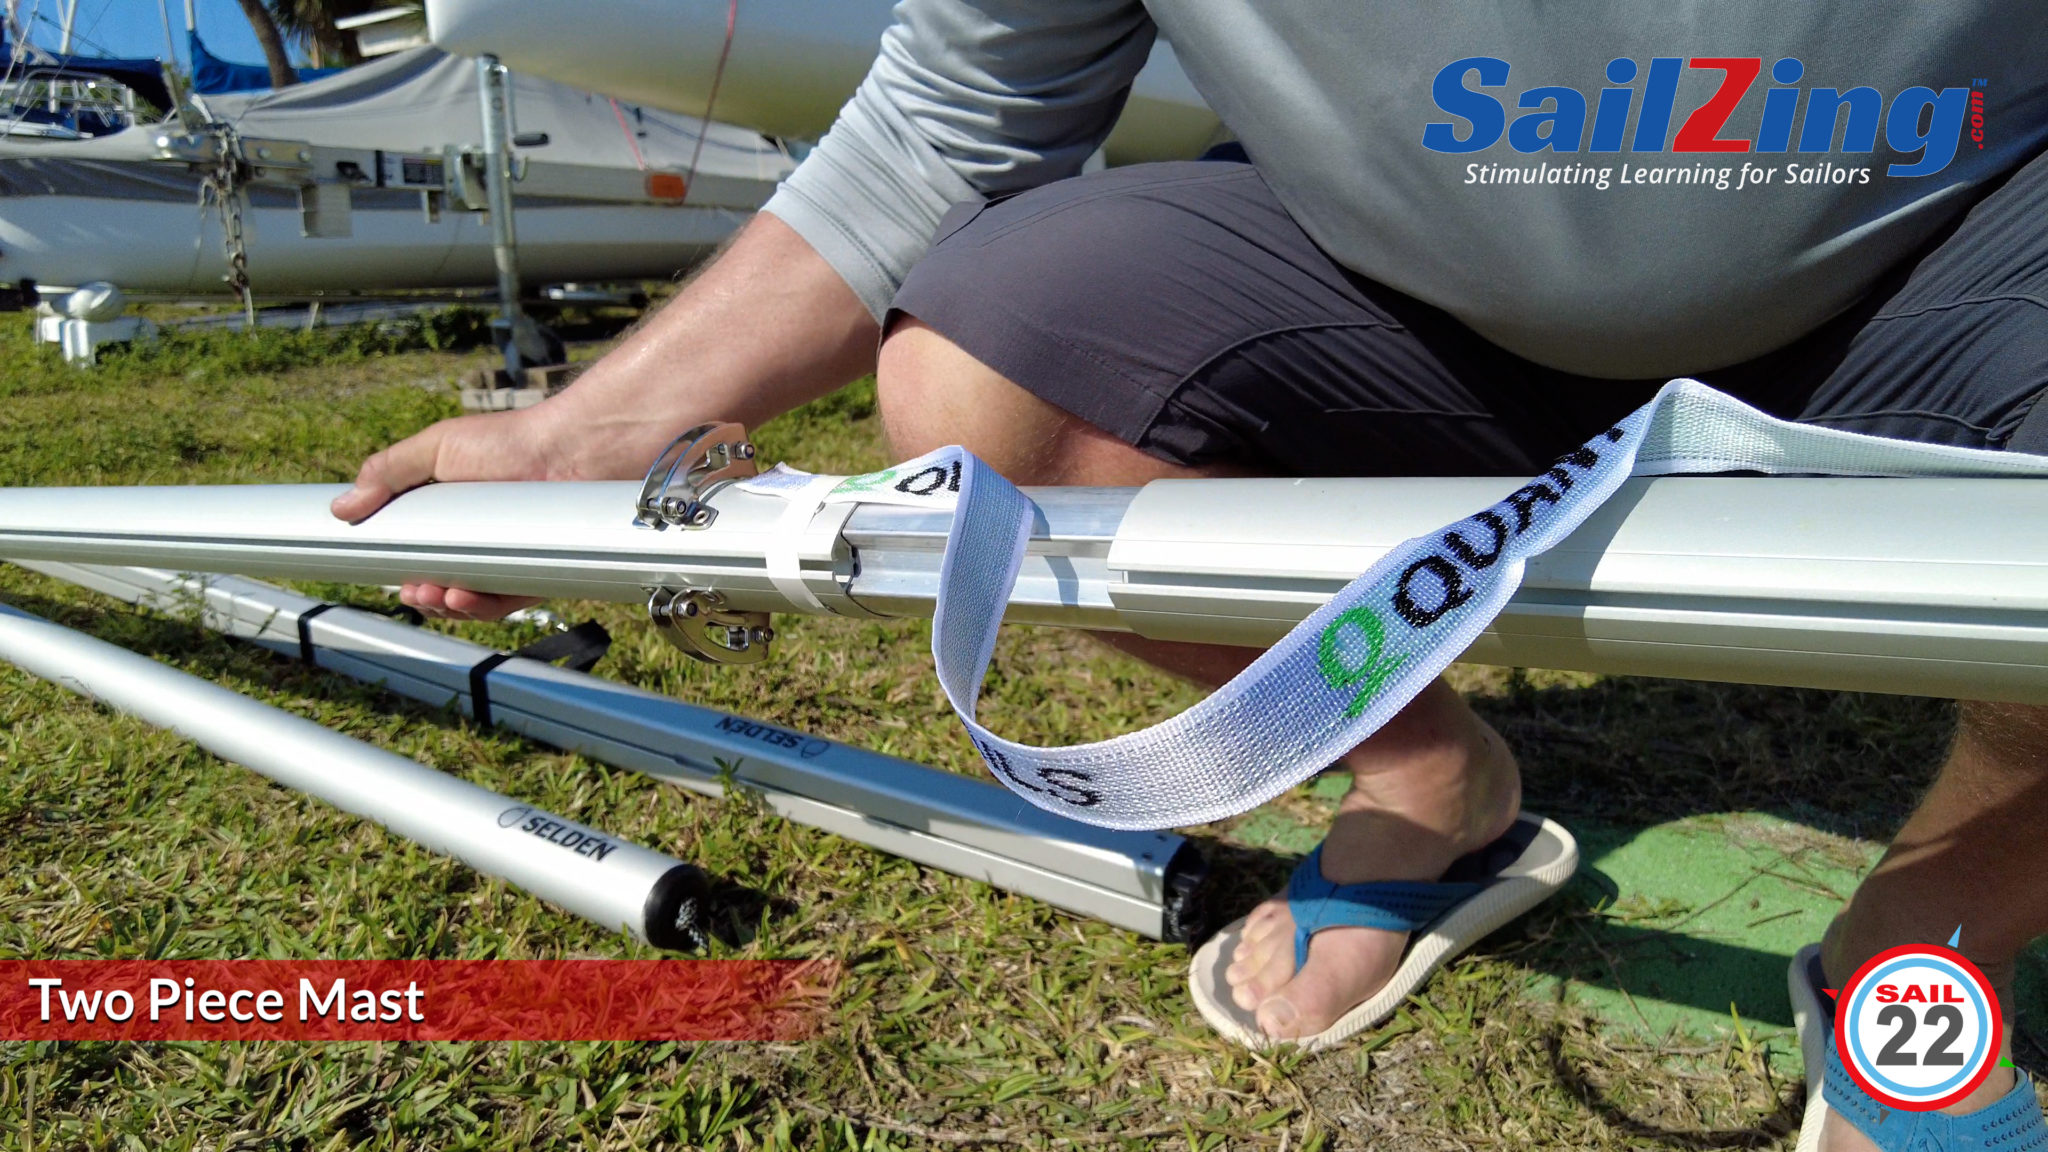
- Mast – 2 piece, with halyards installed.
- Spreaders – Adjustable, Marked for Starboard (green) and Port (red). Angle toward stern when installed.
- Daggerboard
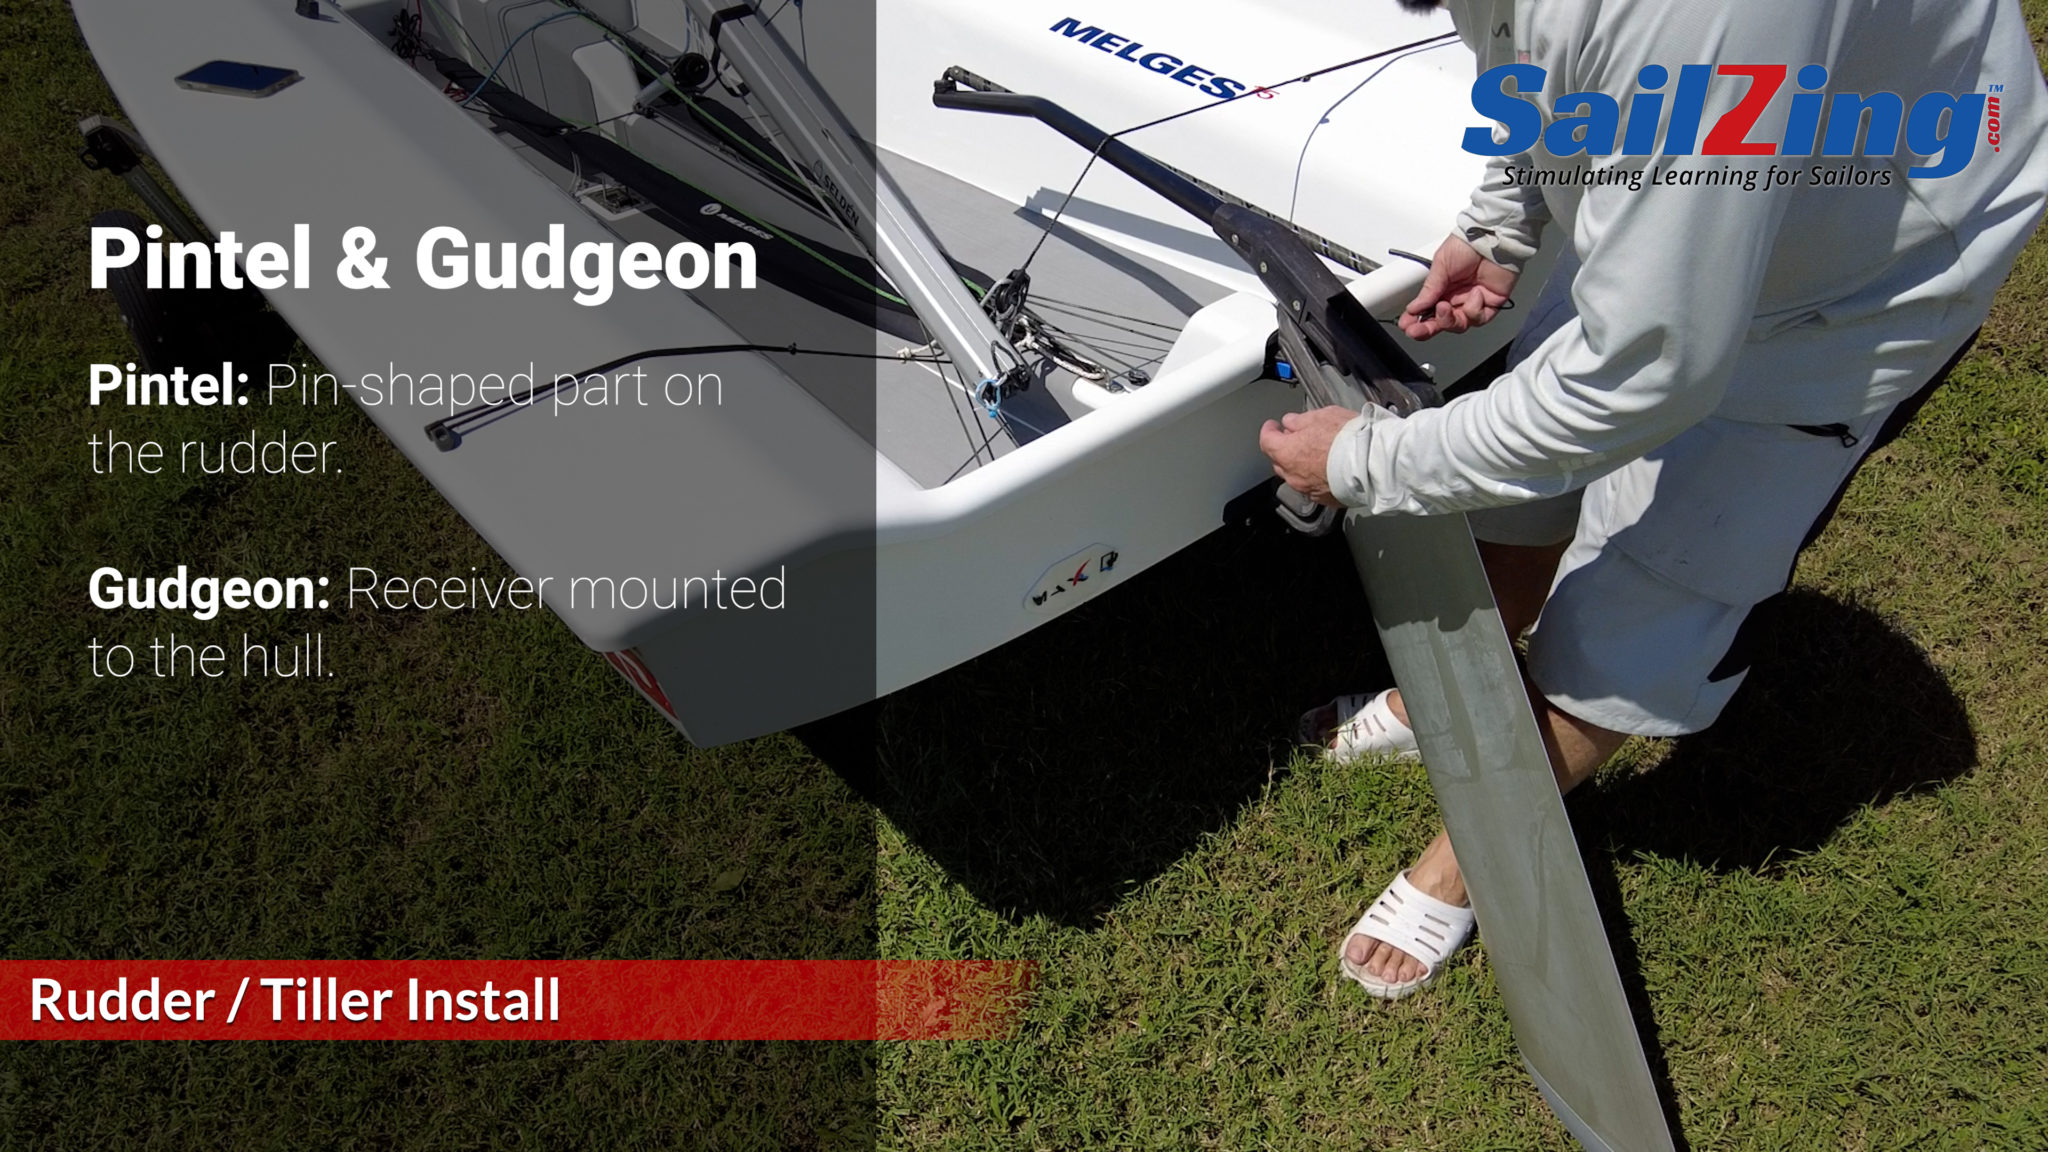
- Rudder
- Tiller – Aluminum
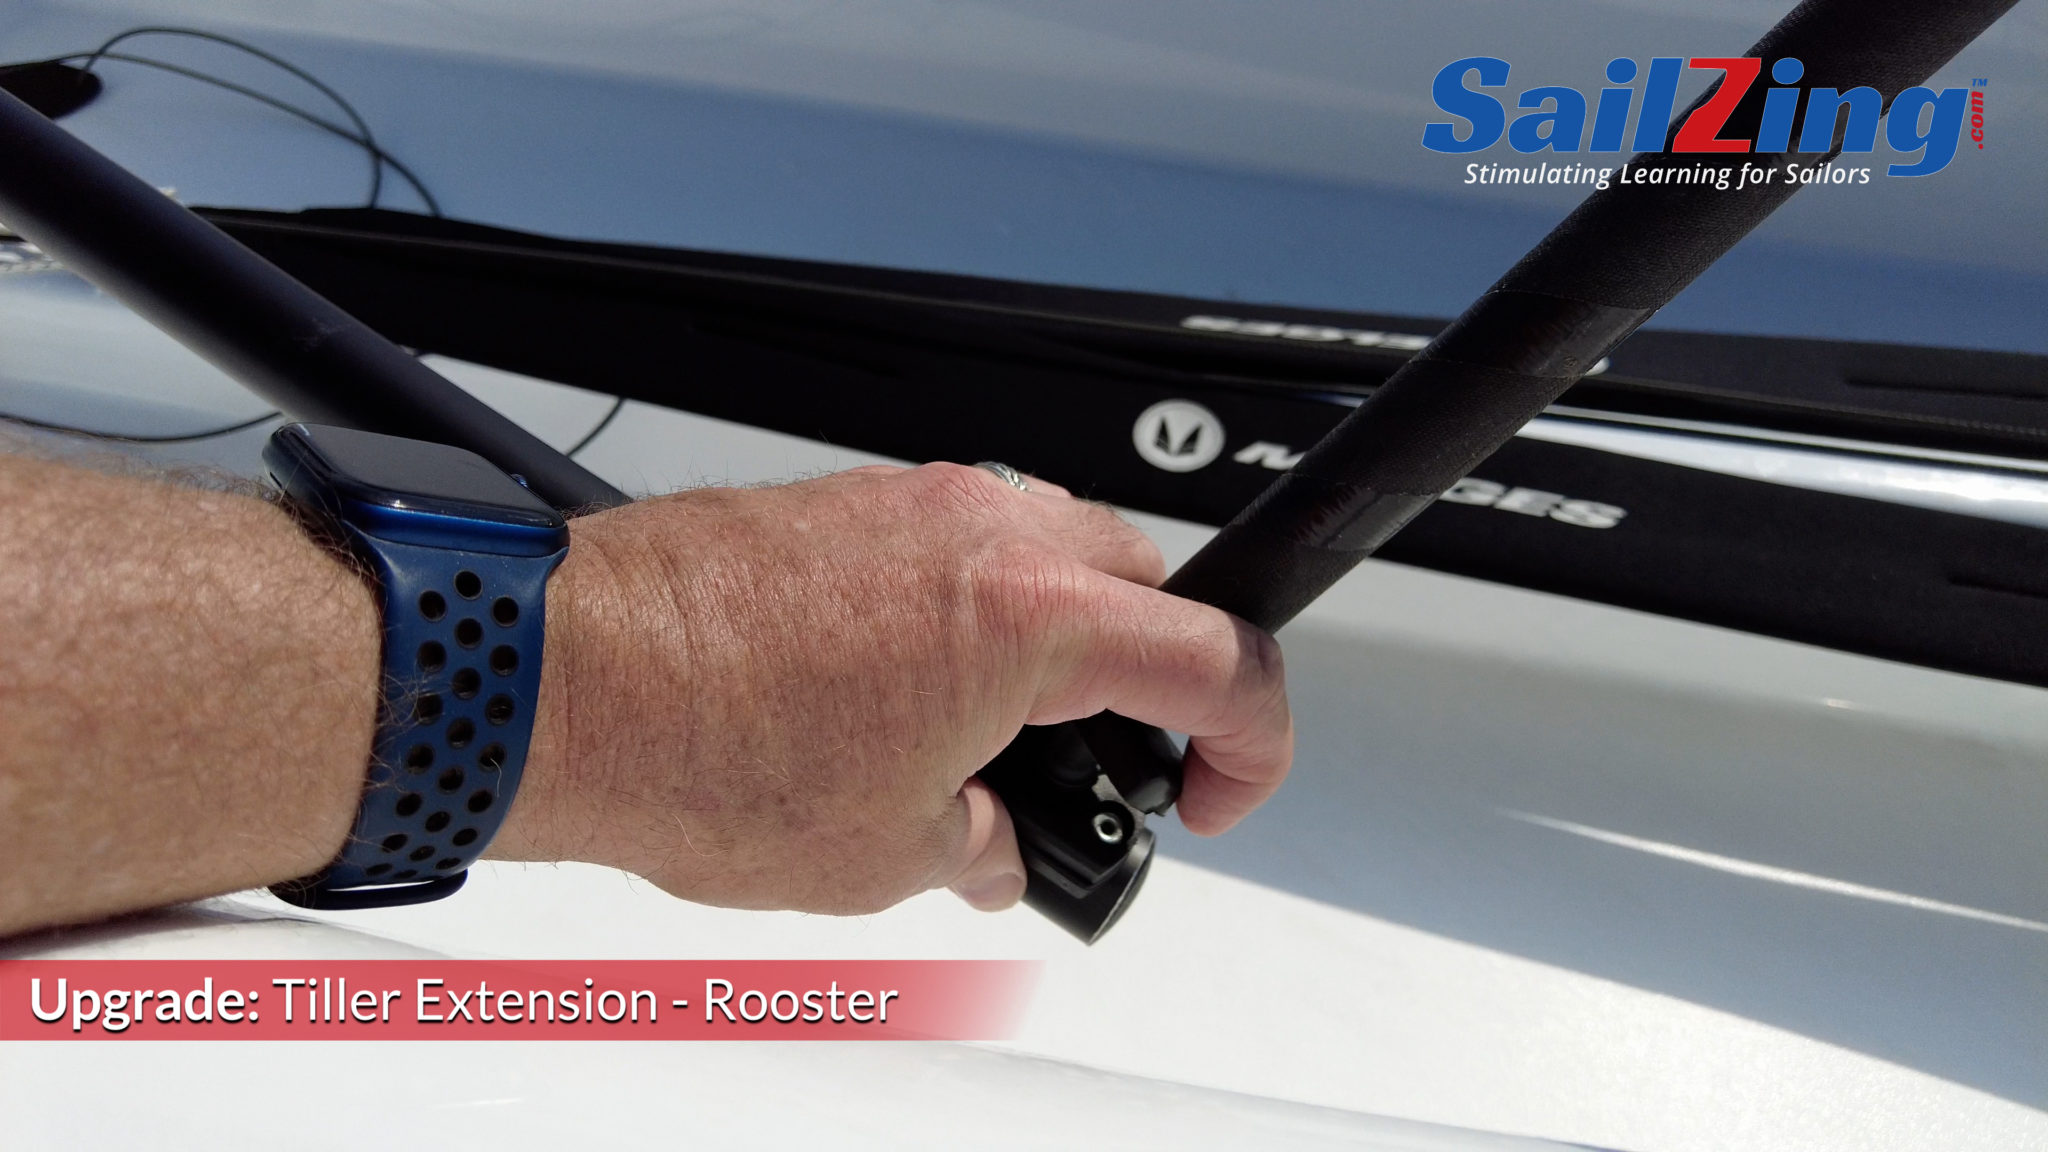
- Upgrade: Rooster Carbon Tiller – 37″ – Removed ~4″ for better clearance while tacking
- Bow Painter – Floating, Class rule
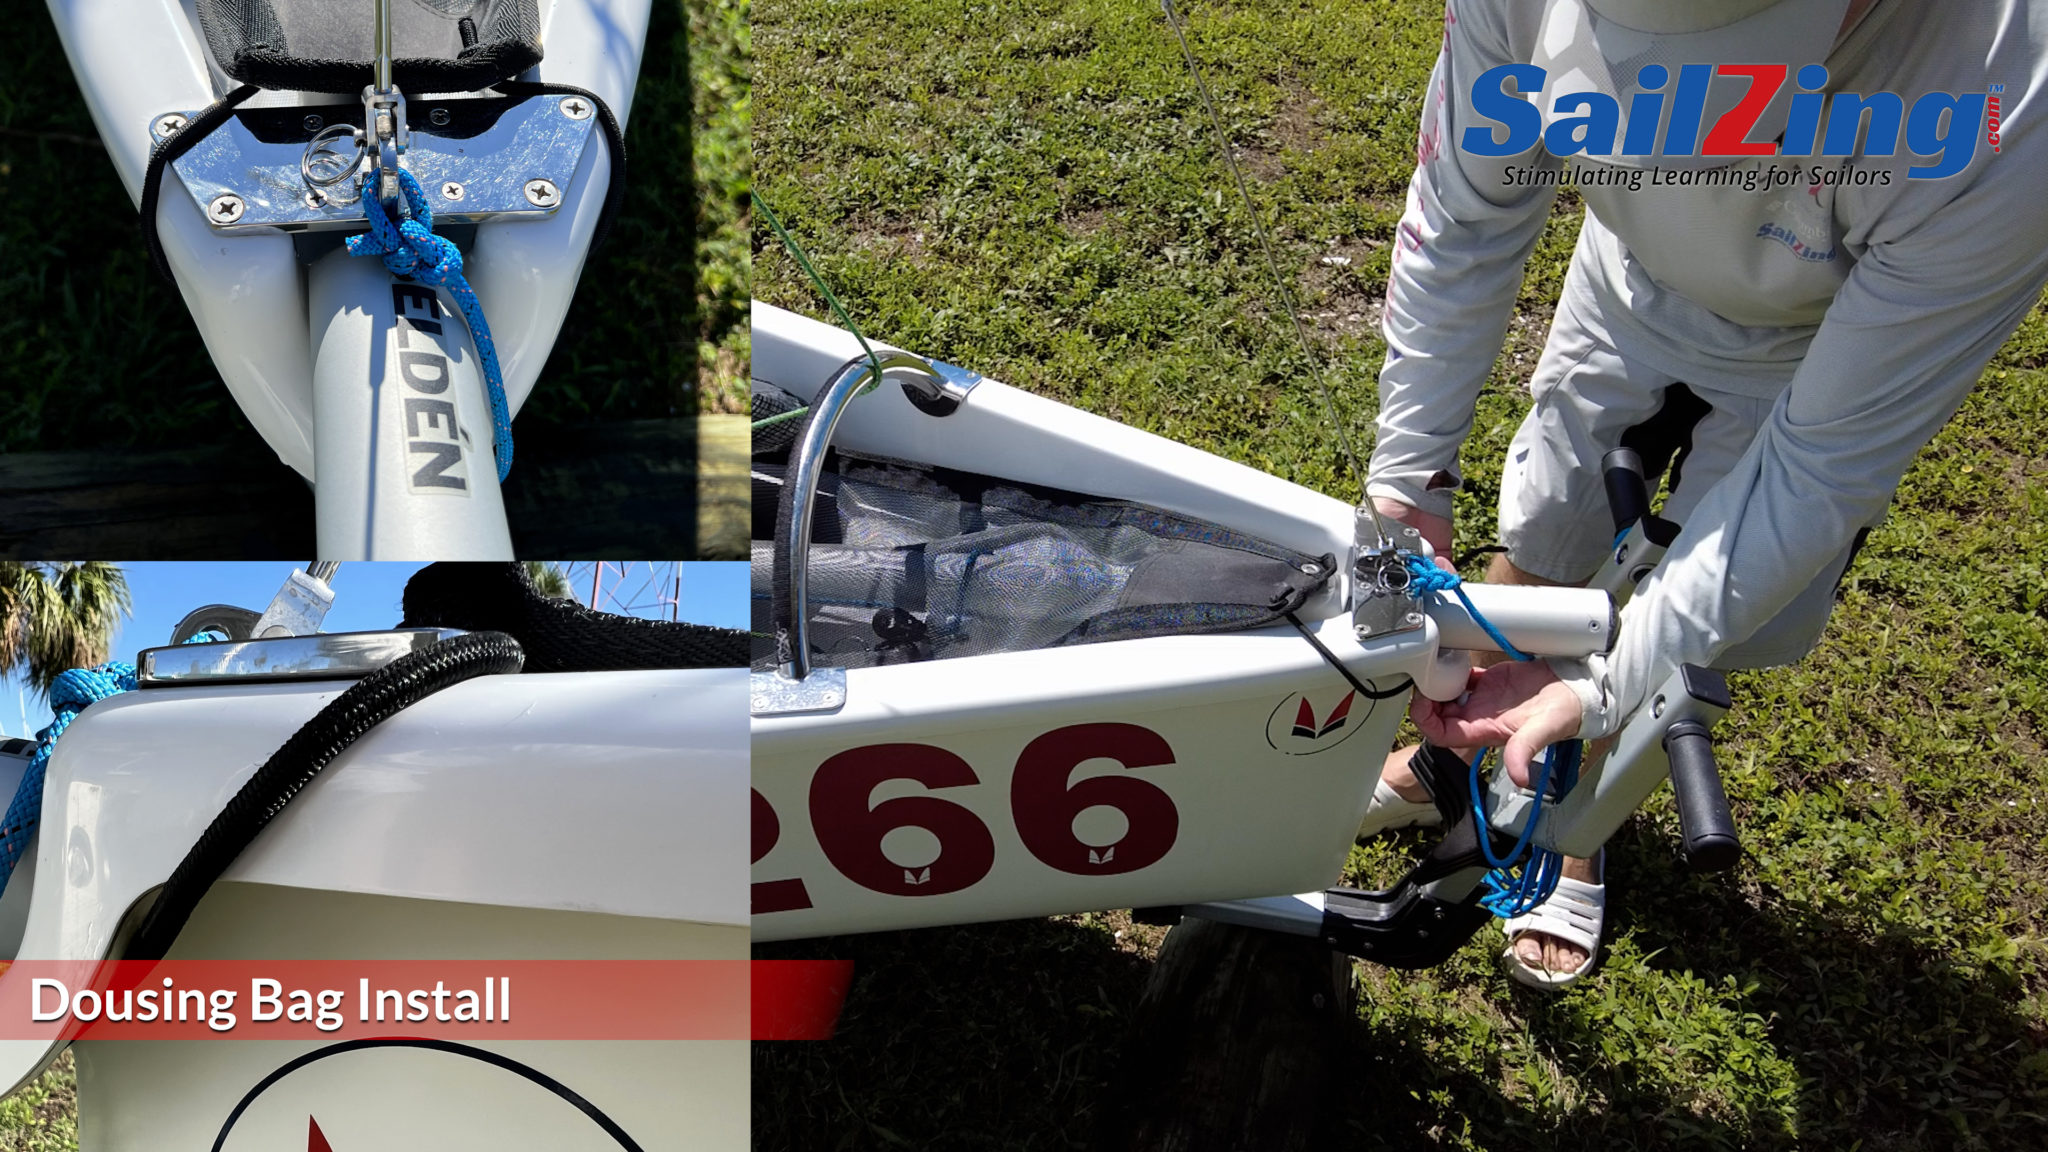
- Dousing Bag / Sock with Halyard storage
- Main Halyard – Pre-installed in mast, Dyneema
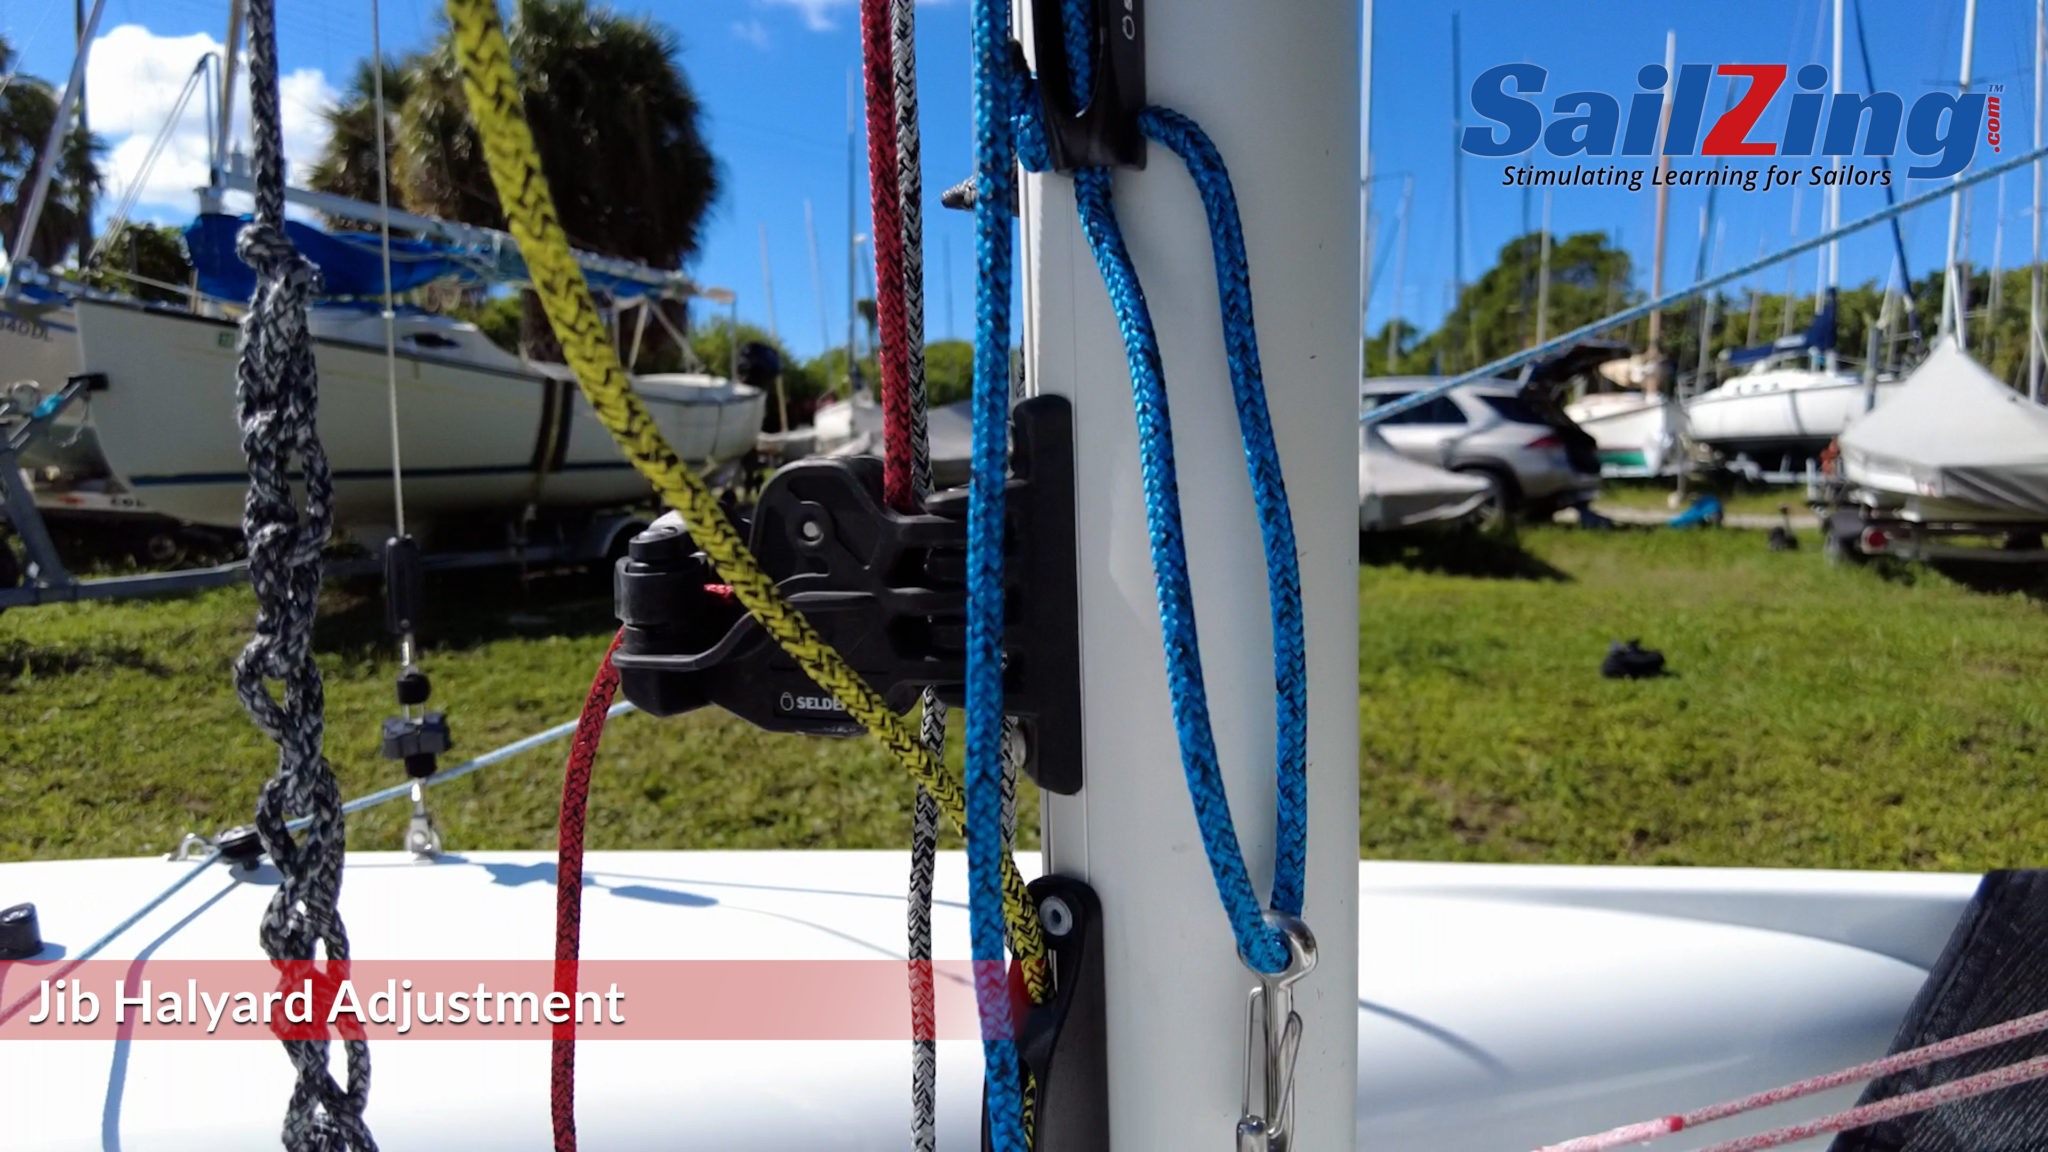
- Jib Halyard – Pre-installed in mast, Dyneema
- Spinnaker Halyard – Pre-installed in mast, Polyester cover / polyester core.
- Upgrade: Spinnaker Halyard – Tapered, fittings on end to help with spinnaker twisting.
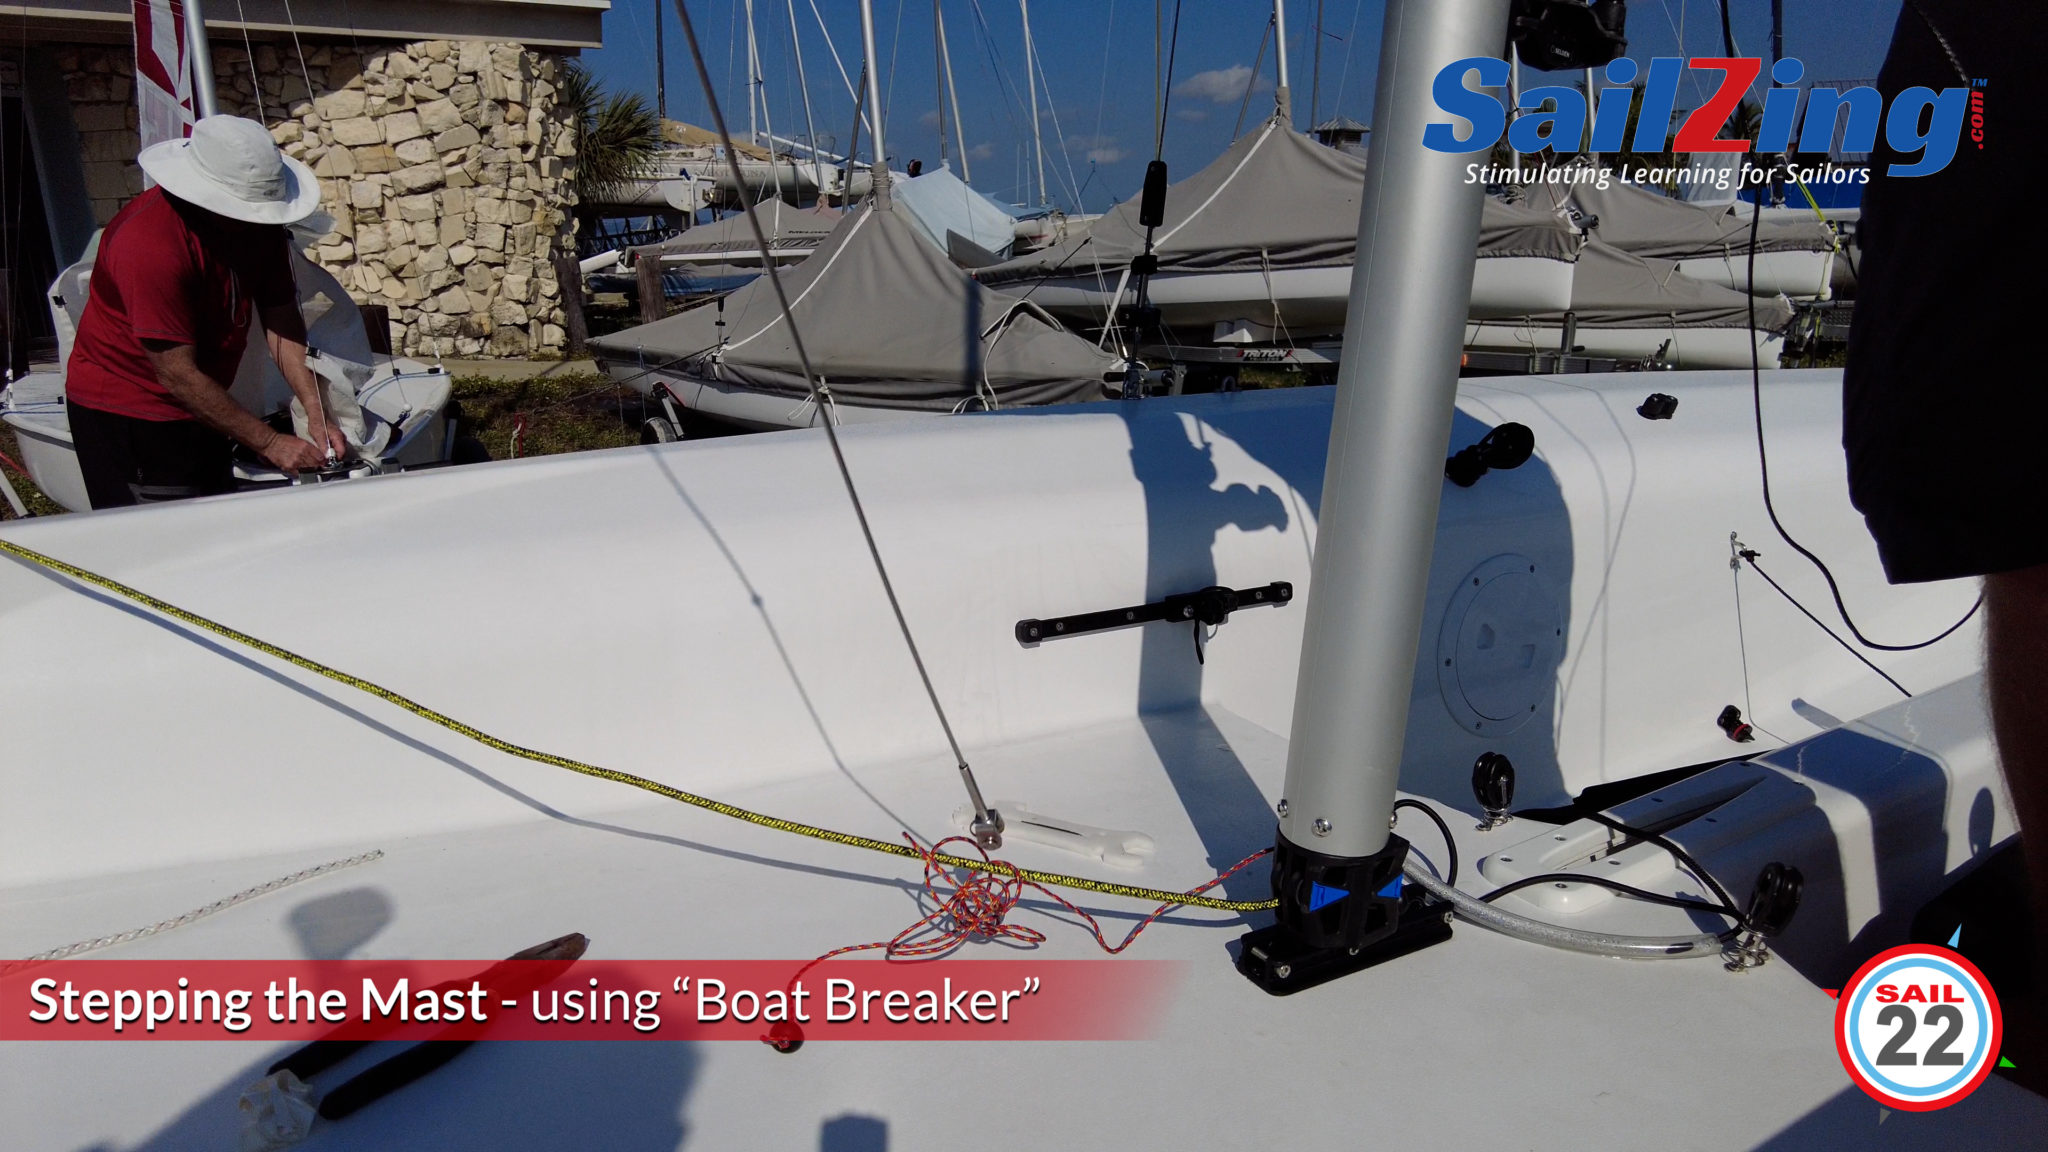
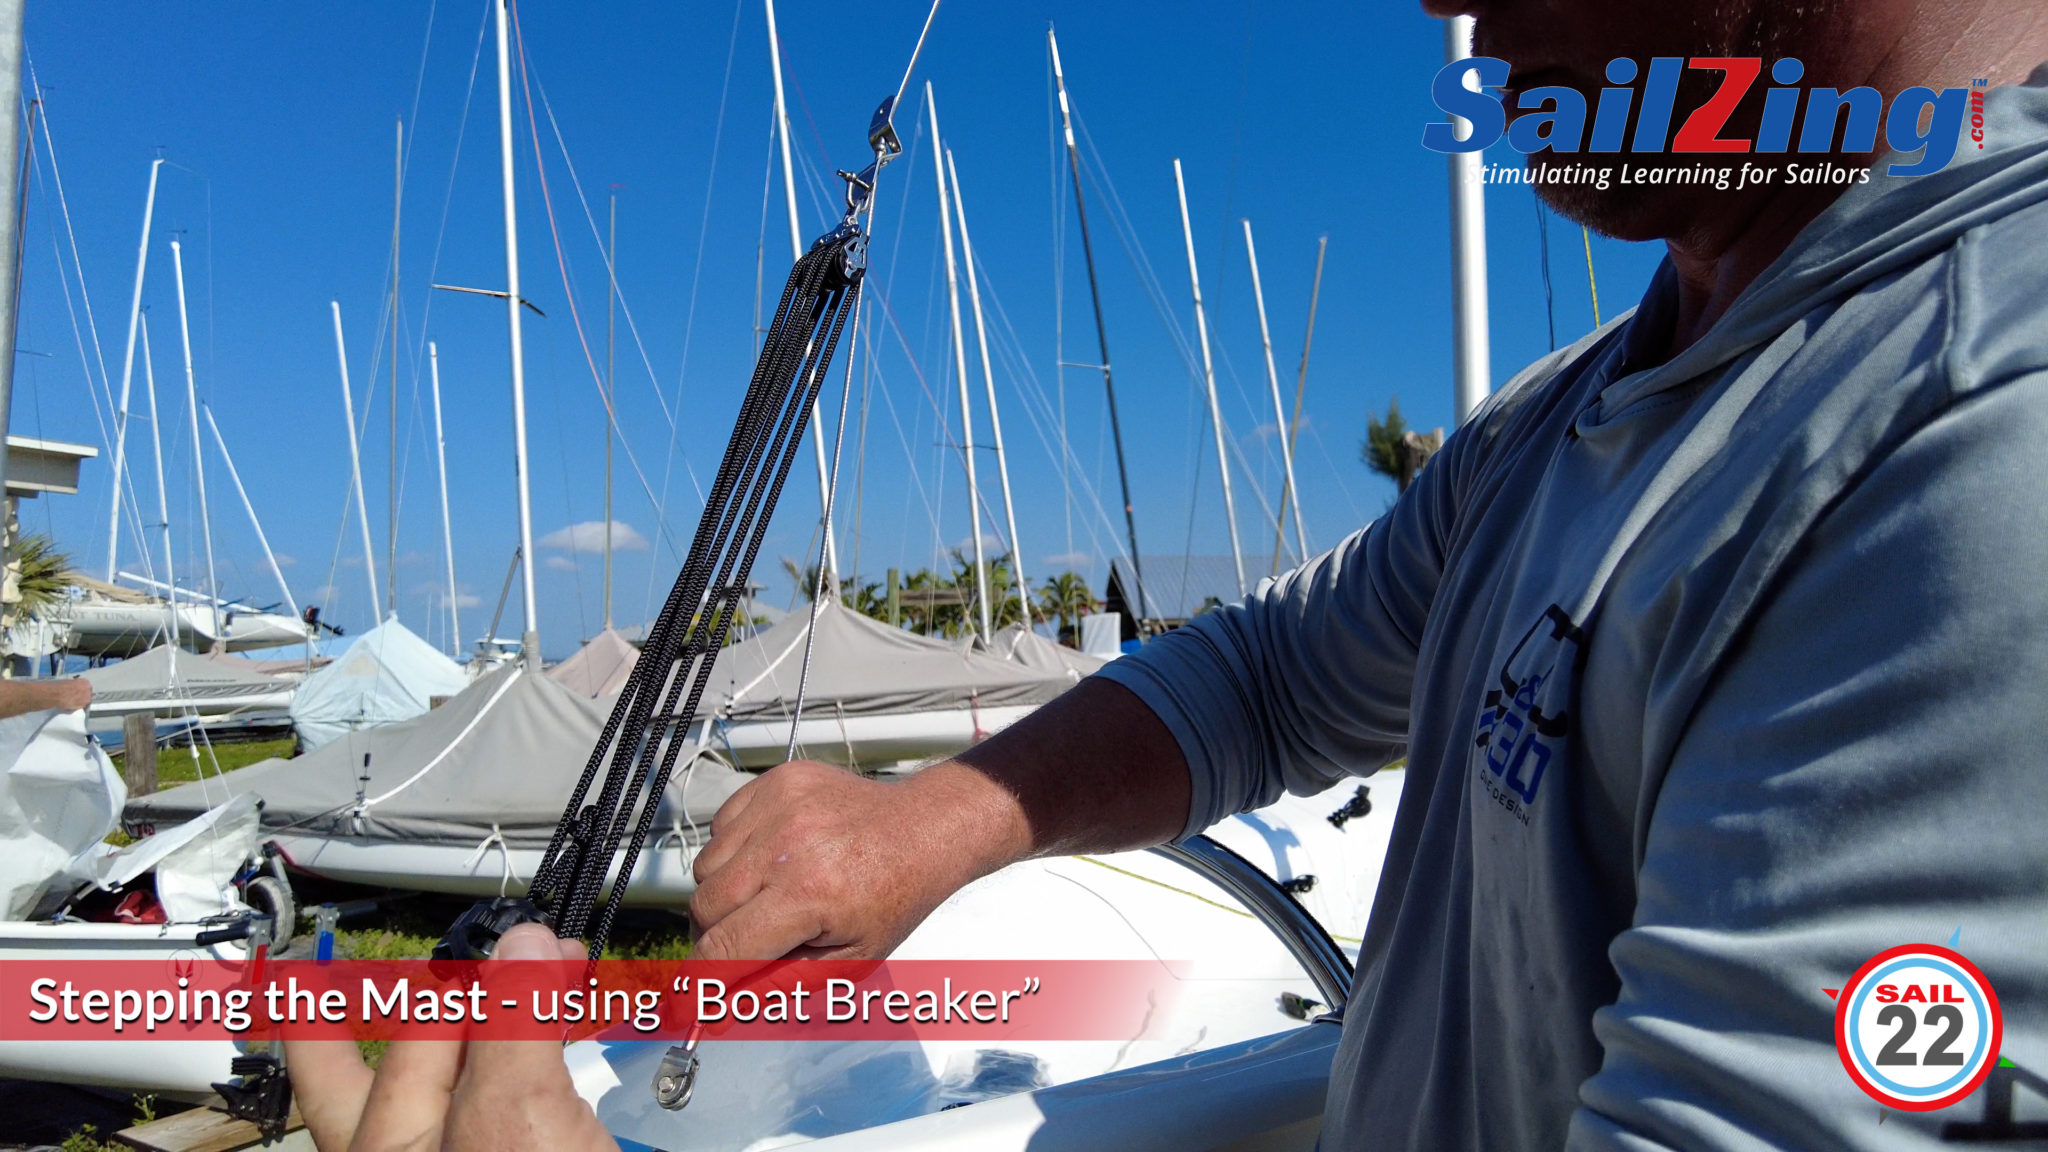
- Rig Tensioner / “Boat Breaker” – Used to finish stepping the mast and to detension the rig when not using the boat for a while.
- Mainsheet – Polyester cover / polyester core, not tapered
- Upgrade: Mainsheet – Tapered, Robline Coppa 5000 / Dyneema core
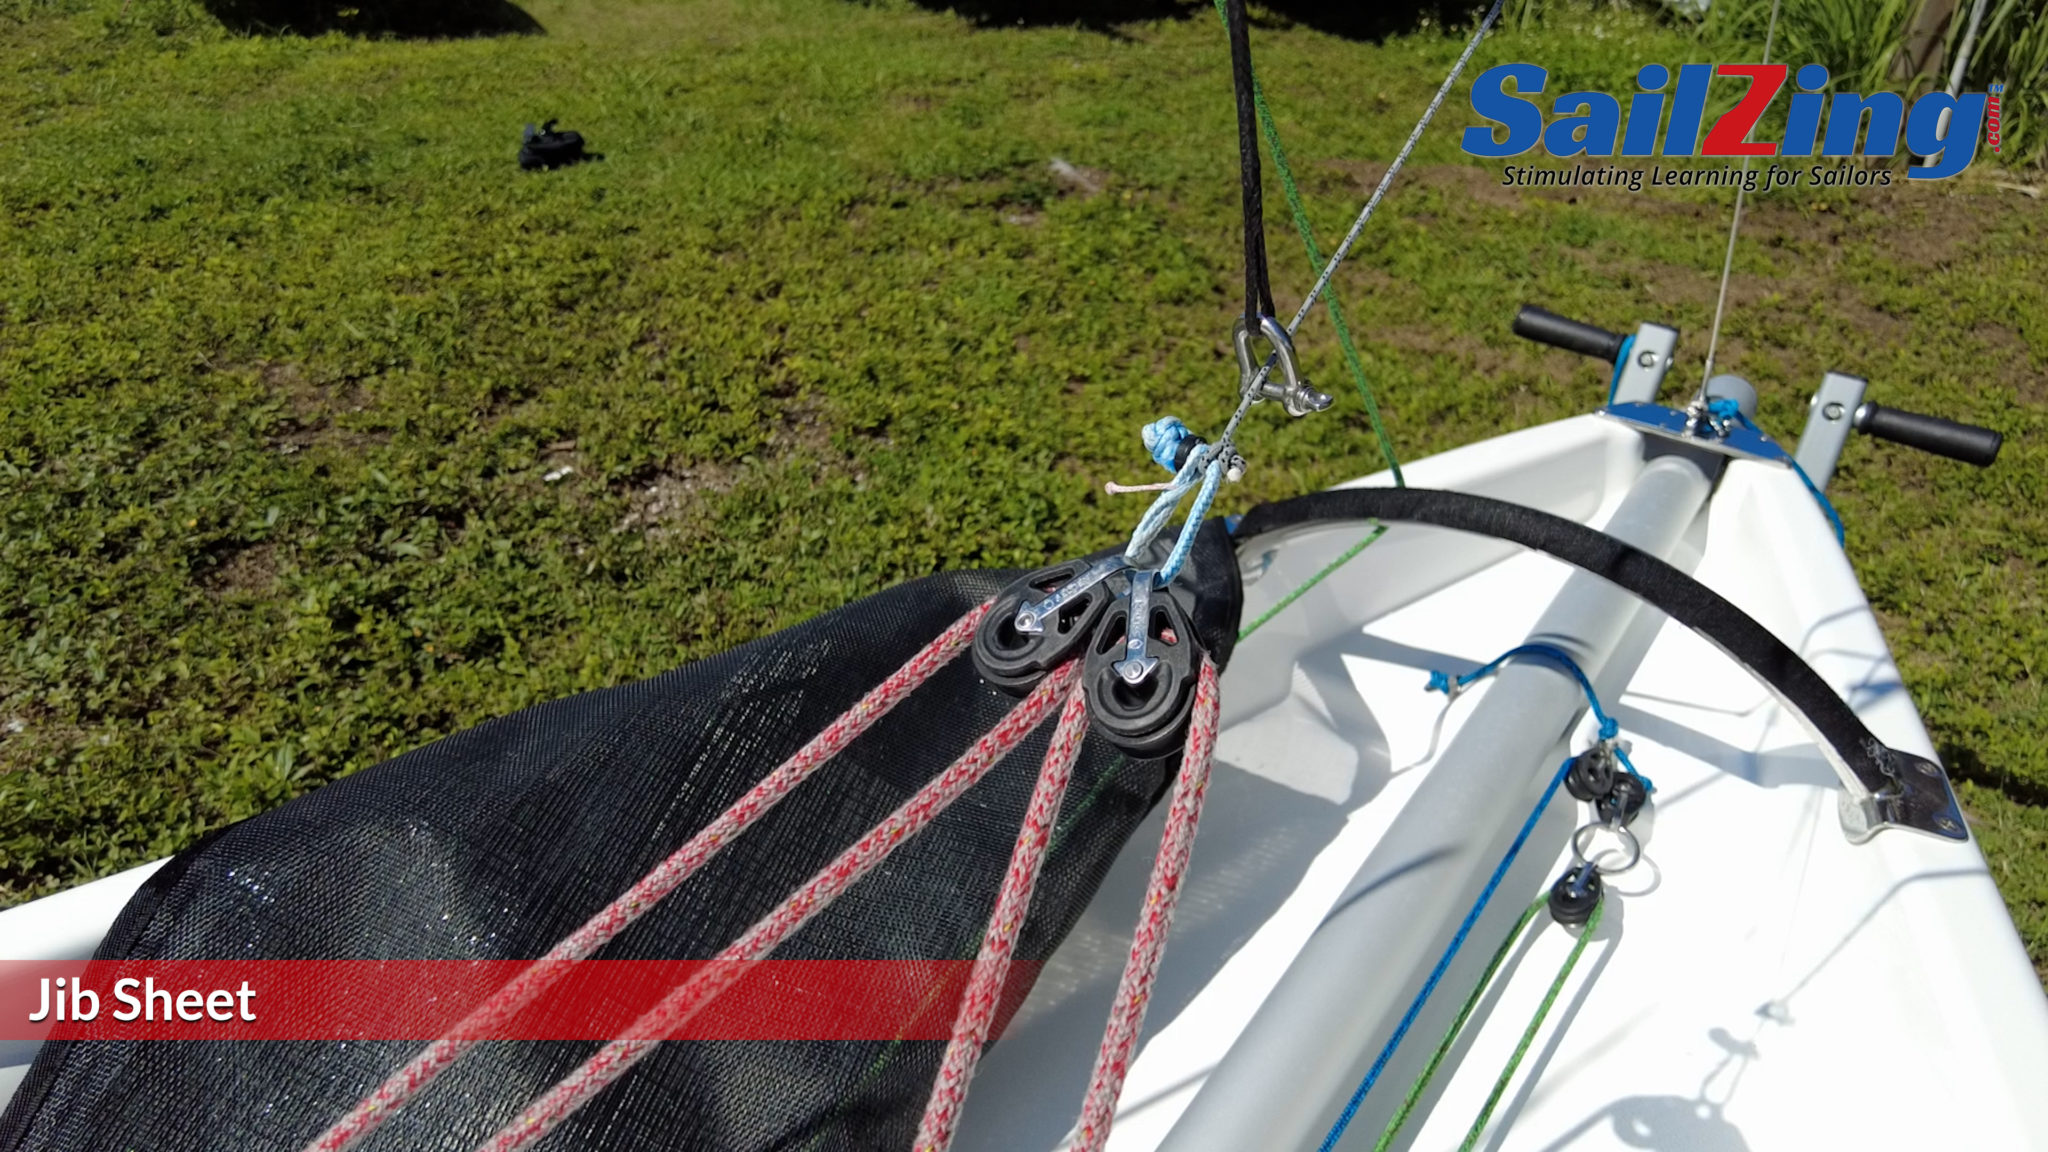
- Jib Sheet – Polyester cover / polyester core, not tapered, need to knot ends
- Upgrade: Jib Sheet – Tapered, Polyester cover / Dyneema core with soft eye ends
- Spinnaker Sheet – Polyester cover / polyester core, not tapered, need to knot ends
- Upgrade: Spinnaker Sheet – Tapered, Polyester cover / Dyneema core with soft eye ends
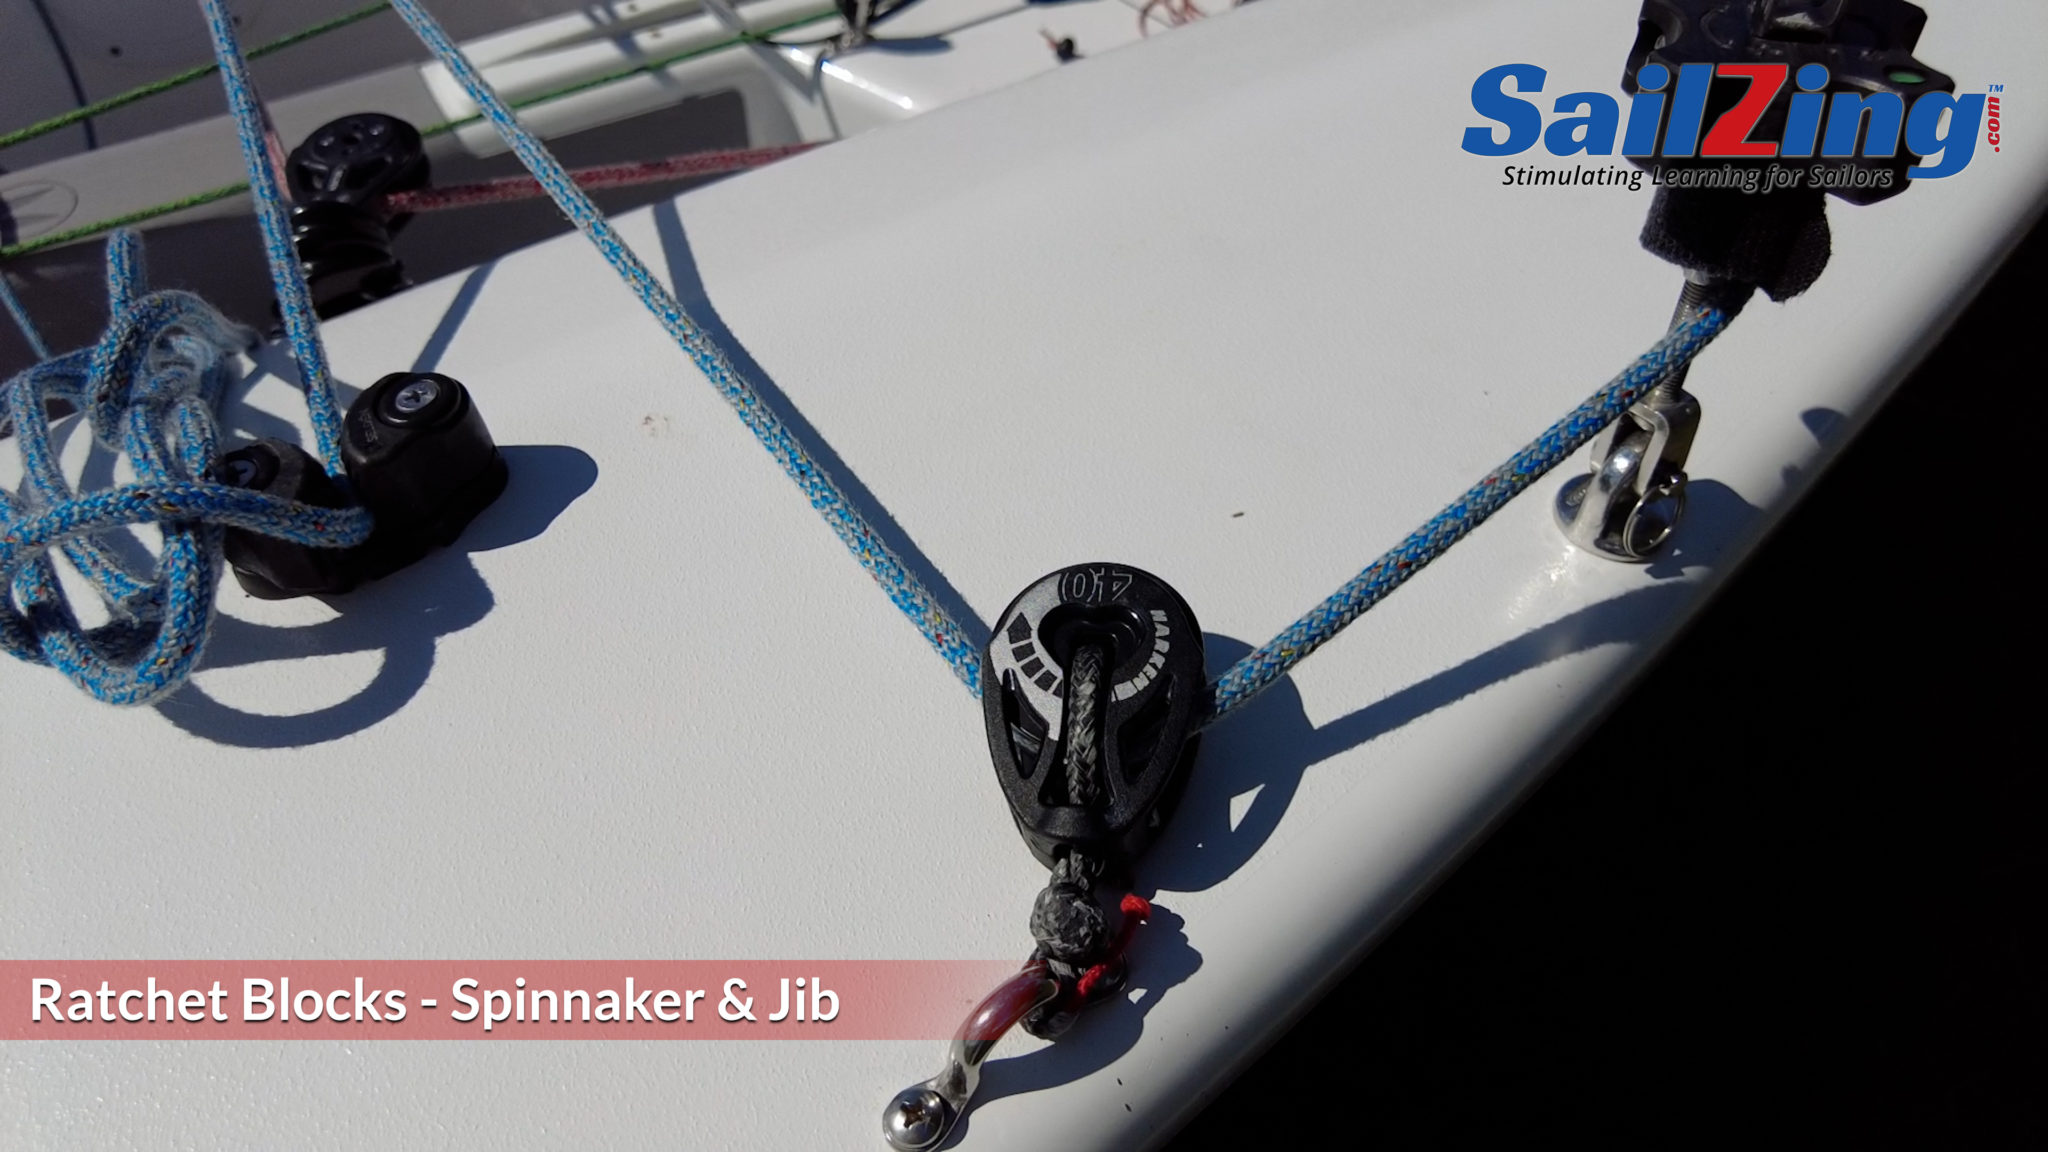
- Jib Blocks – Seldén Autoratchet
- Spinnaker Blocks – Seldén Autoratchet
- Upgrade: Spinnaker Blocks – Harken Autoratchet 40 with soft shackle fastener
- or: Harken manual ratchet with shackle.
- Jib Clew Blocks – Seldén pair with shackle
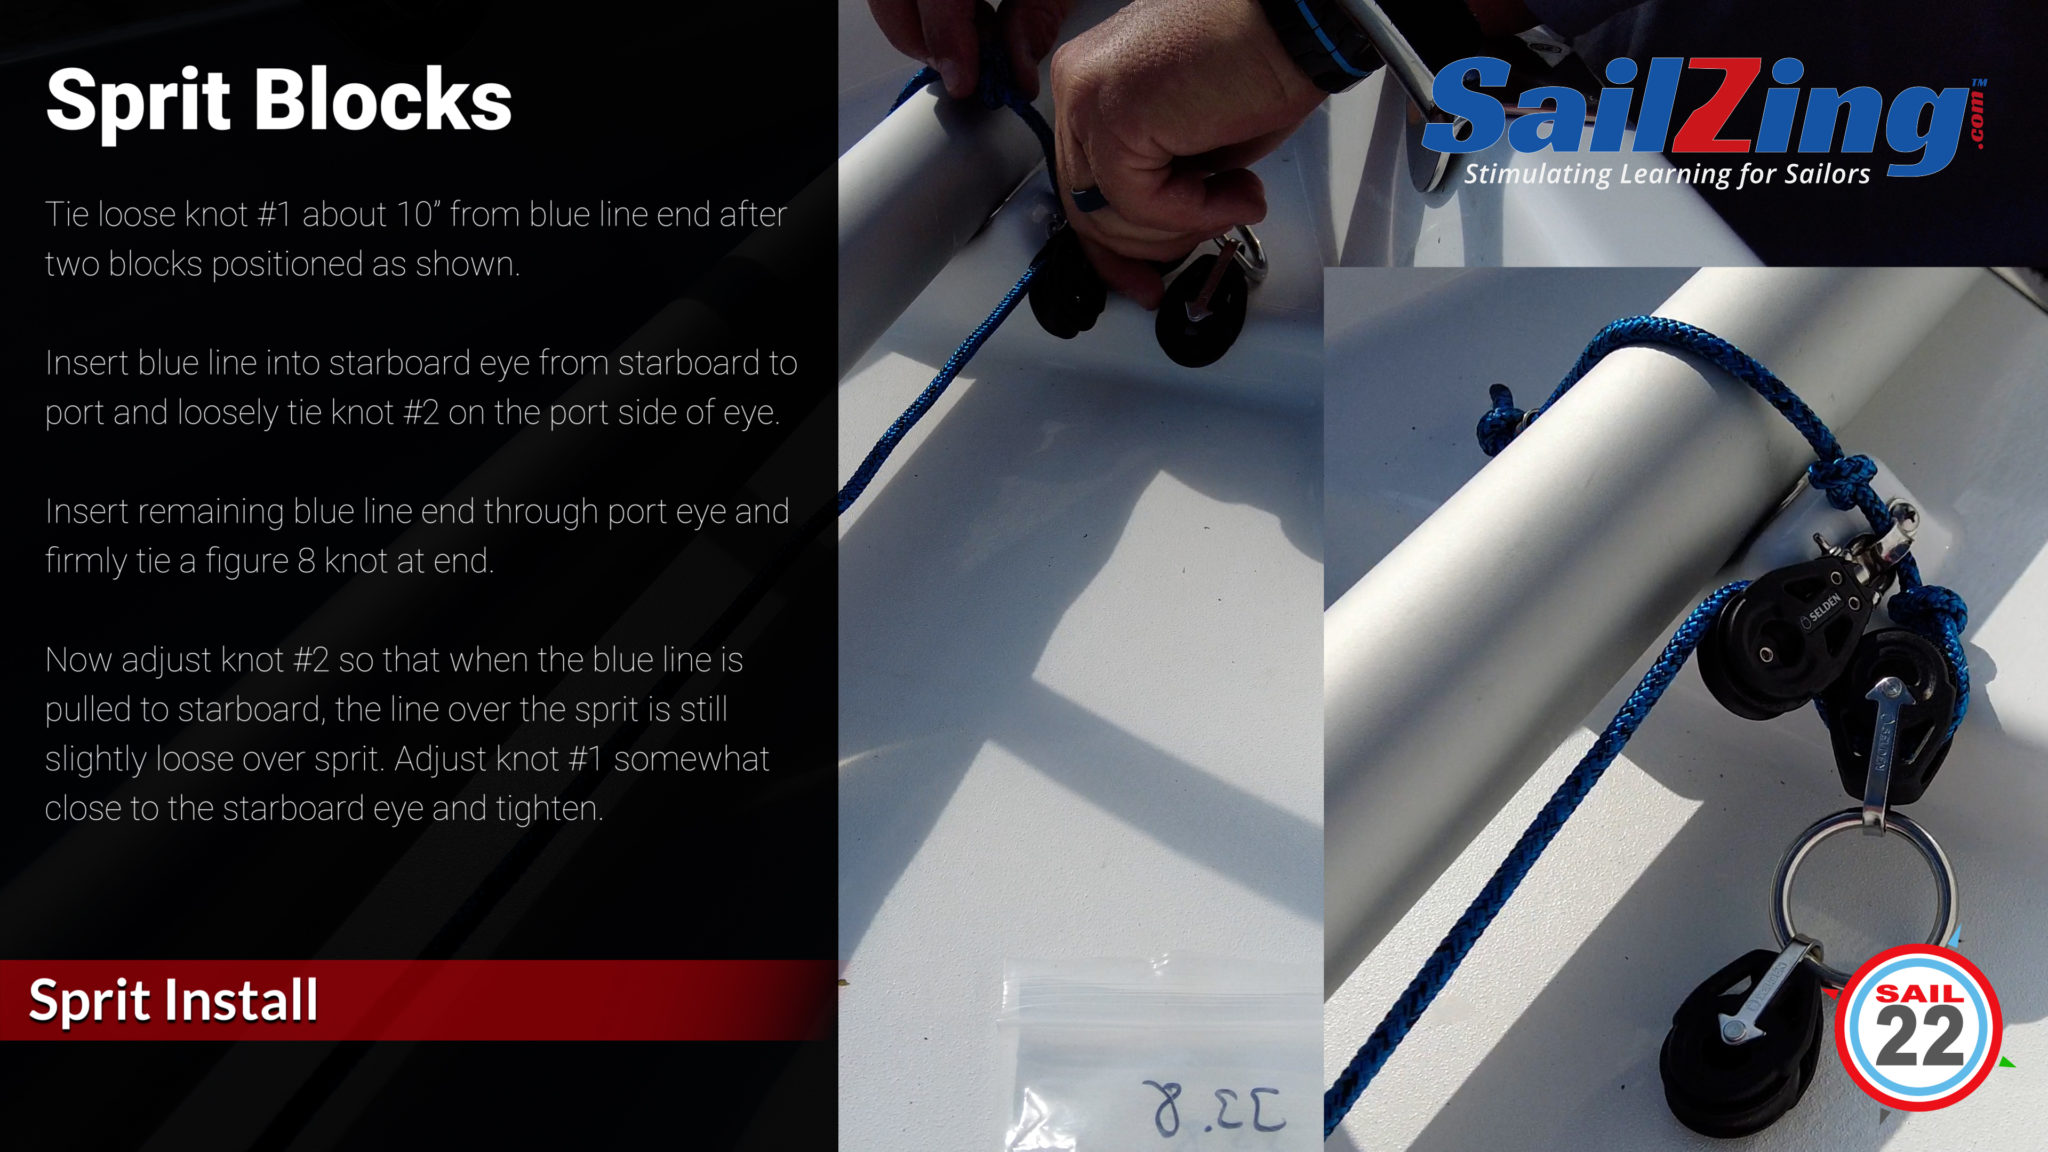
- Sprit Blocks – Seldén pair with ring
- Bridle / Traveler – Dyneema line with Seldén Block on shackle
- Upgrade: Bridle Block – Allen Dynamic 40 TII with soft shackle on Dyneema line
- Lifting Bridle – Pre-stretched polyester with stainless caribiners
- Upgrade: Lifting Bridle – Dyneema, 2 color to distinguish back line, Stainless spring clips.
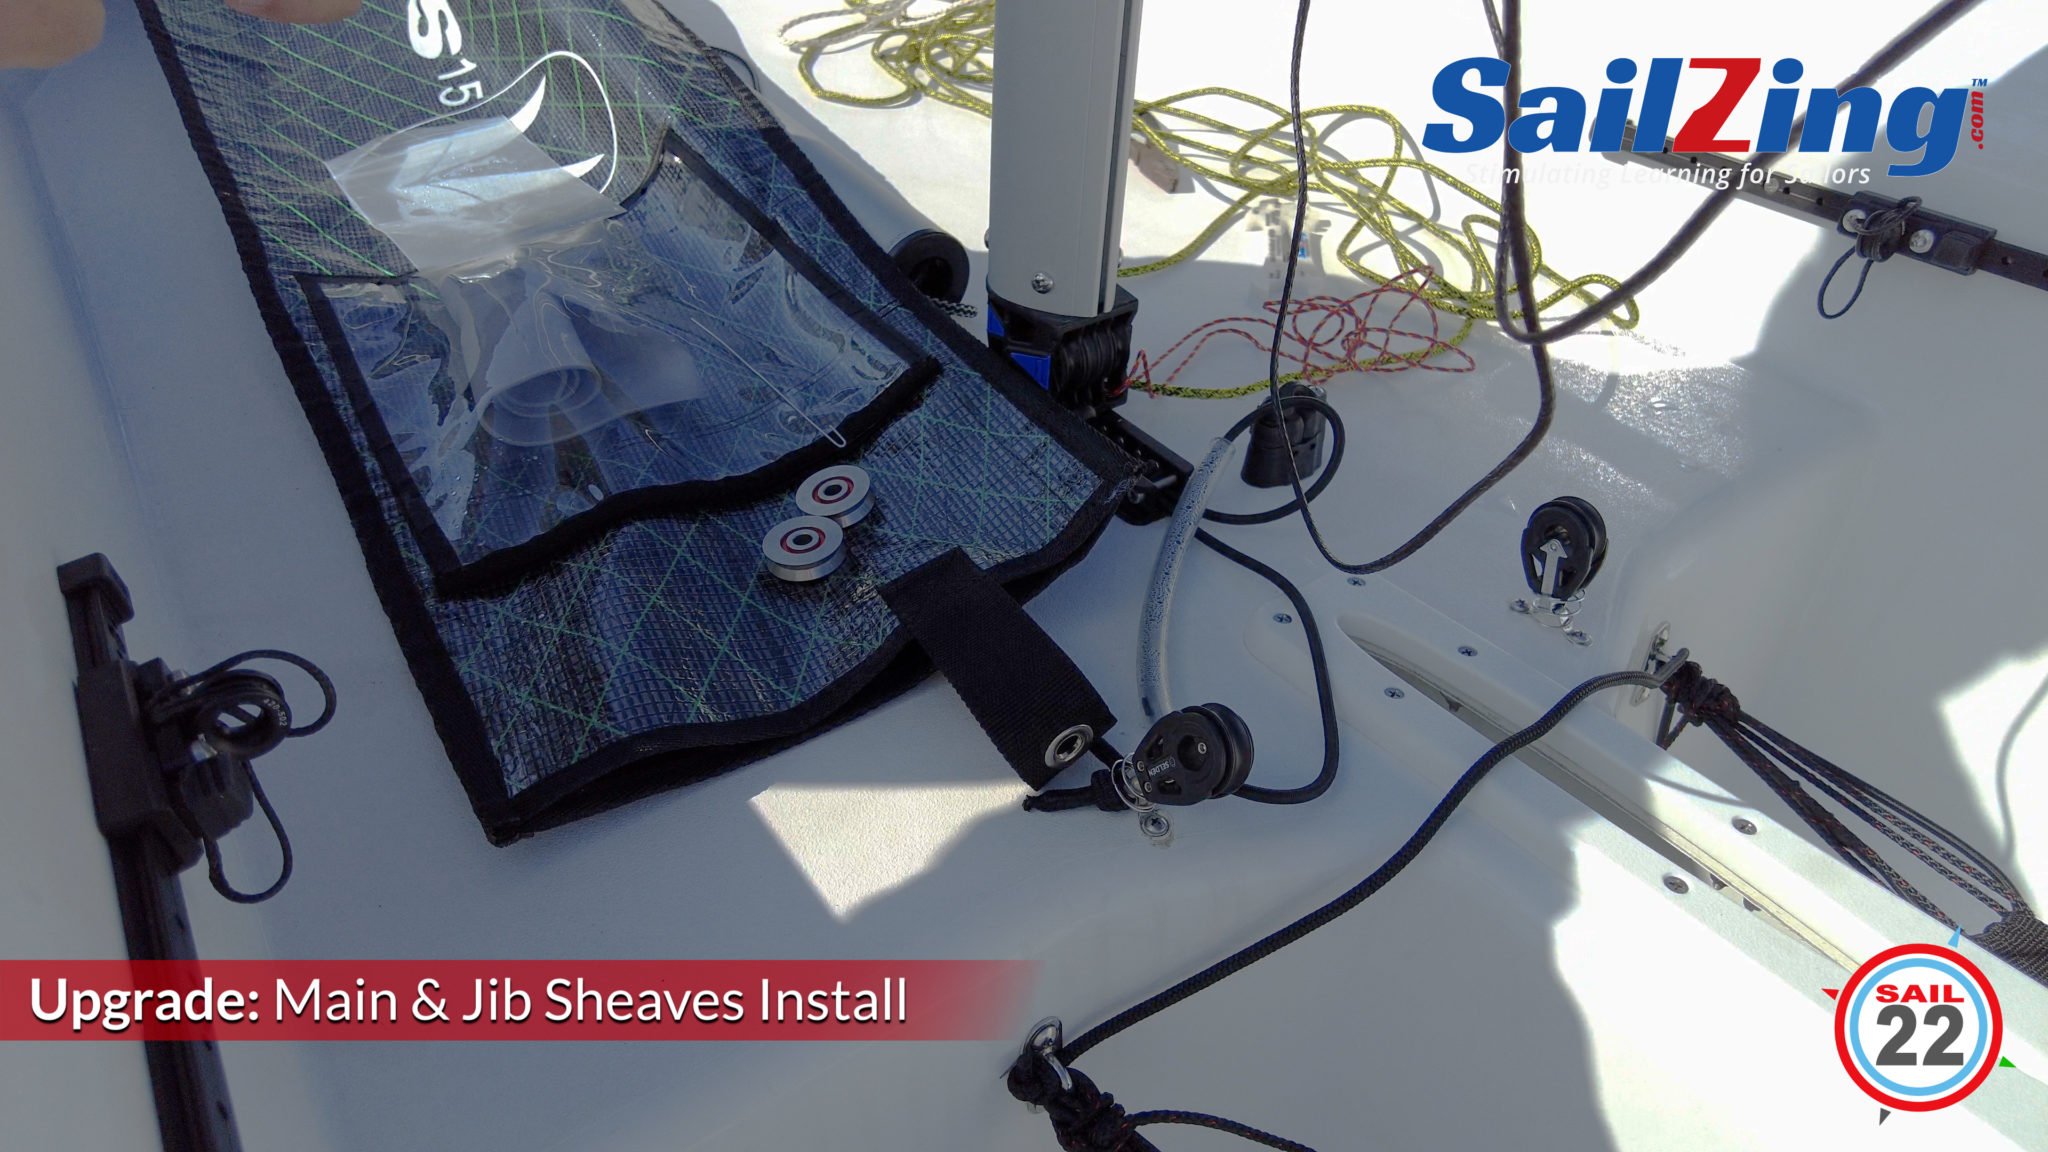
- Mast Sheaves / Halyard pulleys – Main, Jib, Spinnaker – Plastic
- Upgrade: Main, Jib, Spinnaker Sheaves – Aluminum with stainless steel bearings.
- Rig Tuning
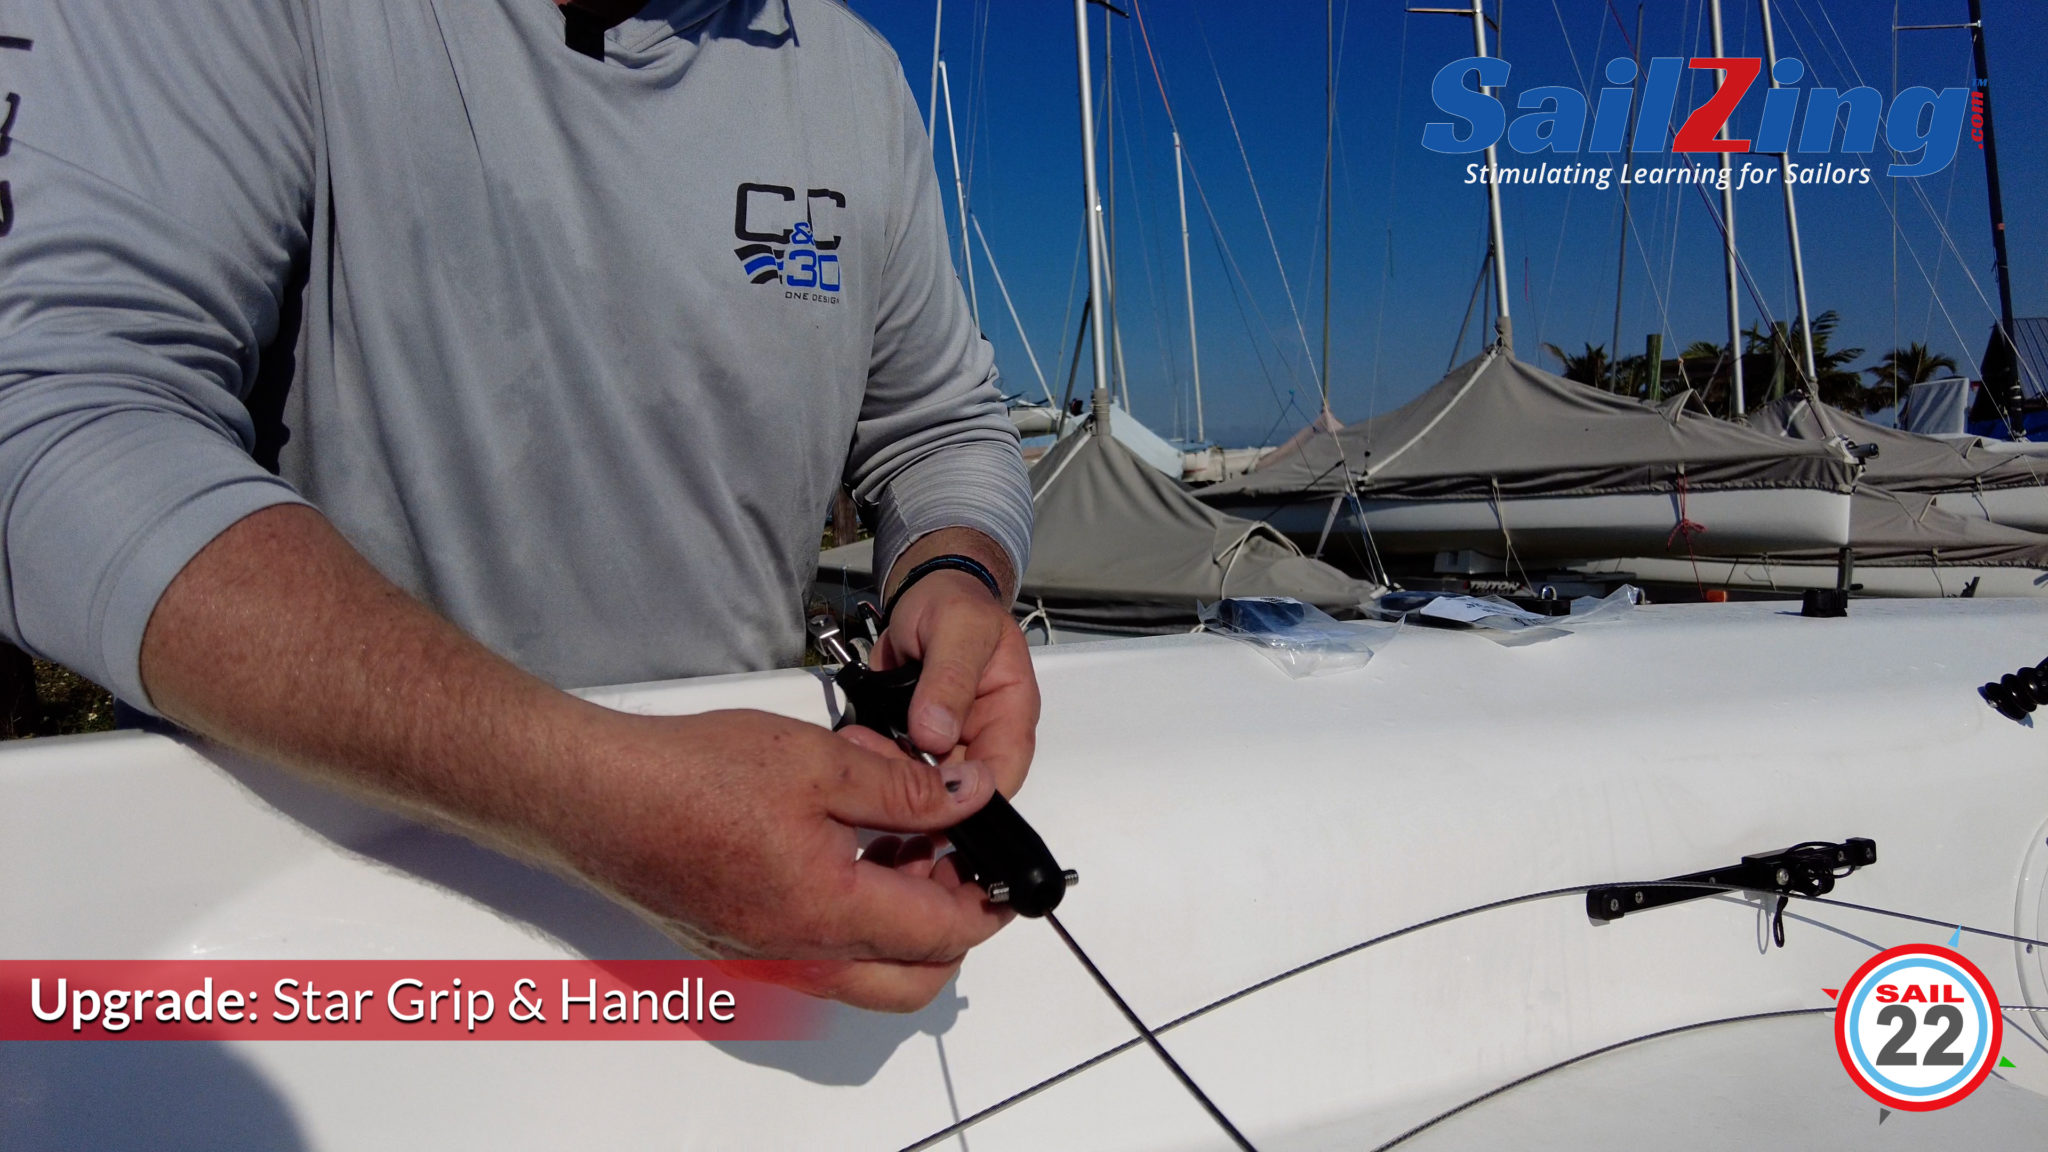
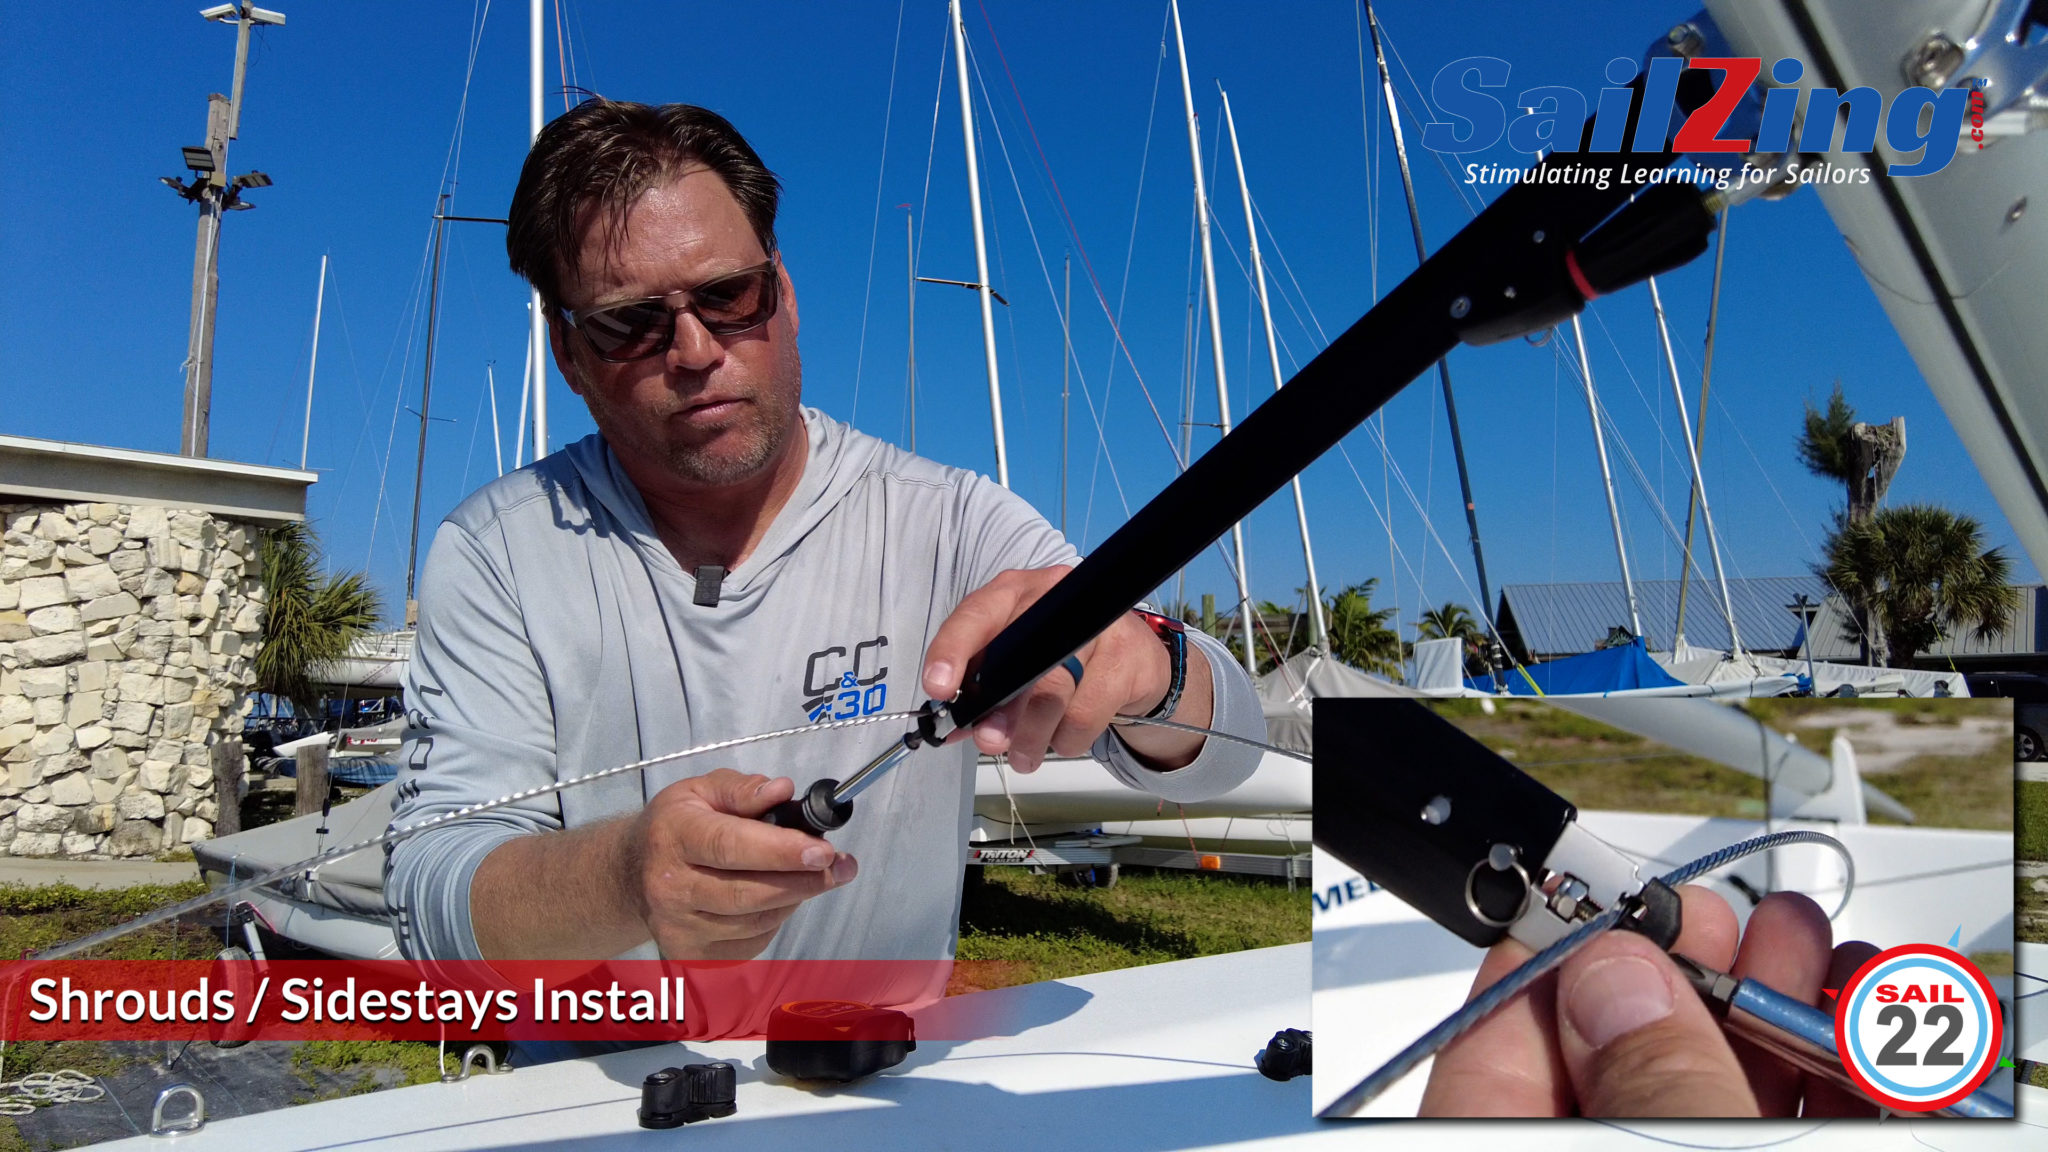
- Upgrade: Shroud handles, Star grips for turnbuckle barrel, Scar Pins with Velcro for tool-less adjustments
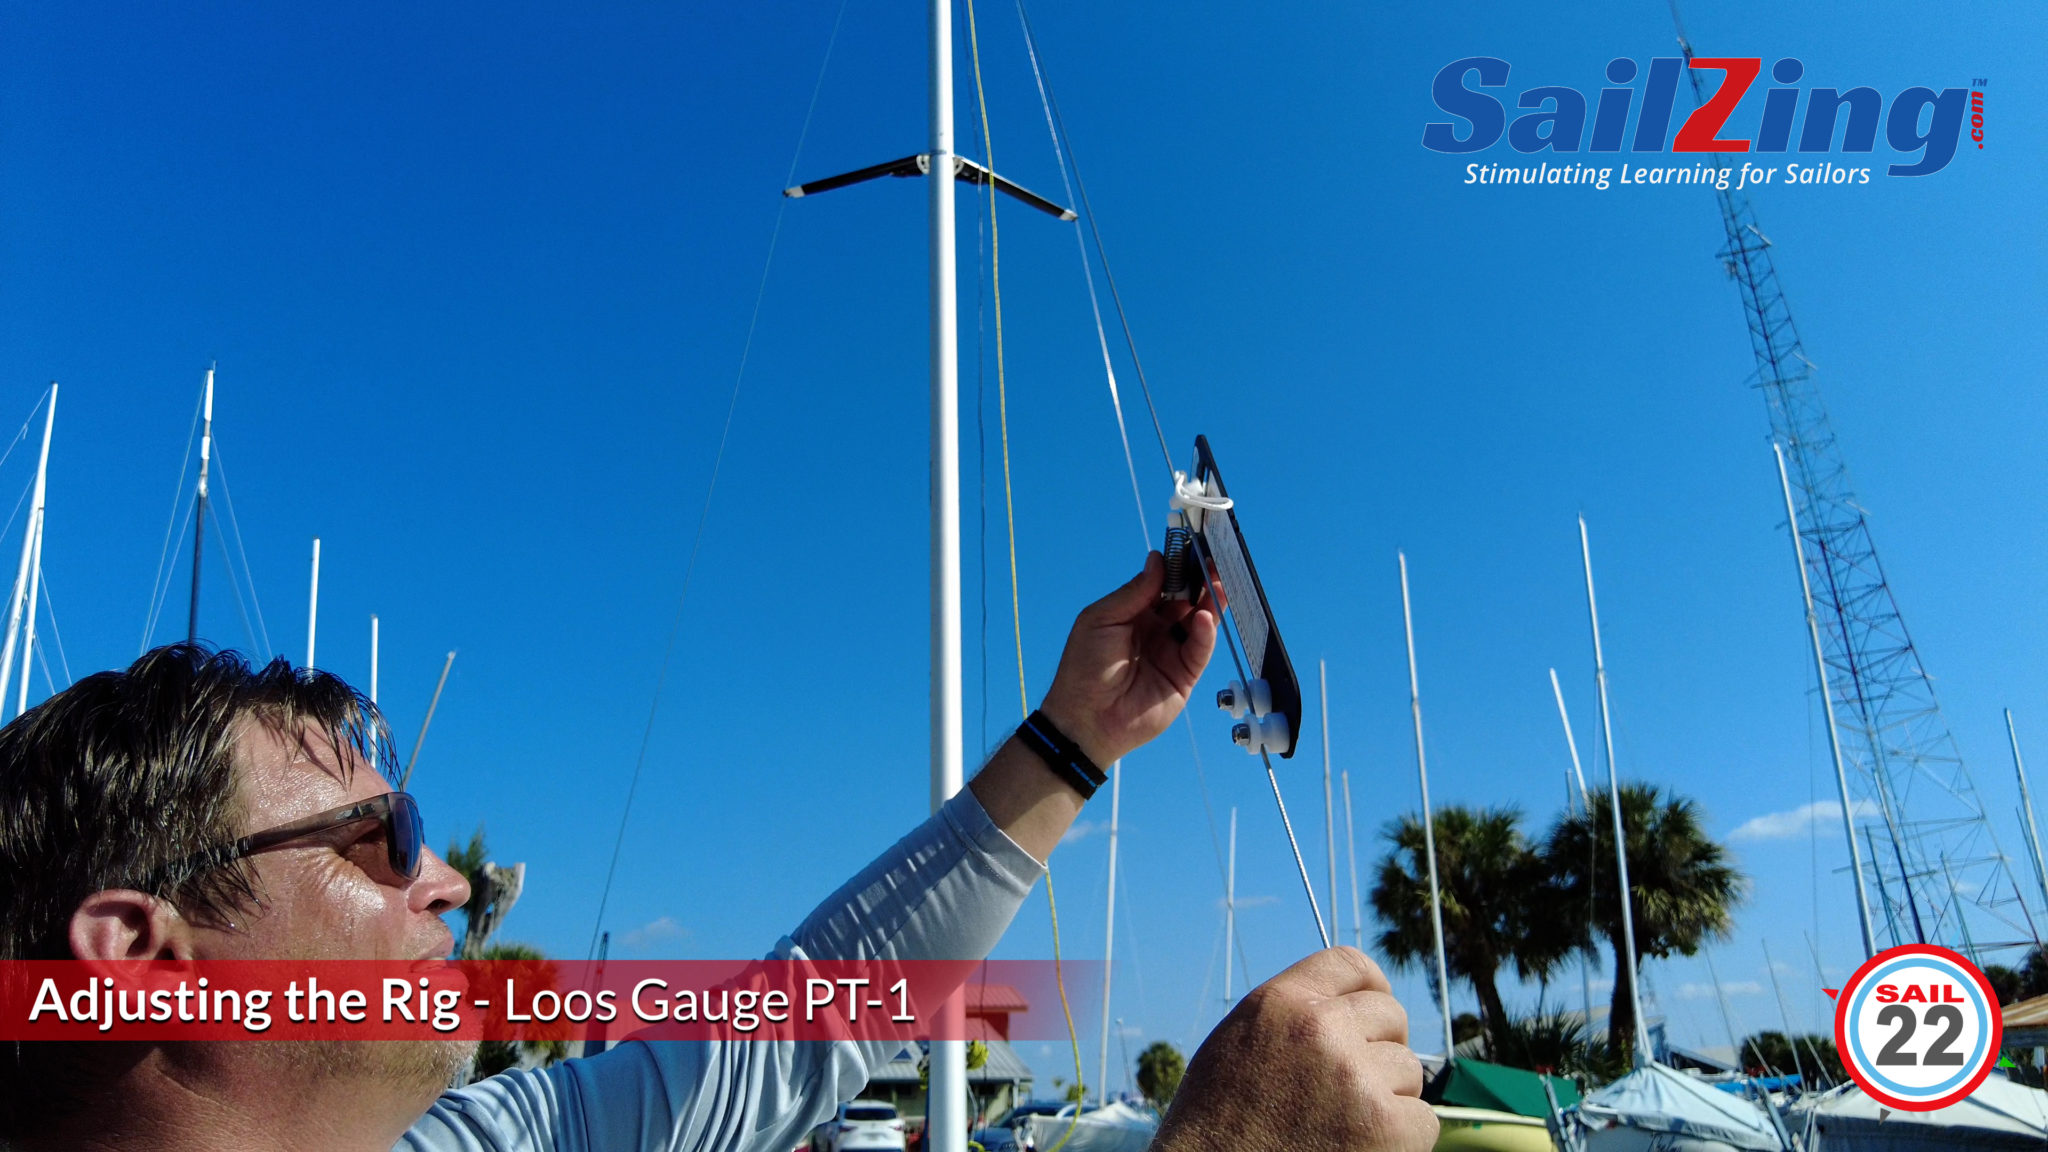
- Upgrade: Rig Tension Gauge – Loos Gauge PT-1
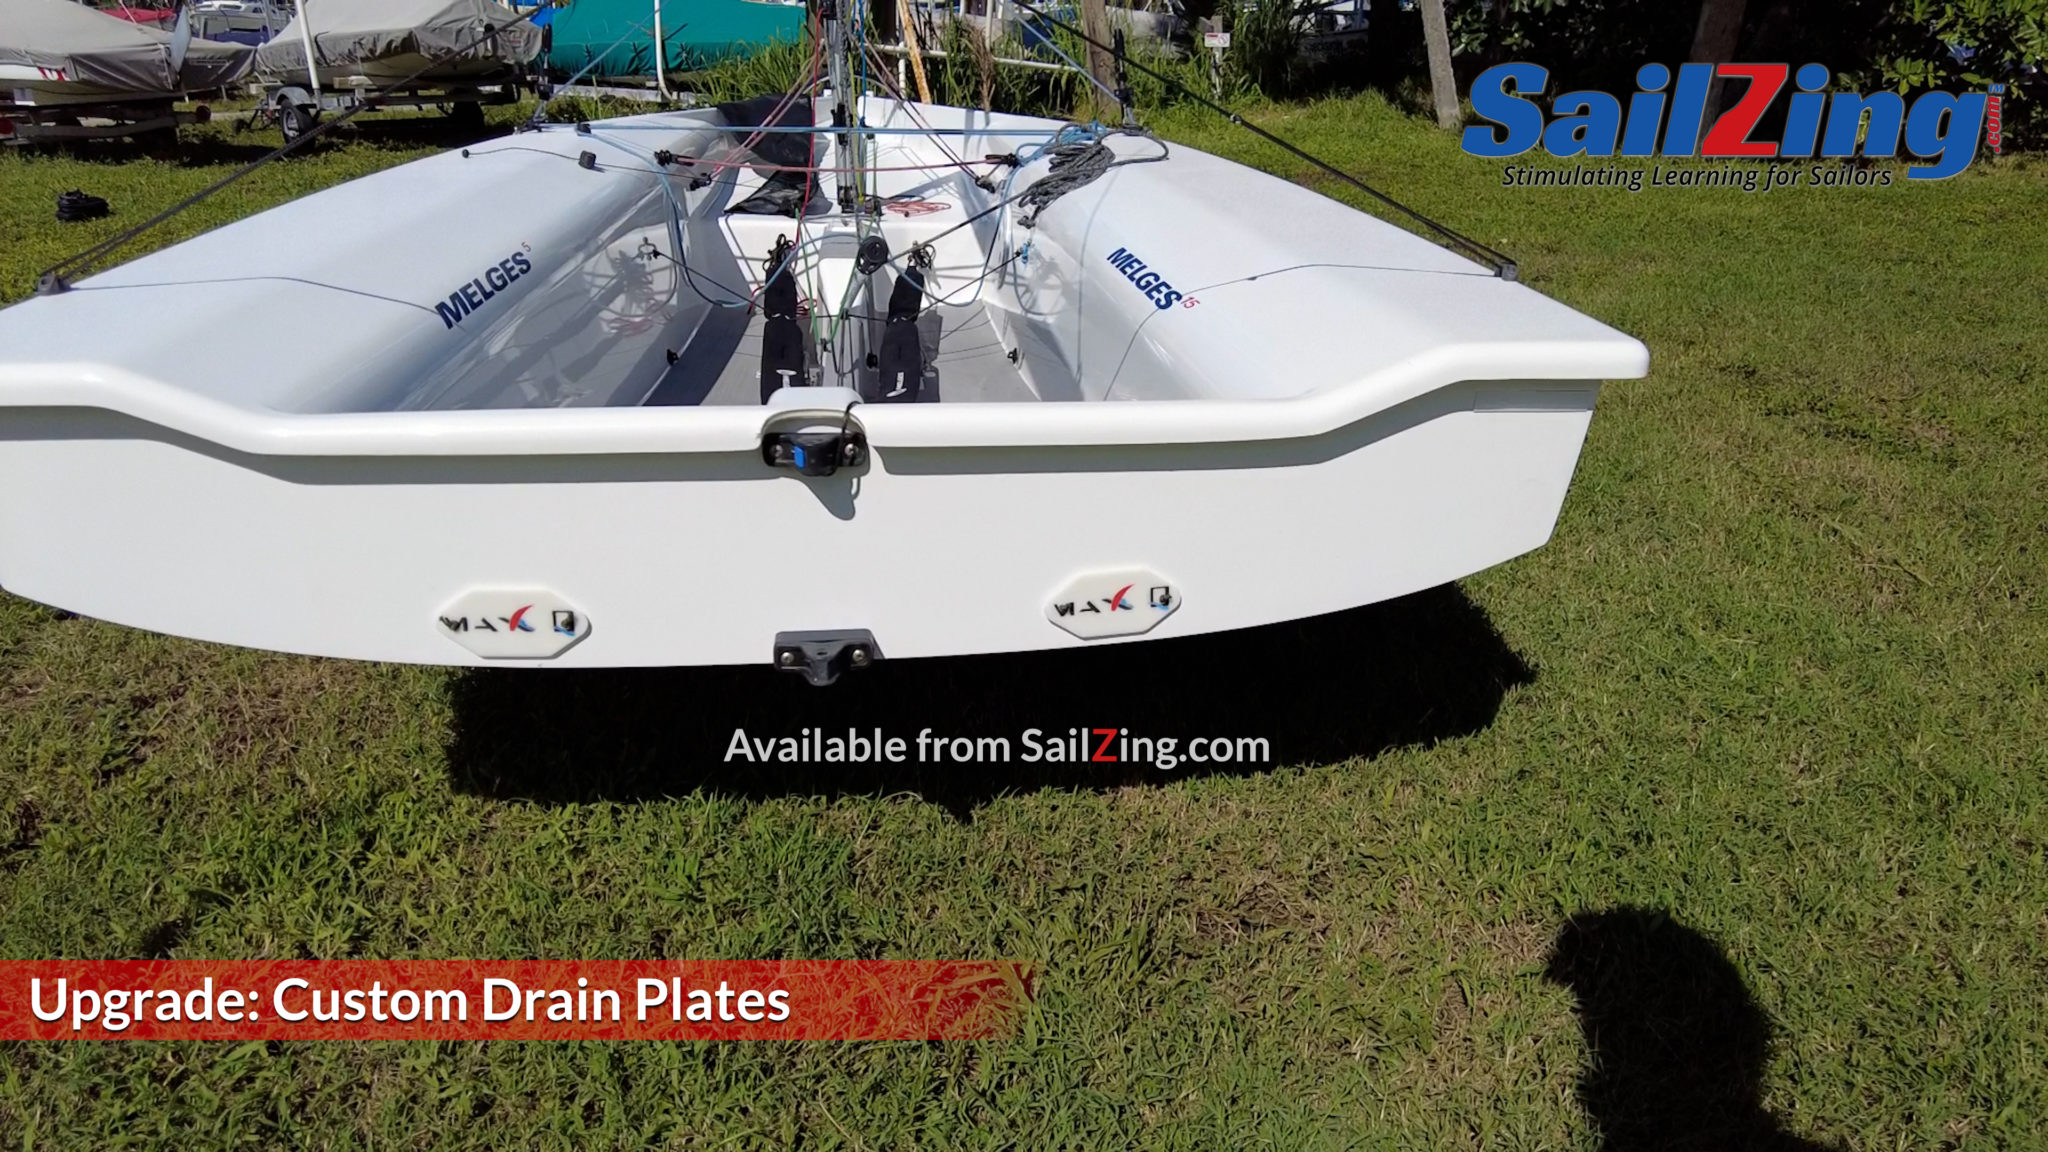
- Drain Plugs – 3 x One Piece
- Upgrade: 3 x One way Valve
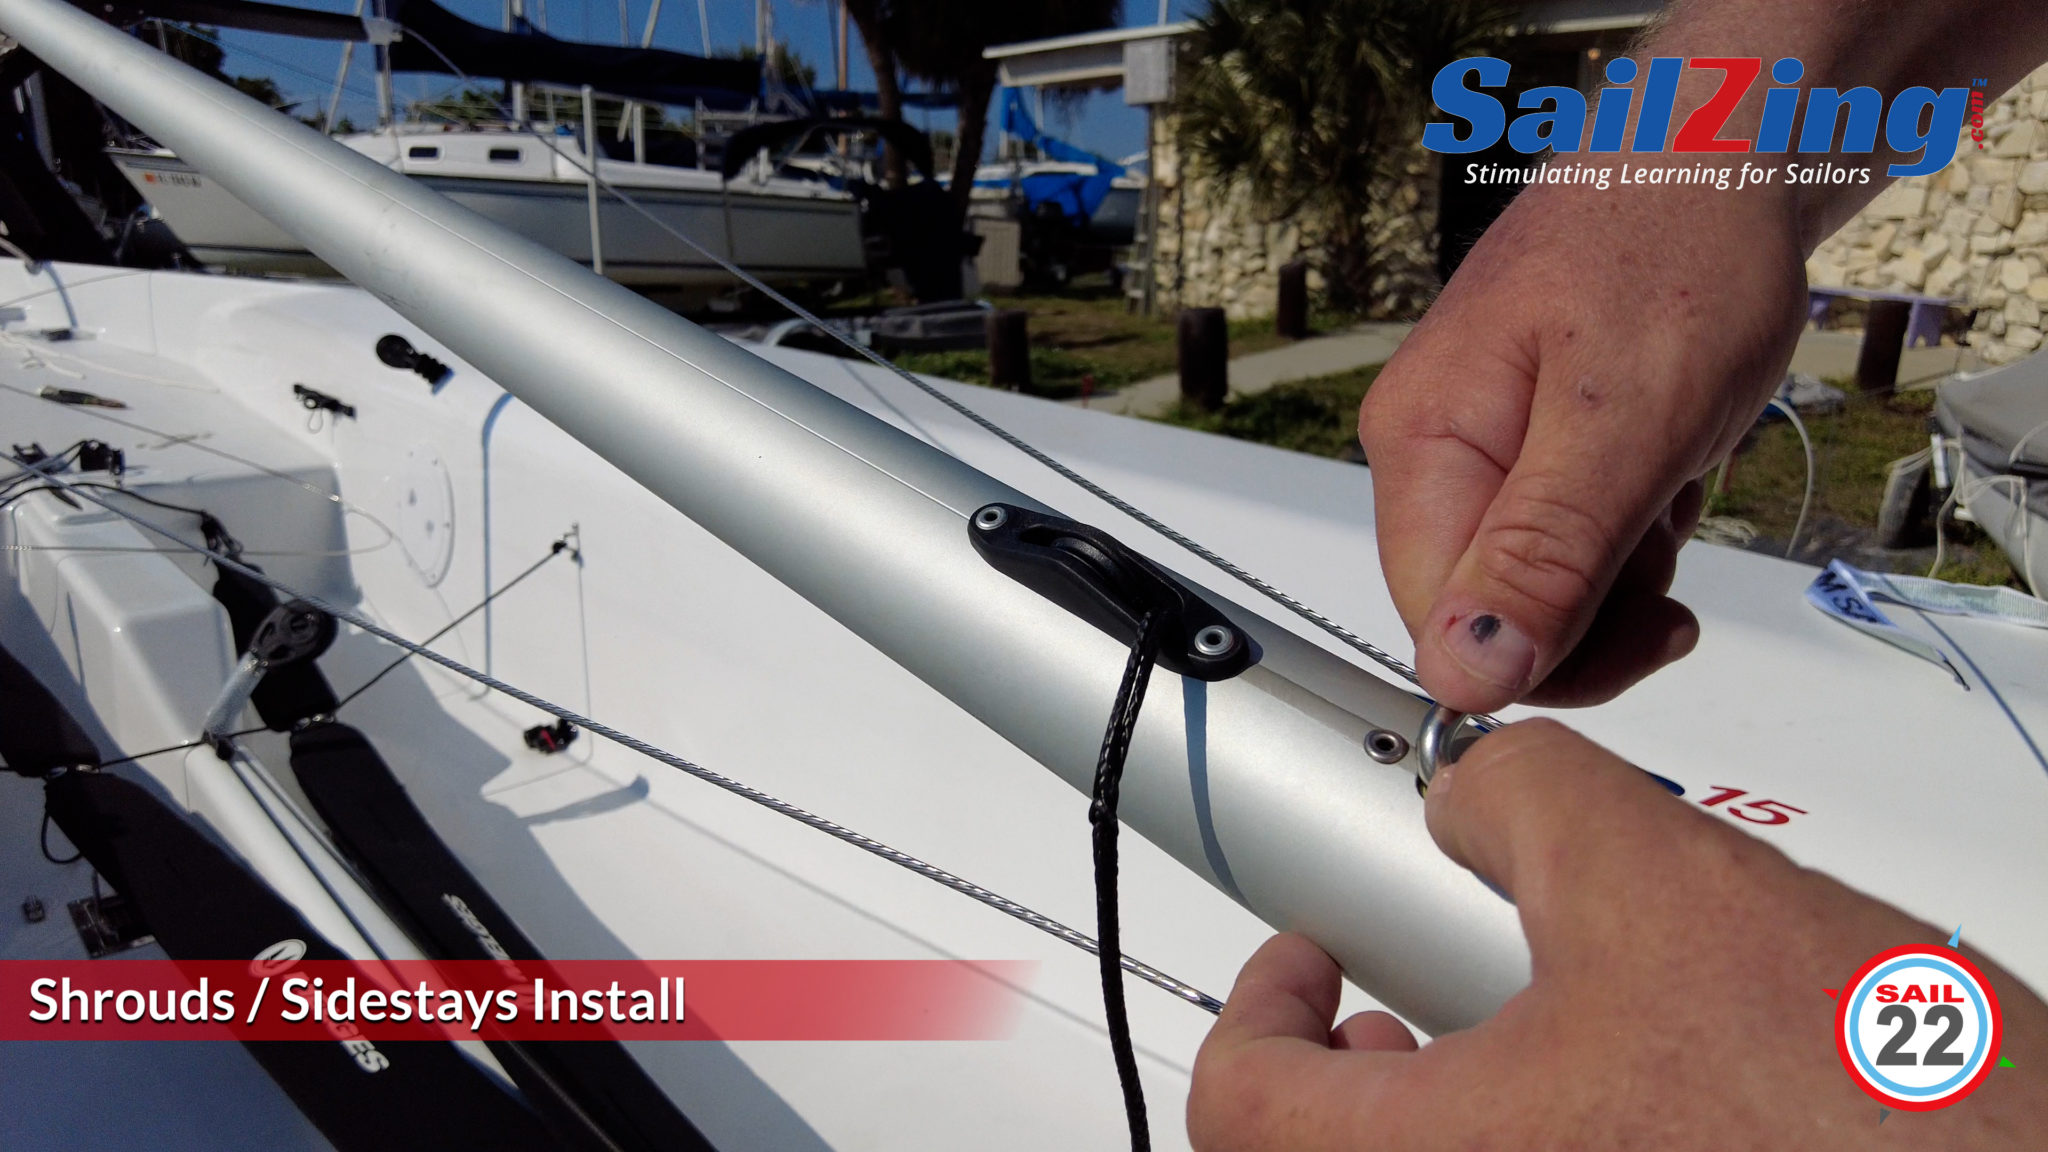
- Shrouds – Dyform / compacted strand wire, low stretch, high strength with T fittings and turnbuckles
- Forestay – 1×19 wire with T fitting and pin fitting and ball for Boat Breaker.
00:09:26 Upgrade: Star Grips & Handles Installation
00:14:06 Two Piece Mast Assembly
00:15:16 Melges Trailer & Mast Support

00:15:51 Spreaders Installation
00:18:16 Spreaders Adjustment

00:19:27 Shrouds / Sidestays Installation
00:23:47 Attaching the Shrouds / Sidestays
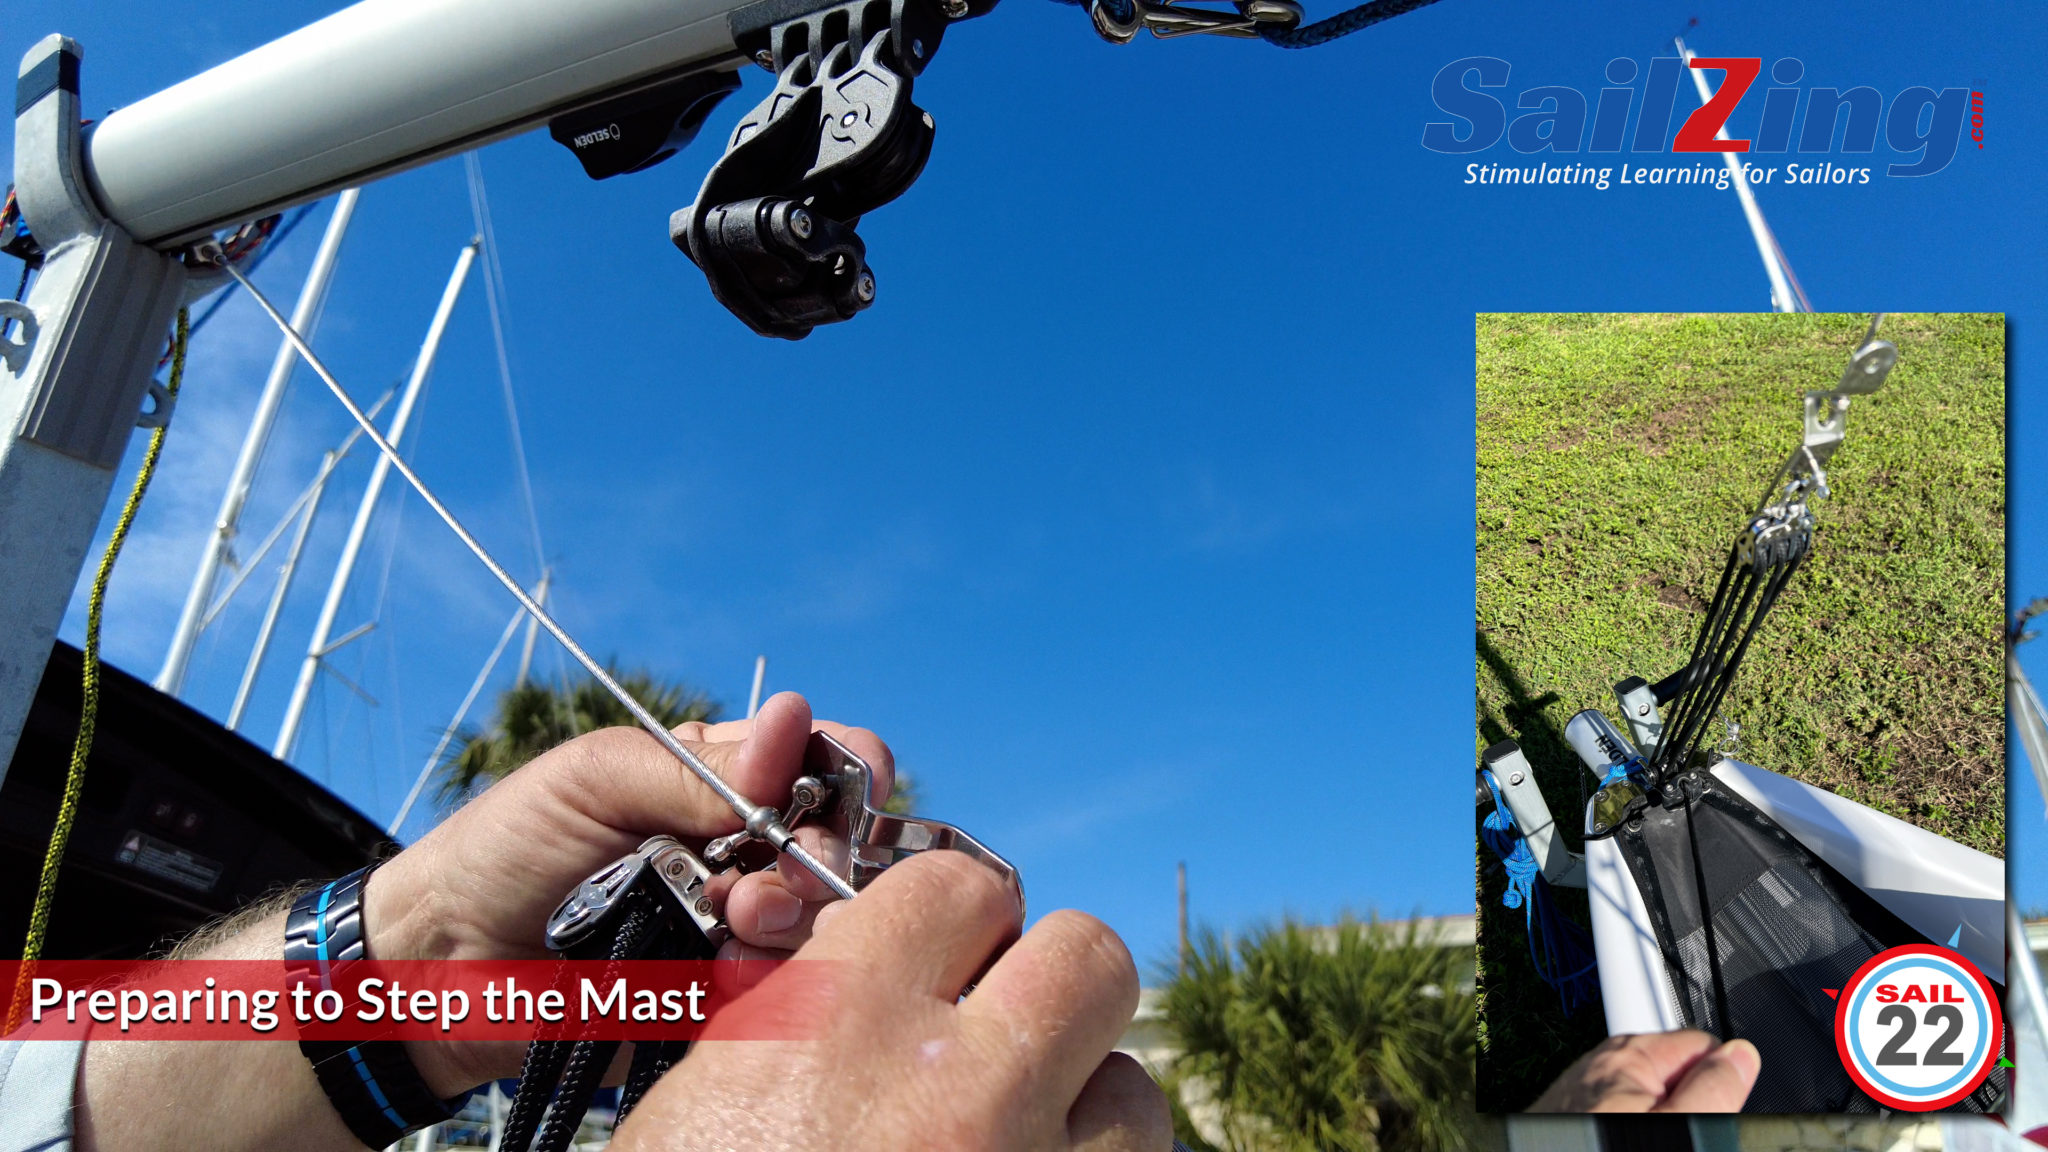
00:24:13 Preparing to Step the Mast
00:27:16 Stepping the Mast and using “Boat Breaker”
00:28:58 Adjusting the Rig
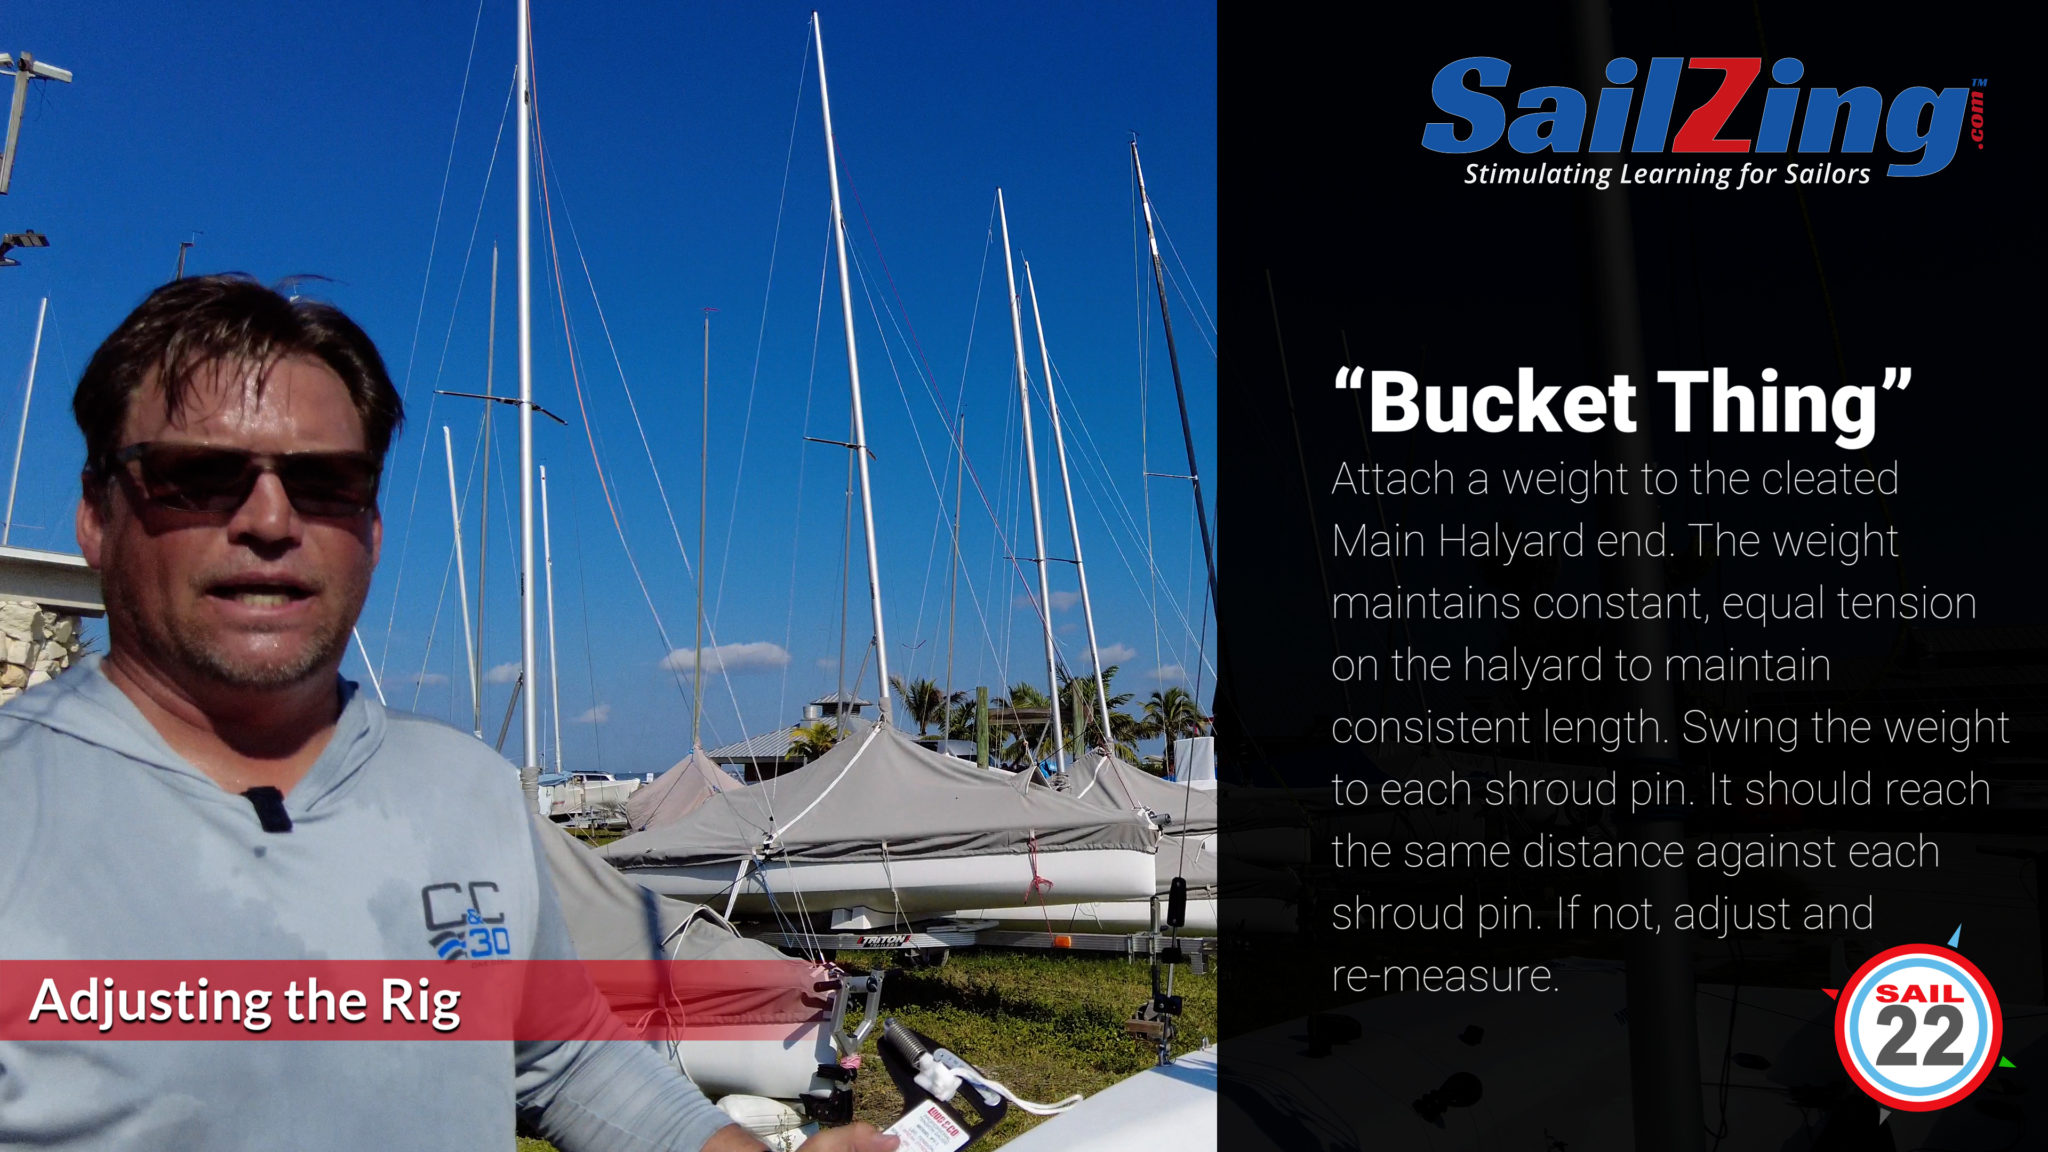
00:30:22 Synchronizing the Shroud Length – “Bucket Thing”
00:31:04 Adjusting the Rig – Using the Loos Gauge PT-1
00:32:34 Detensioning with “Boat Breaker”
00:33:15 Sprit Install
00:33:53 Installing the Sprit blocks
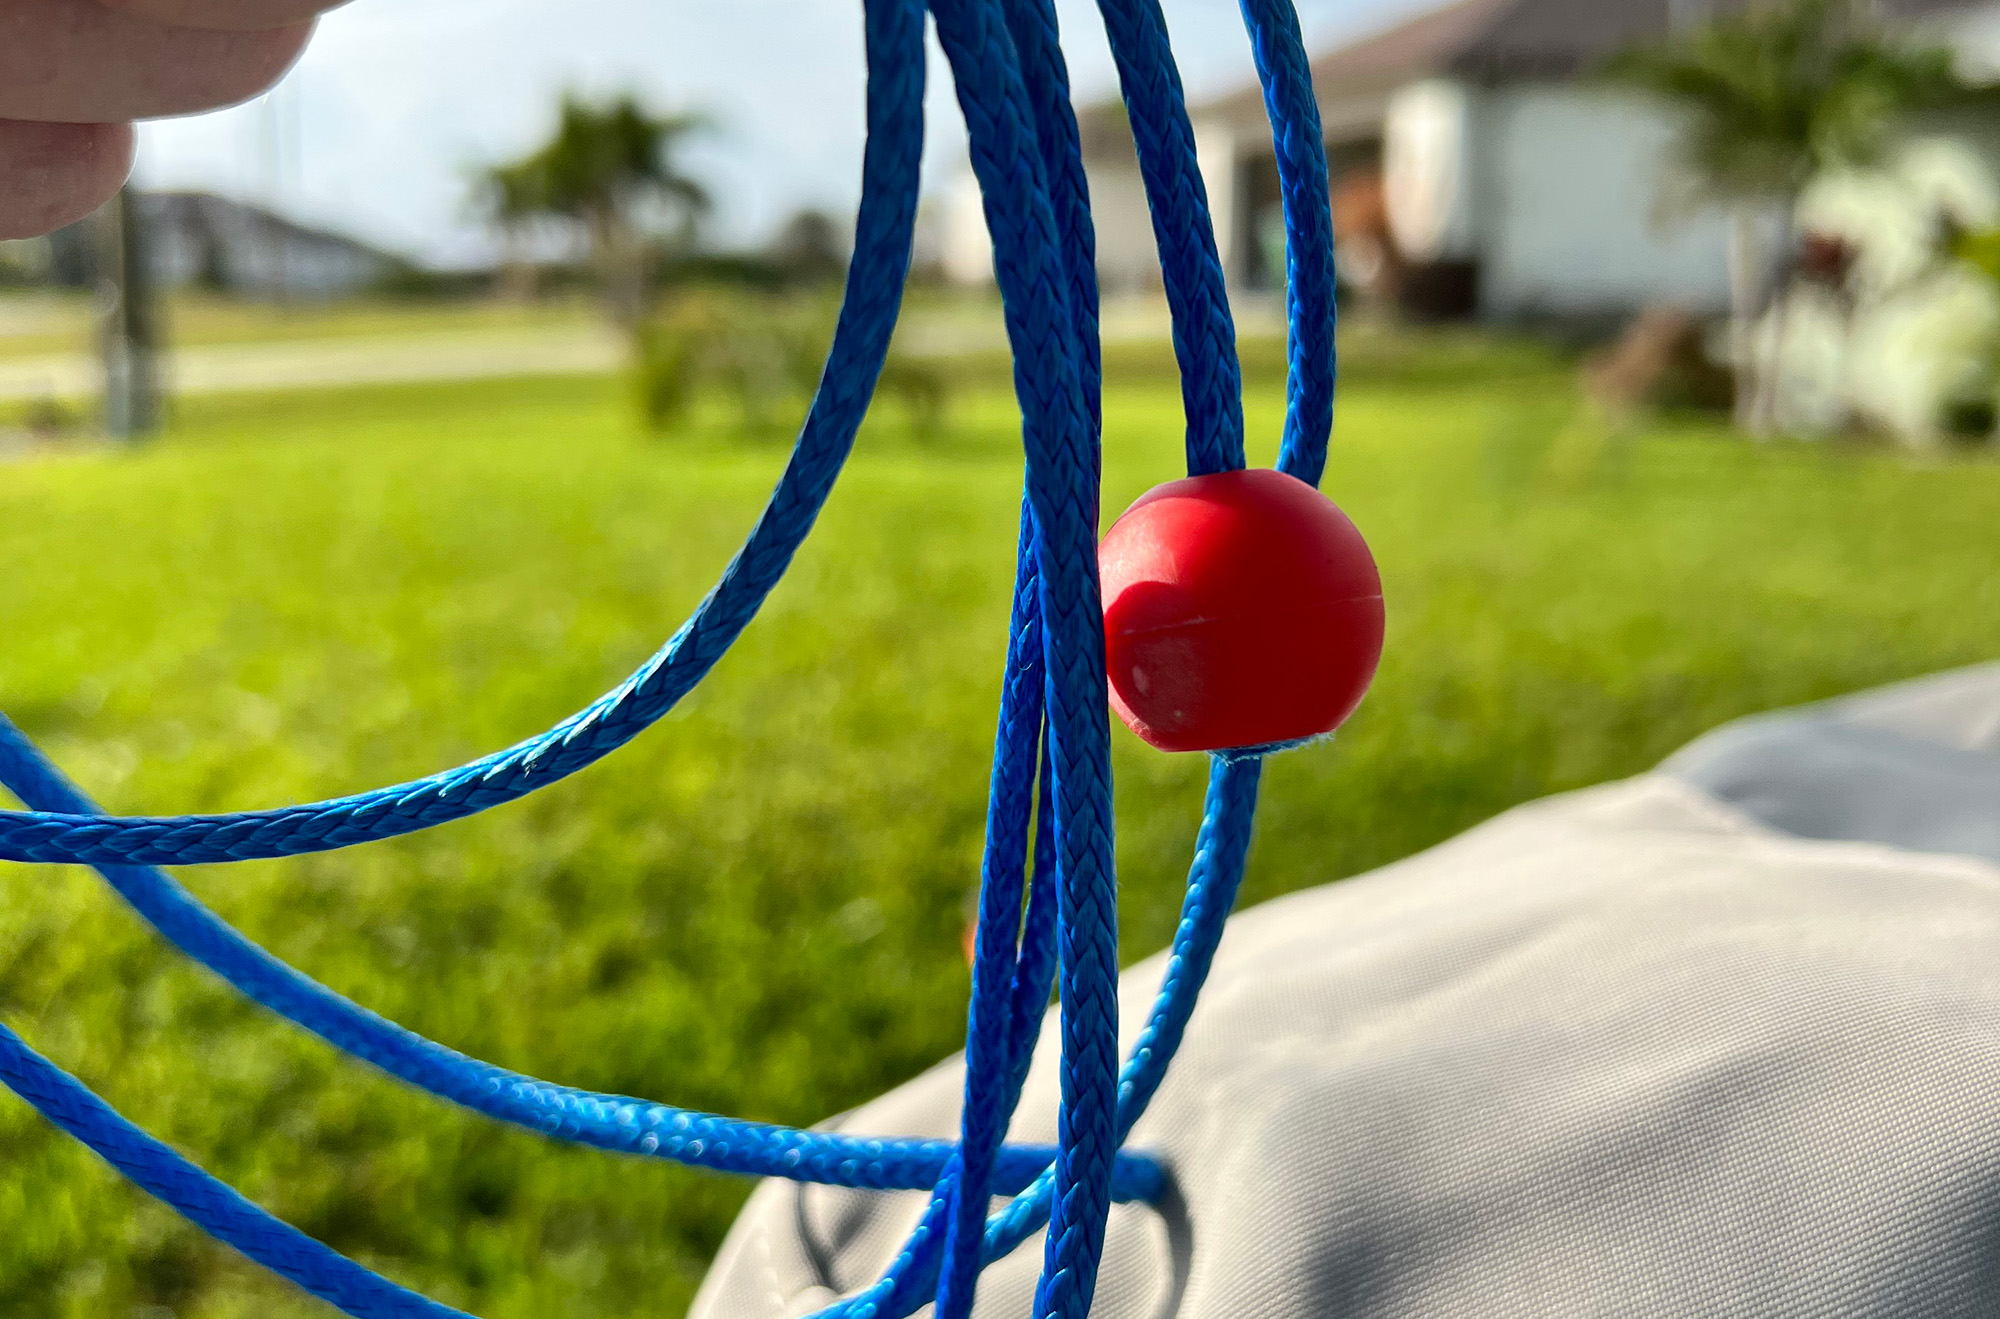
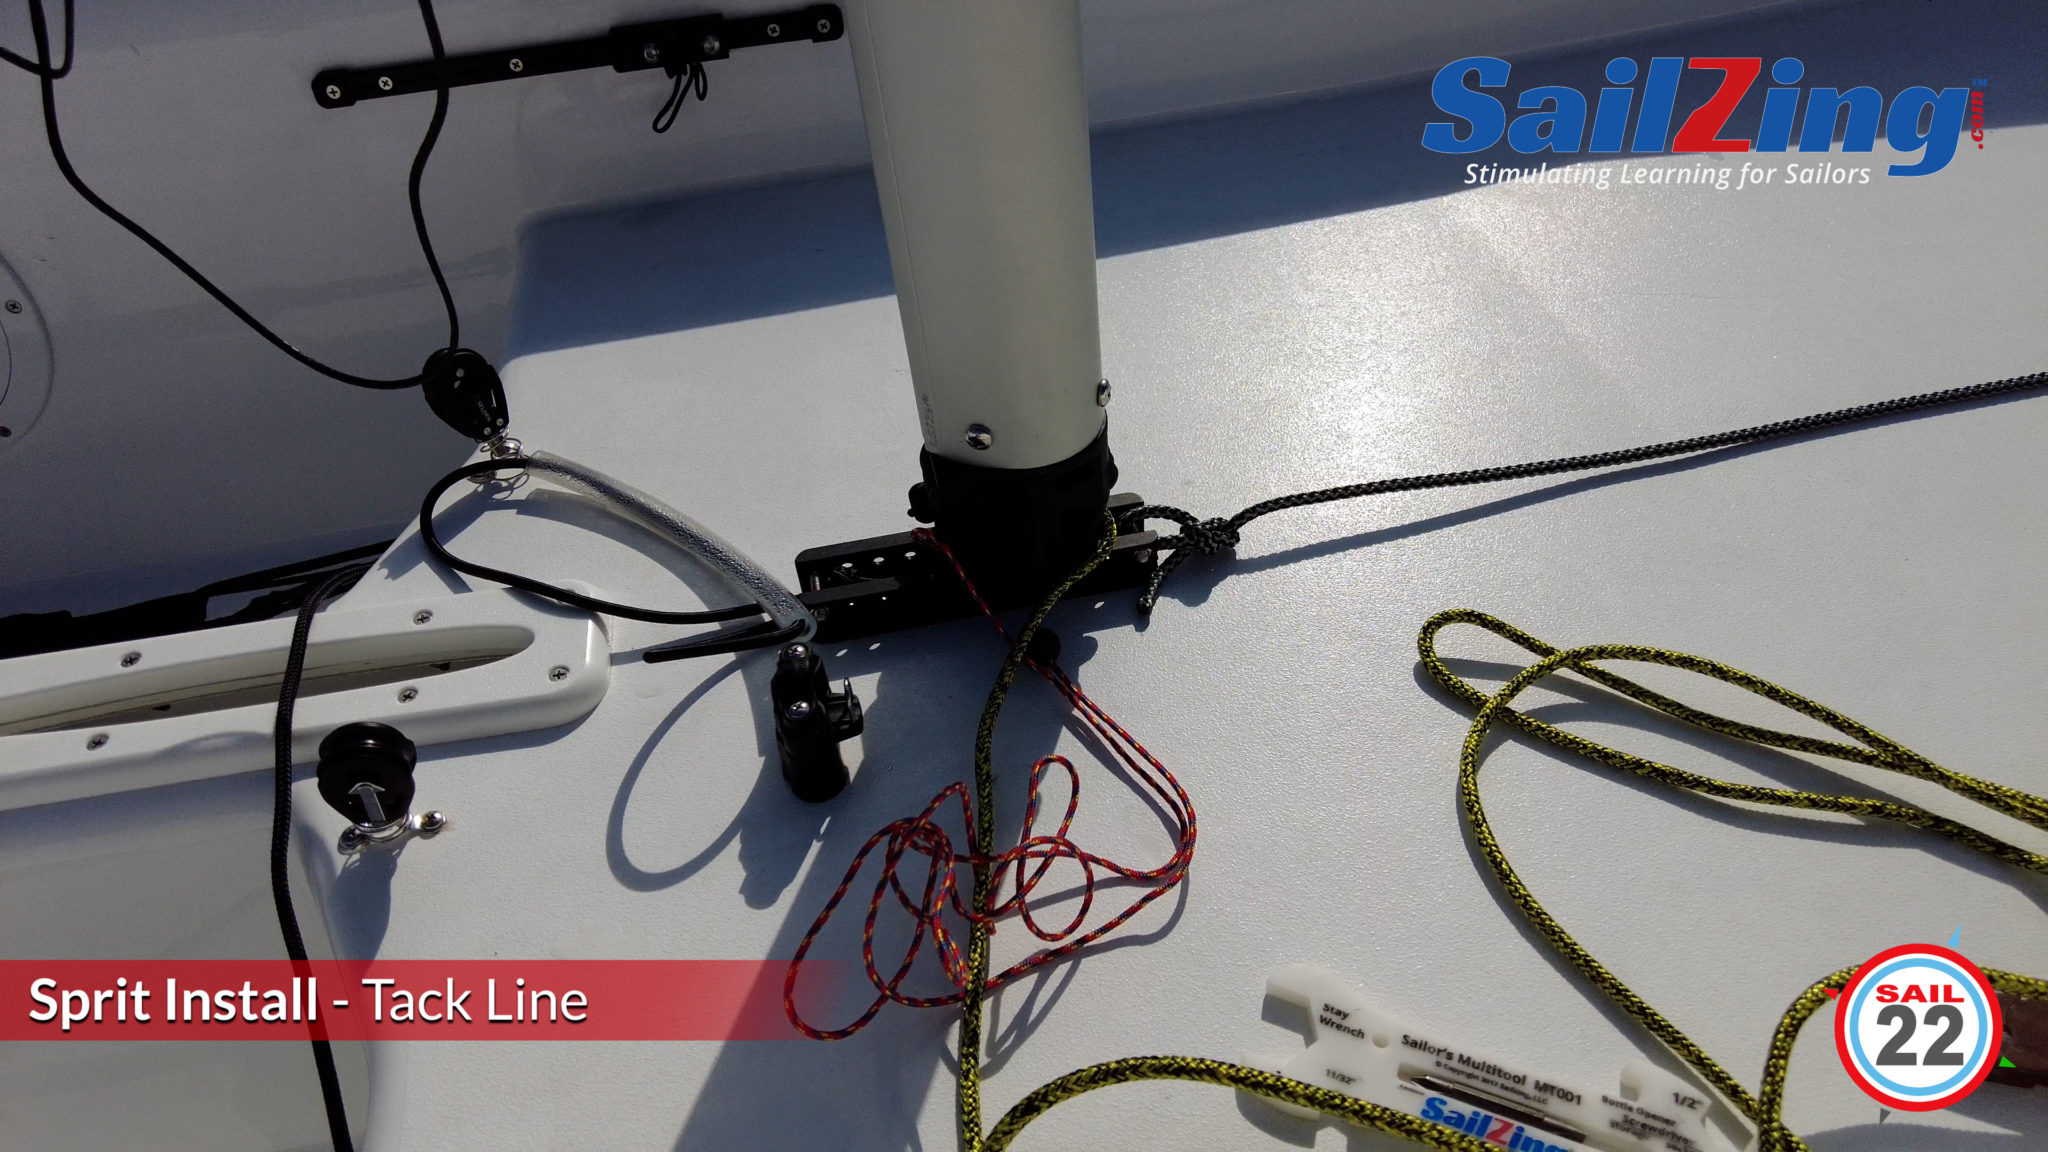
00:35:33 Tying the Tack Line
00:36:51 Dousing Bag / Sock Installation
00:38:30 Upgrading the Mast Sheaves
00:40:41 Rudder / Tiller Installation
00:42:18 Upgrading the Tiller Extension
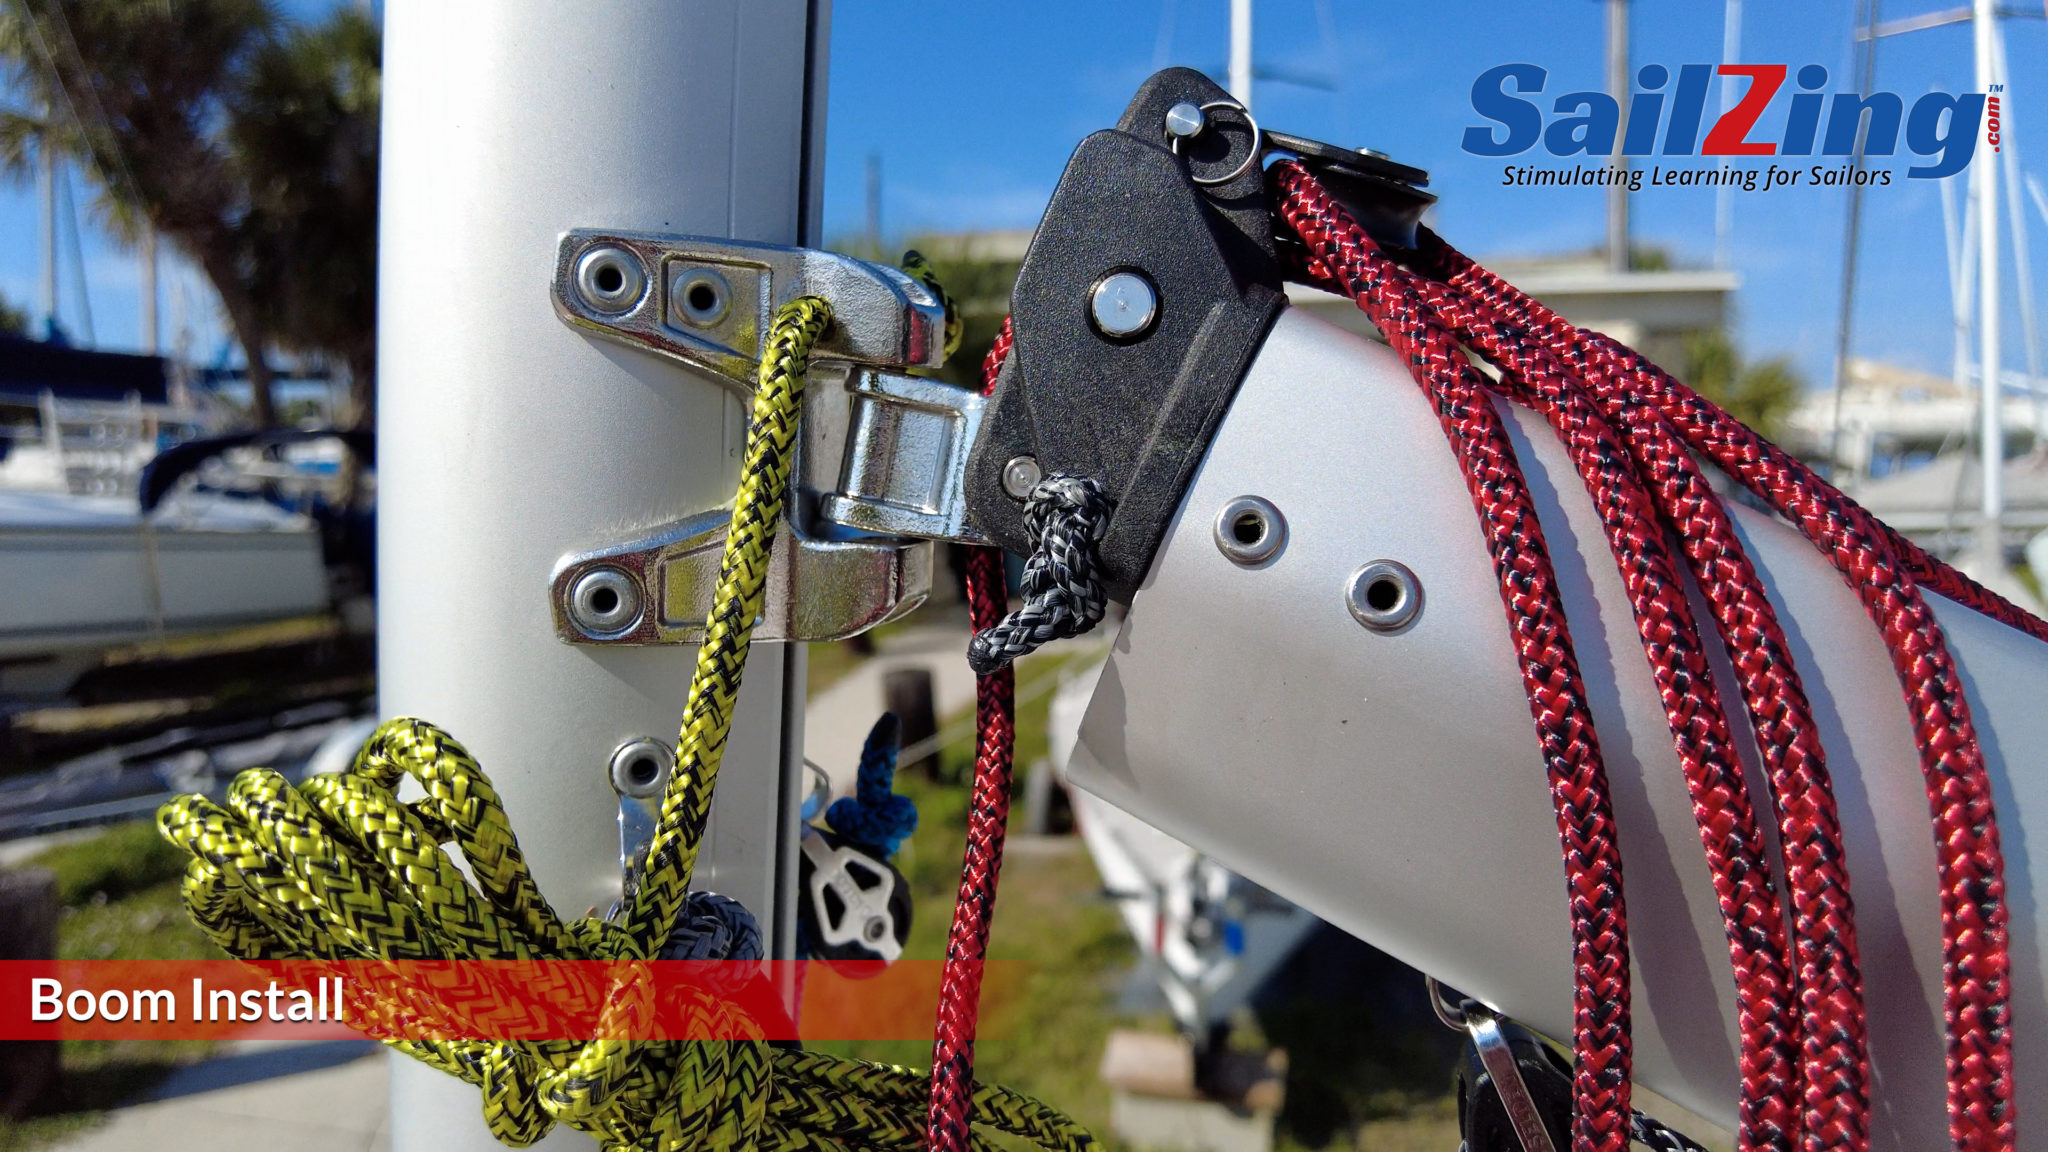
00:42:46 Boom Installation
00:43:17 Vang Installation
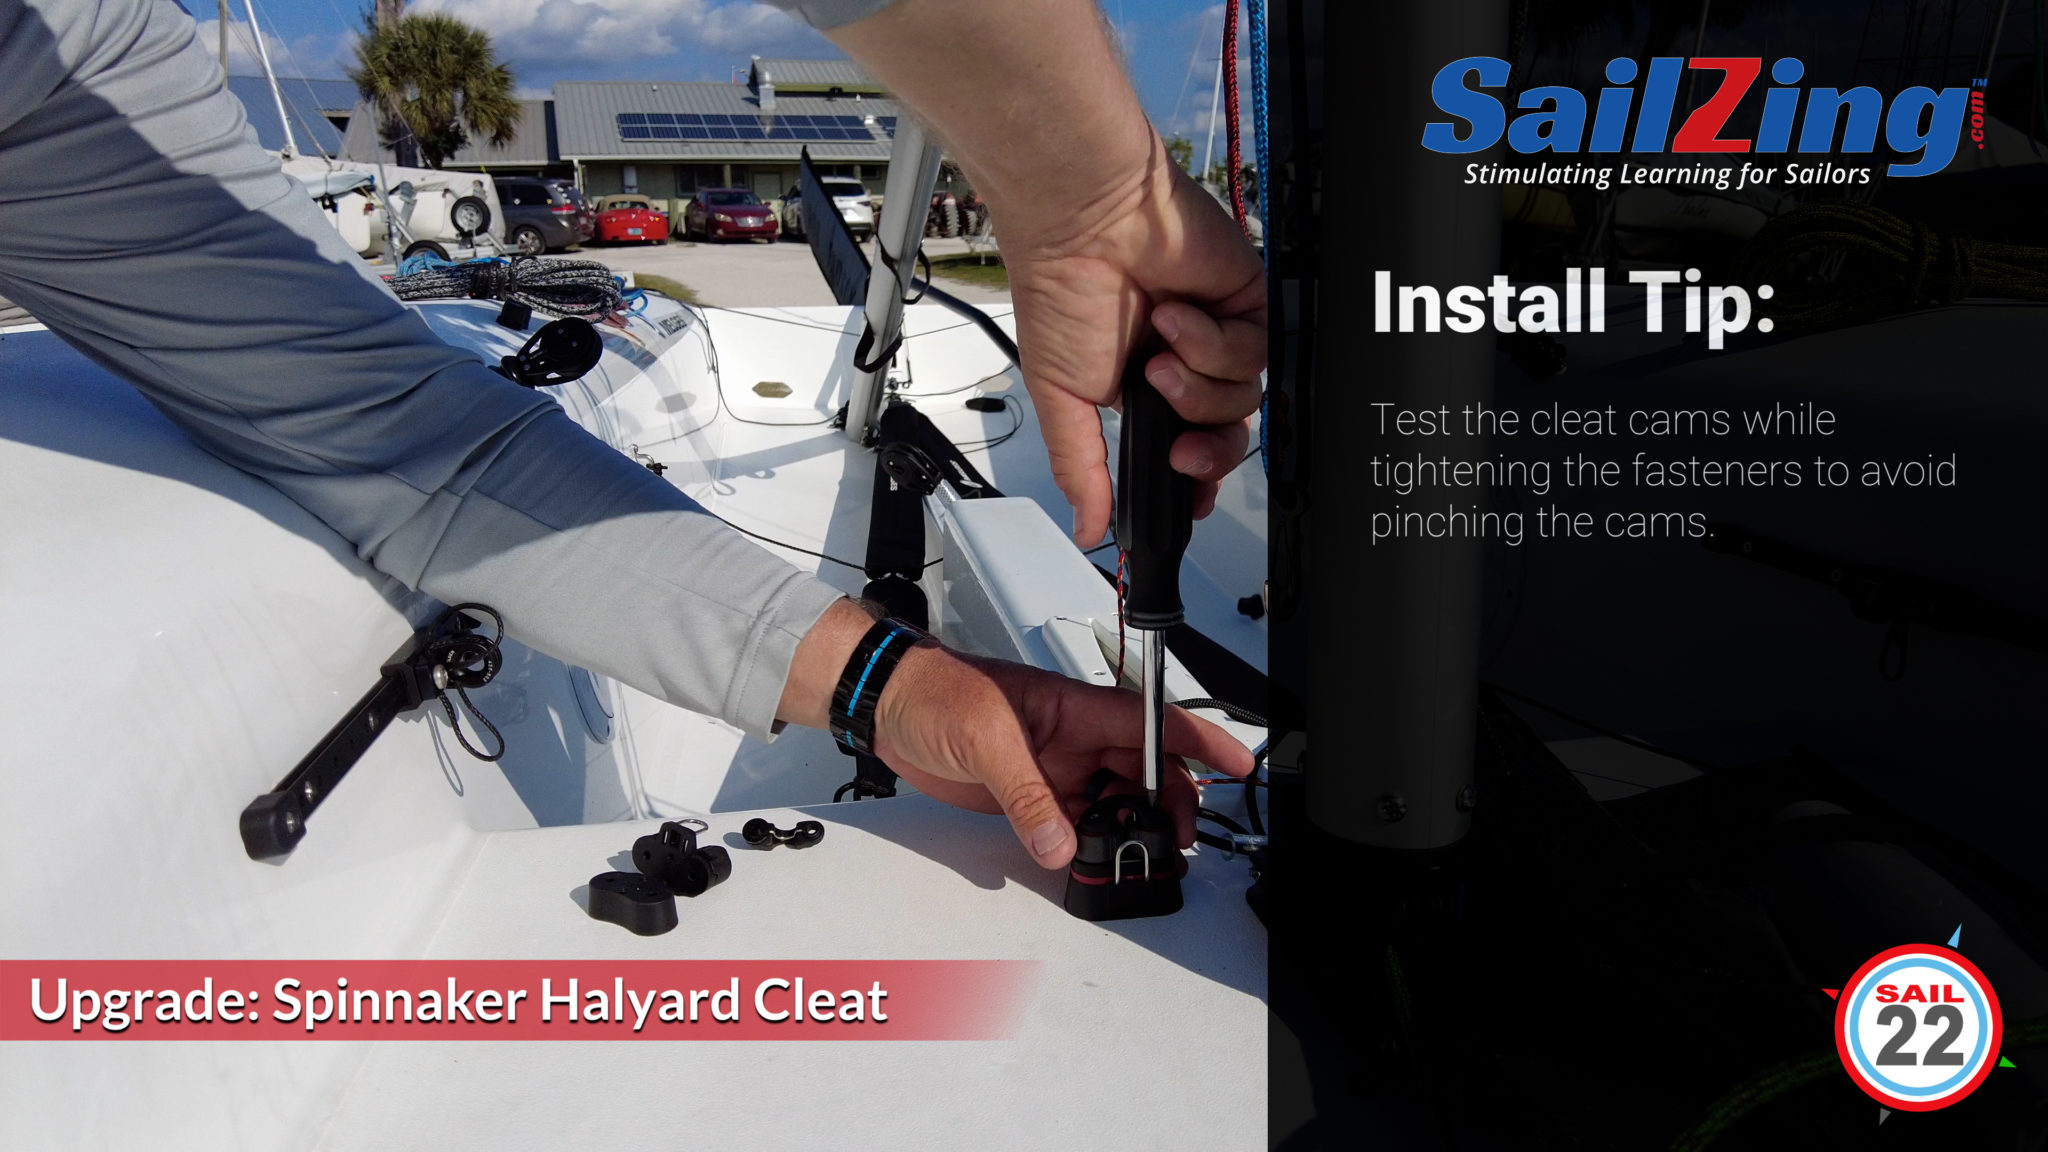
00:44:08 Upgrading the Spinnaker Halyard Cleat
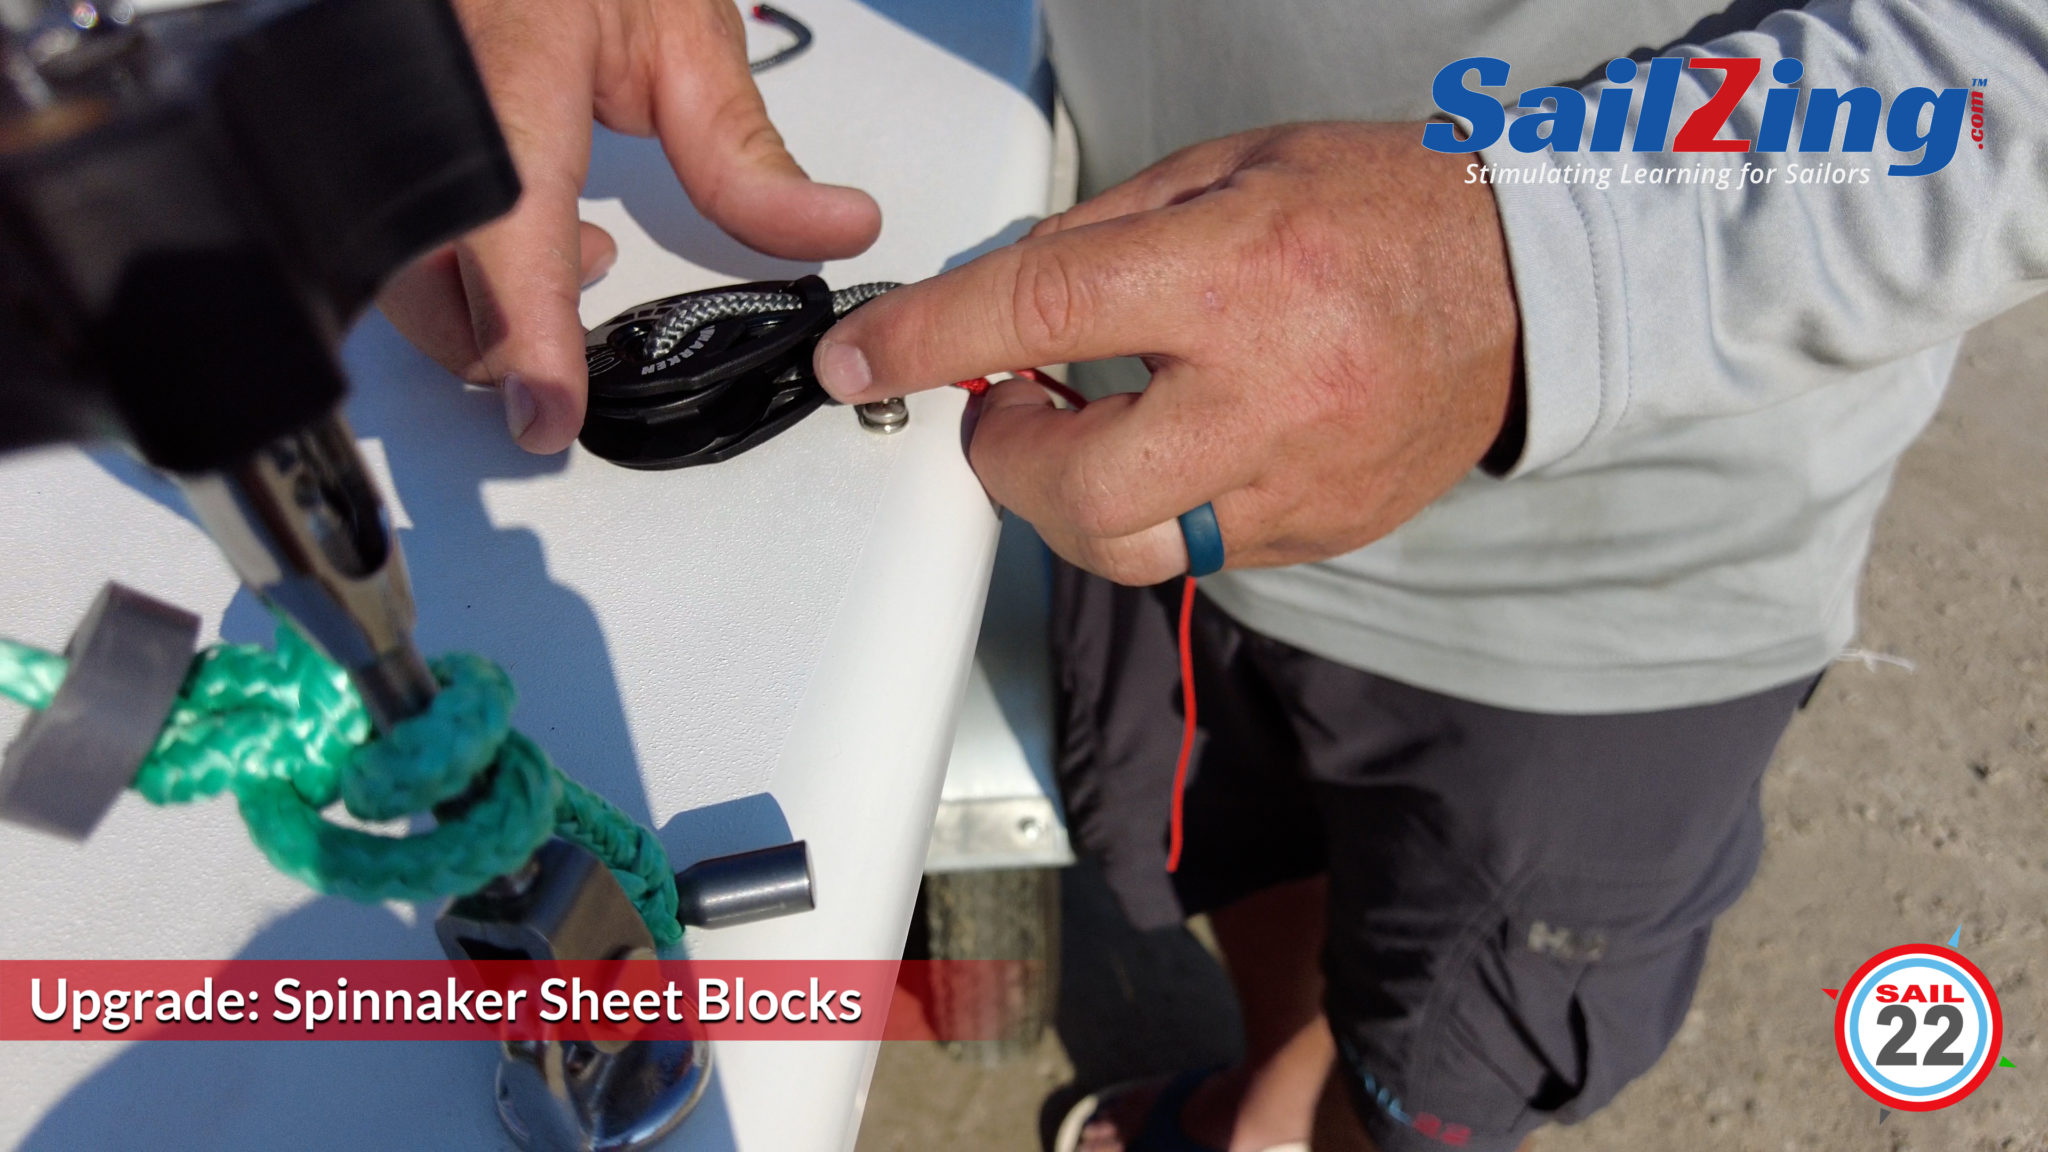
00:45:47 Upgrading the Spinnaker Sheet Blocks
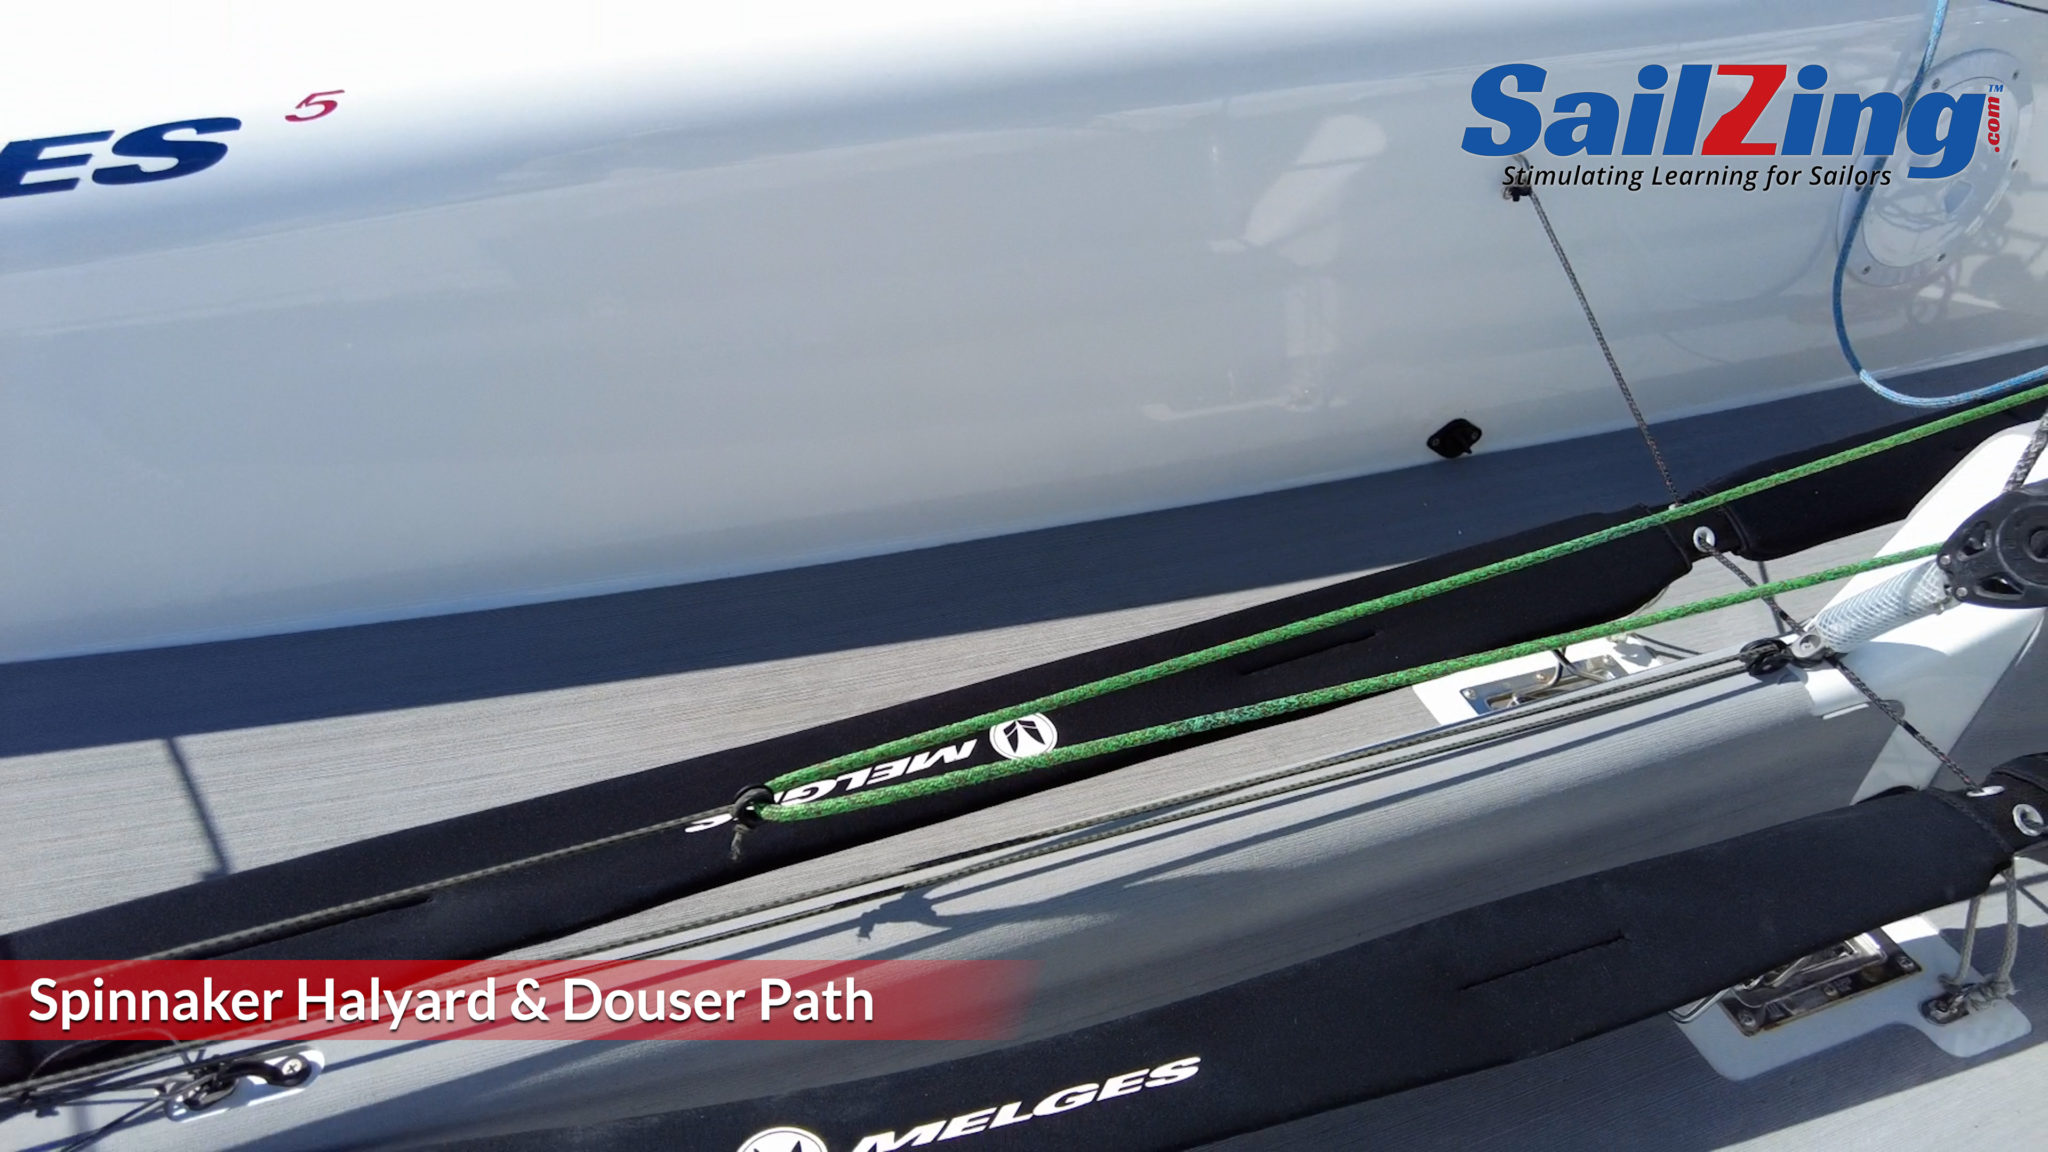
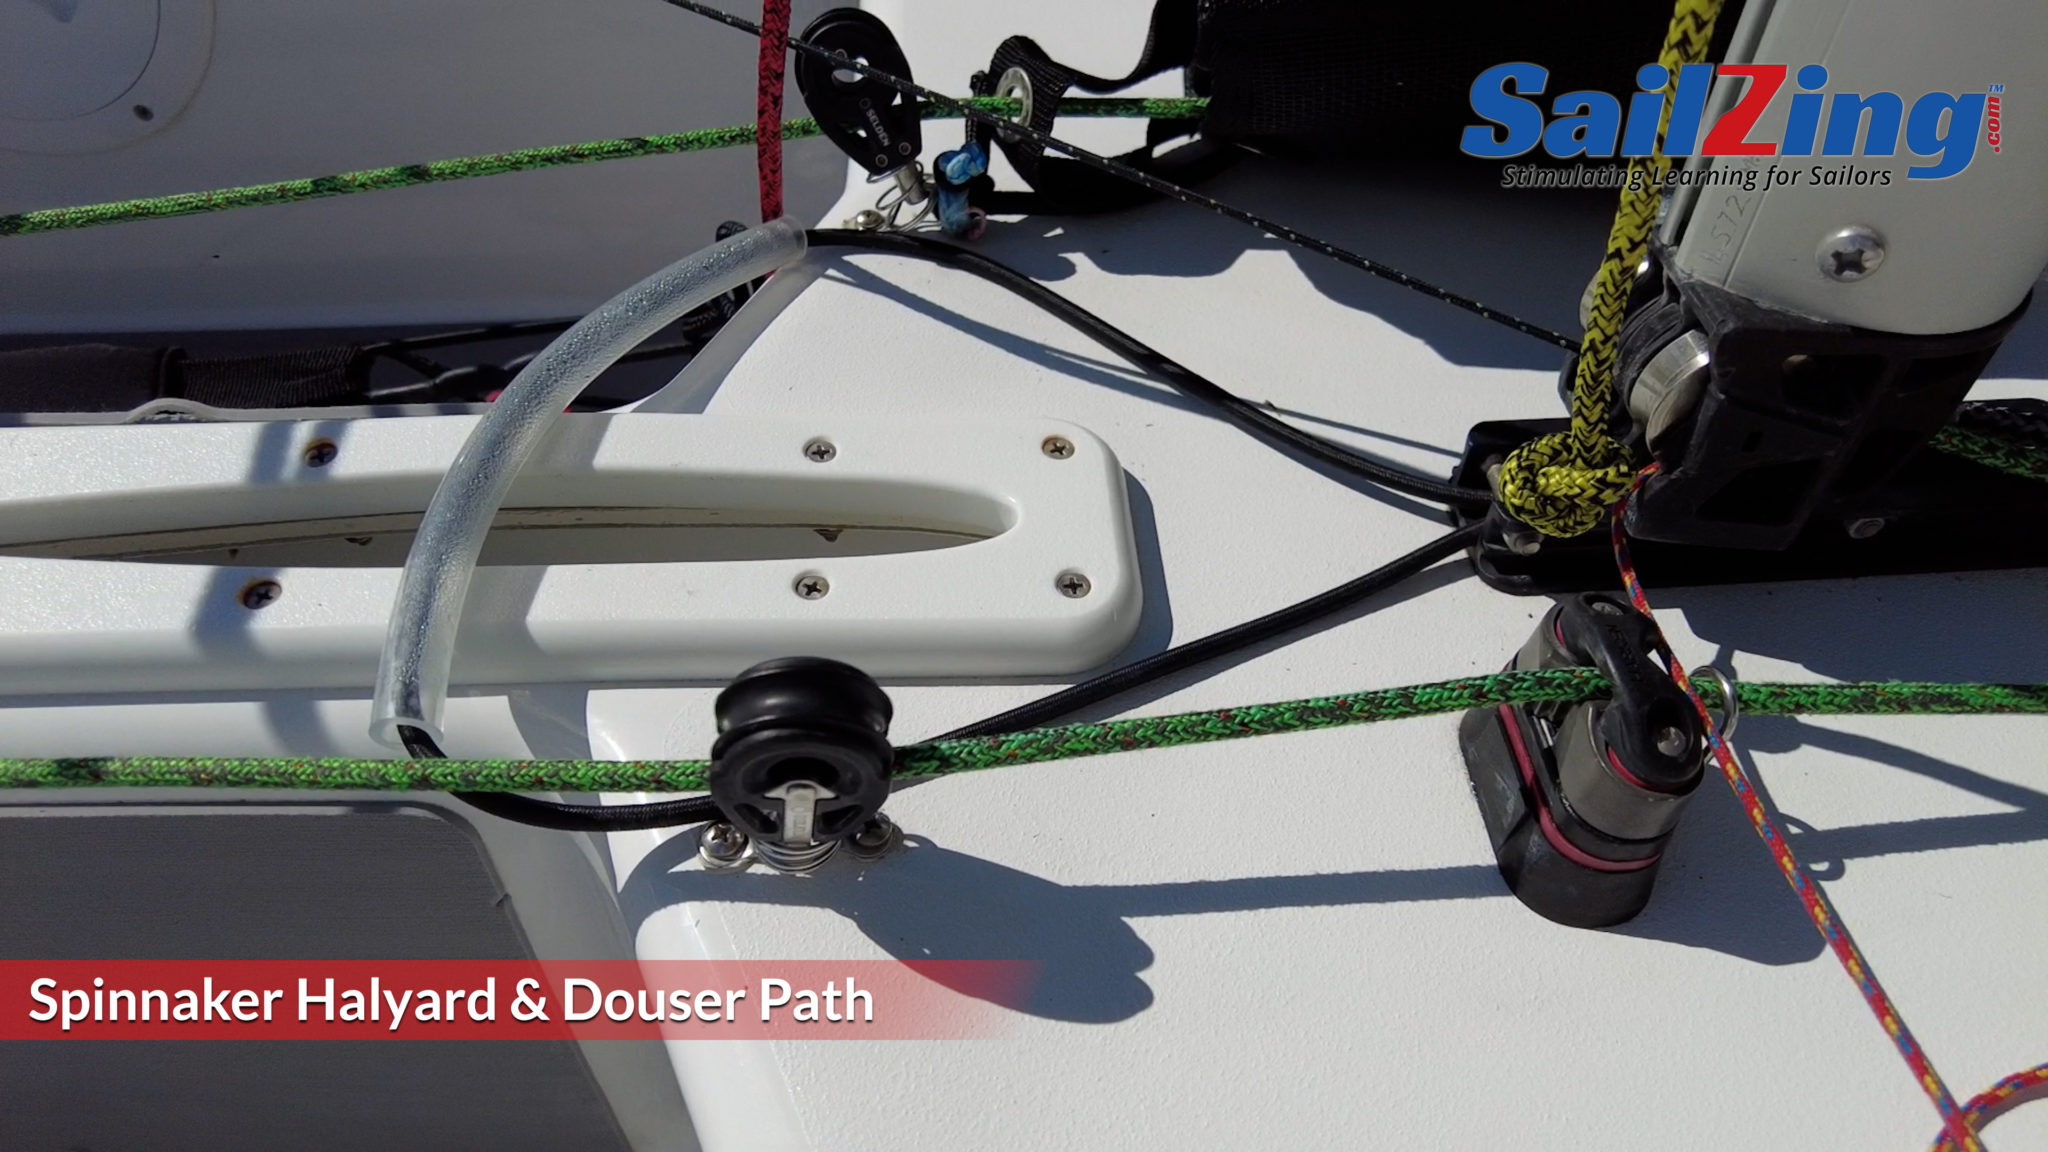
00:47:13 Spinnaker Halyard & Dousing Line Path
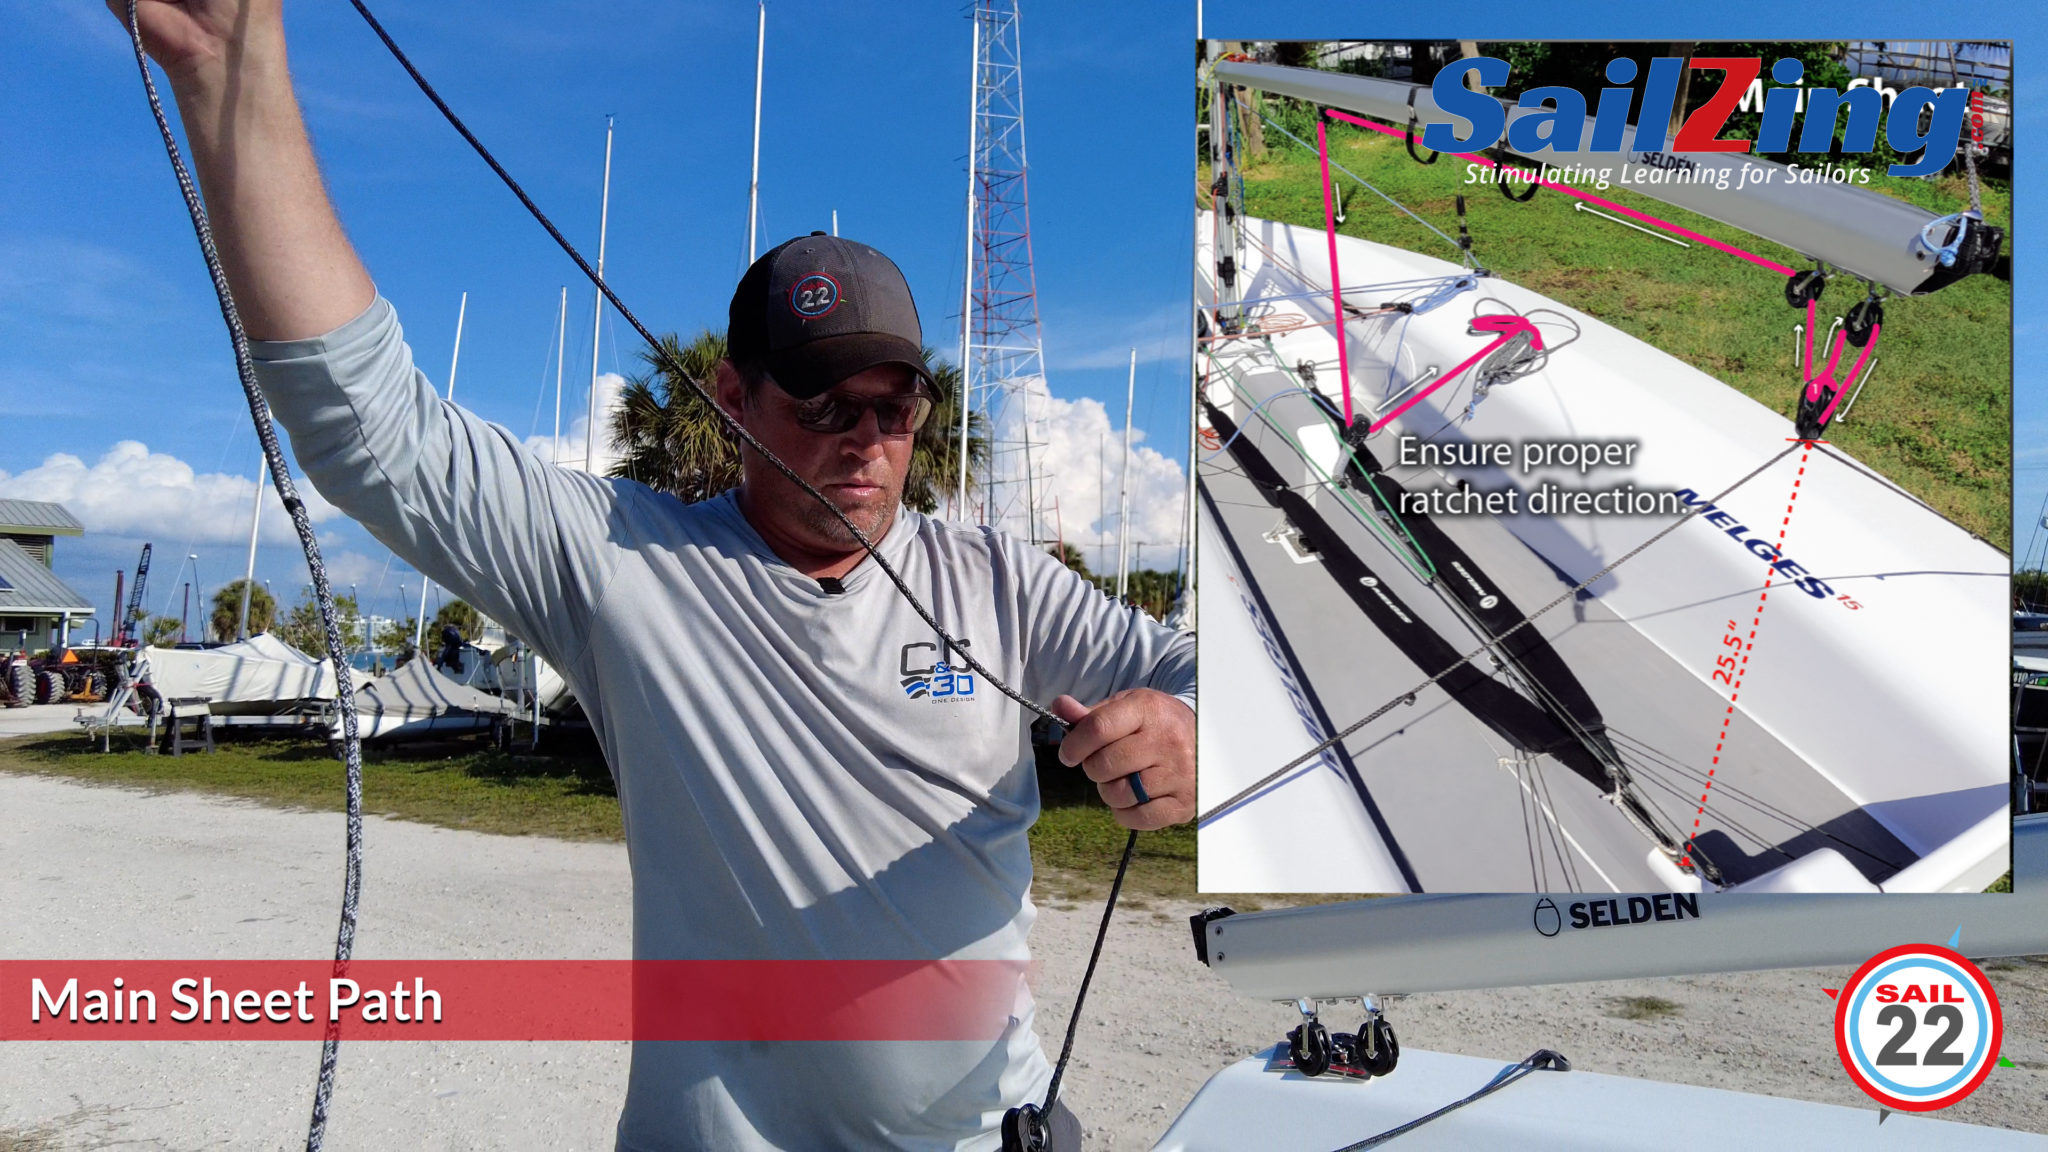
00:50:34 Main Sheet Path
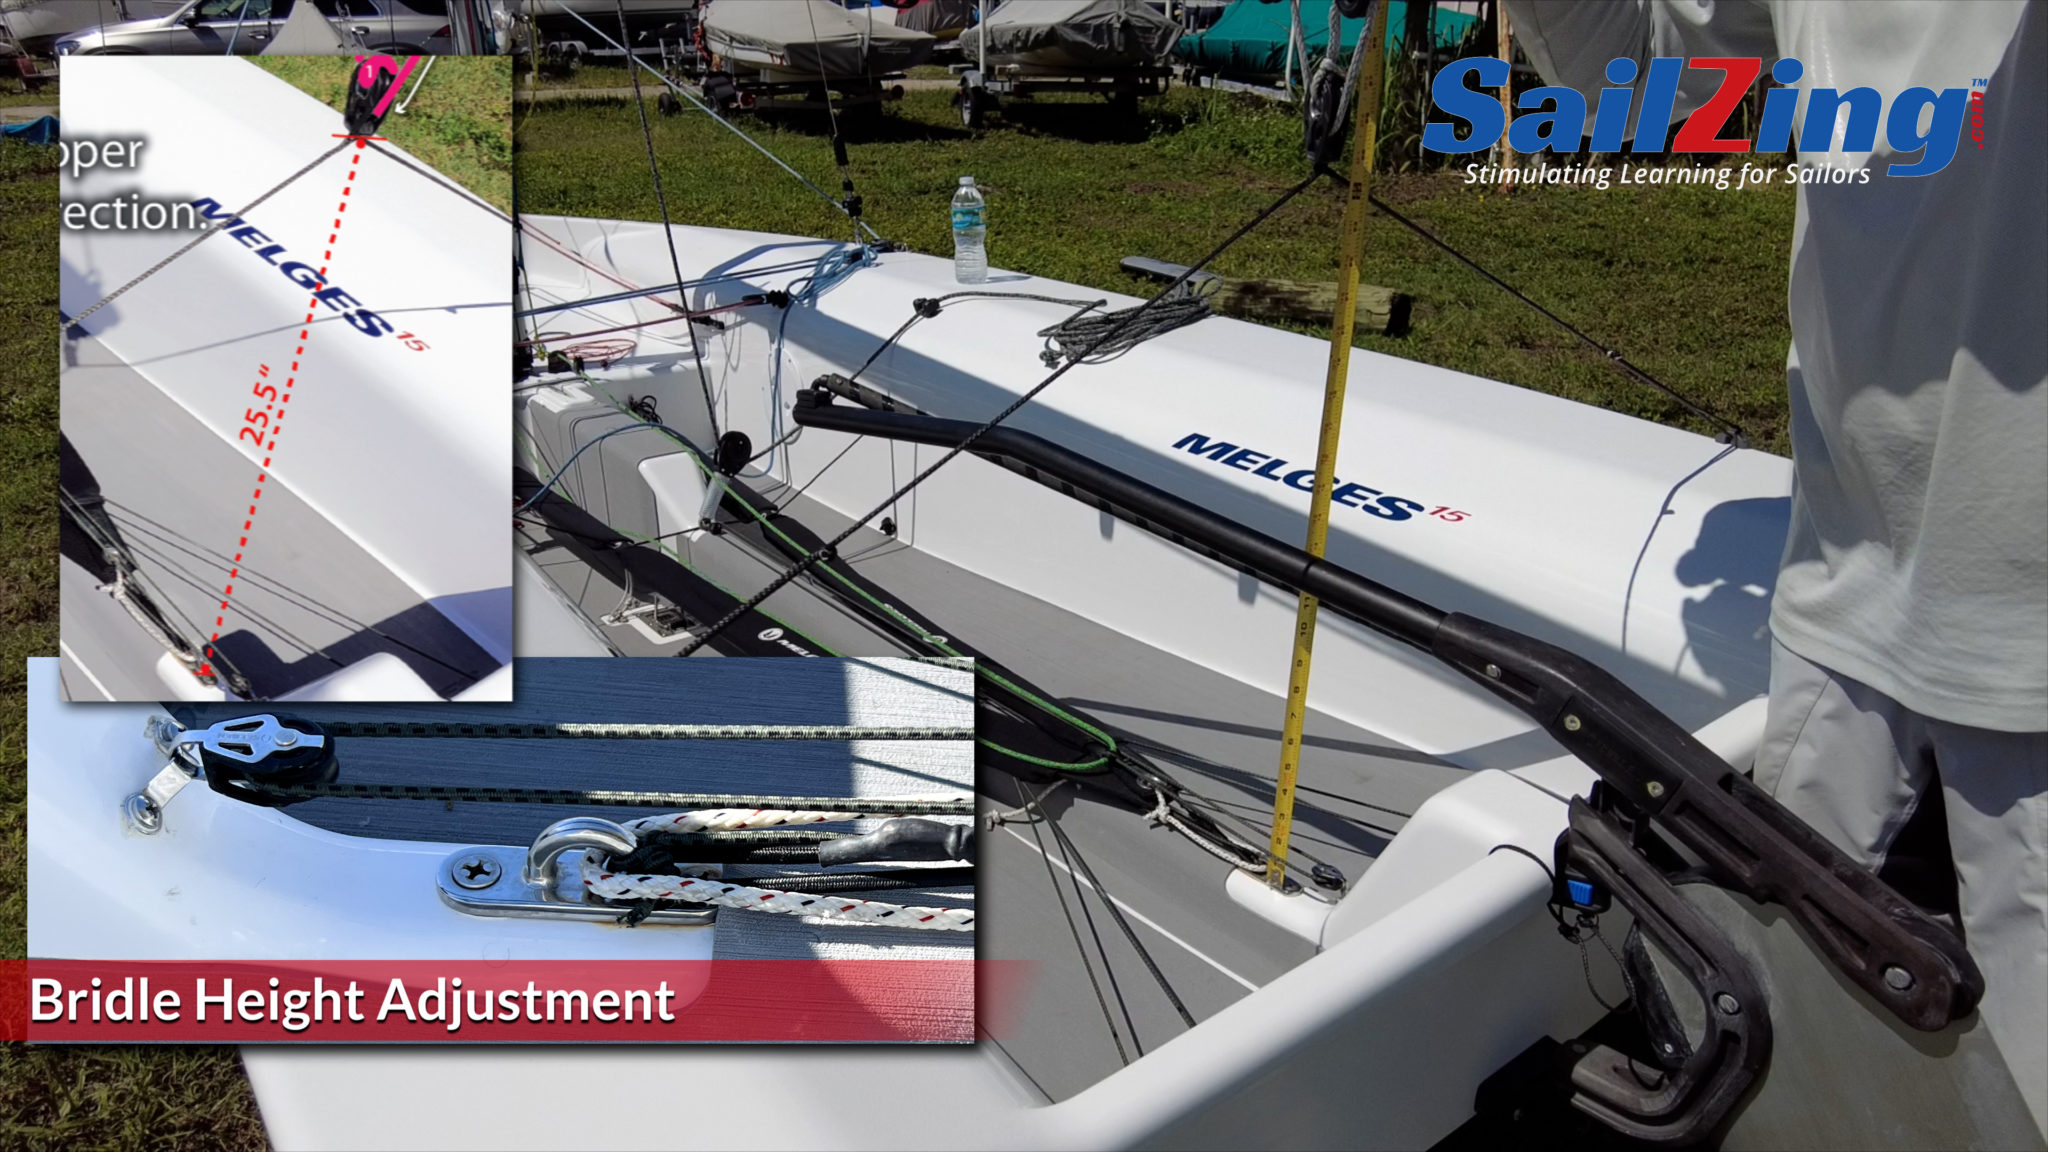
00:51:54 Bridle Height Adjustment
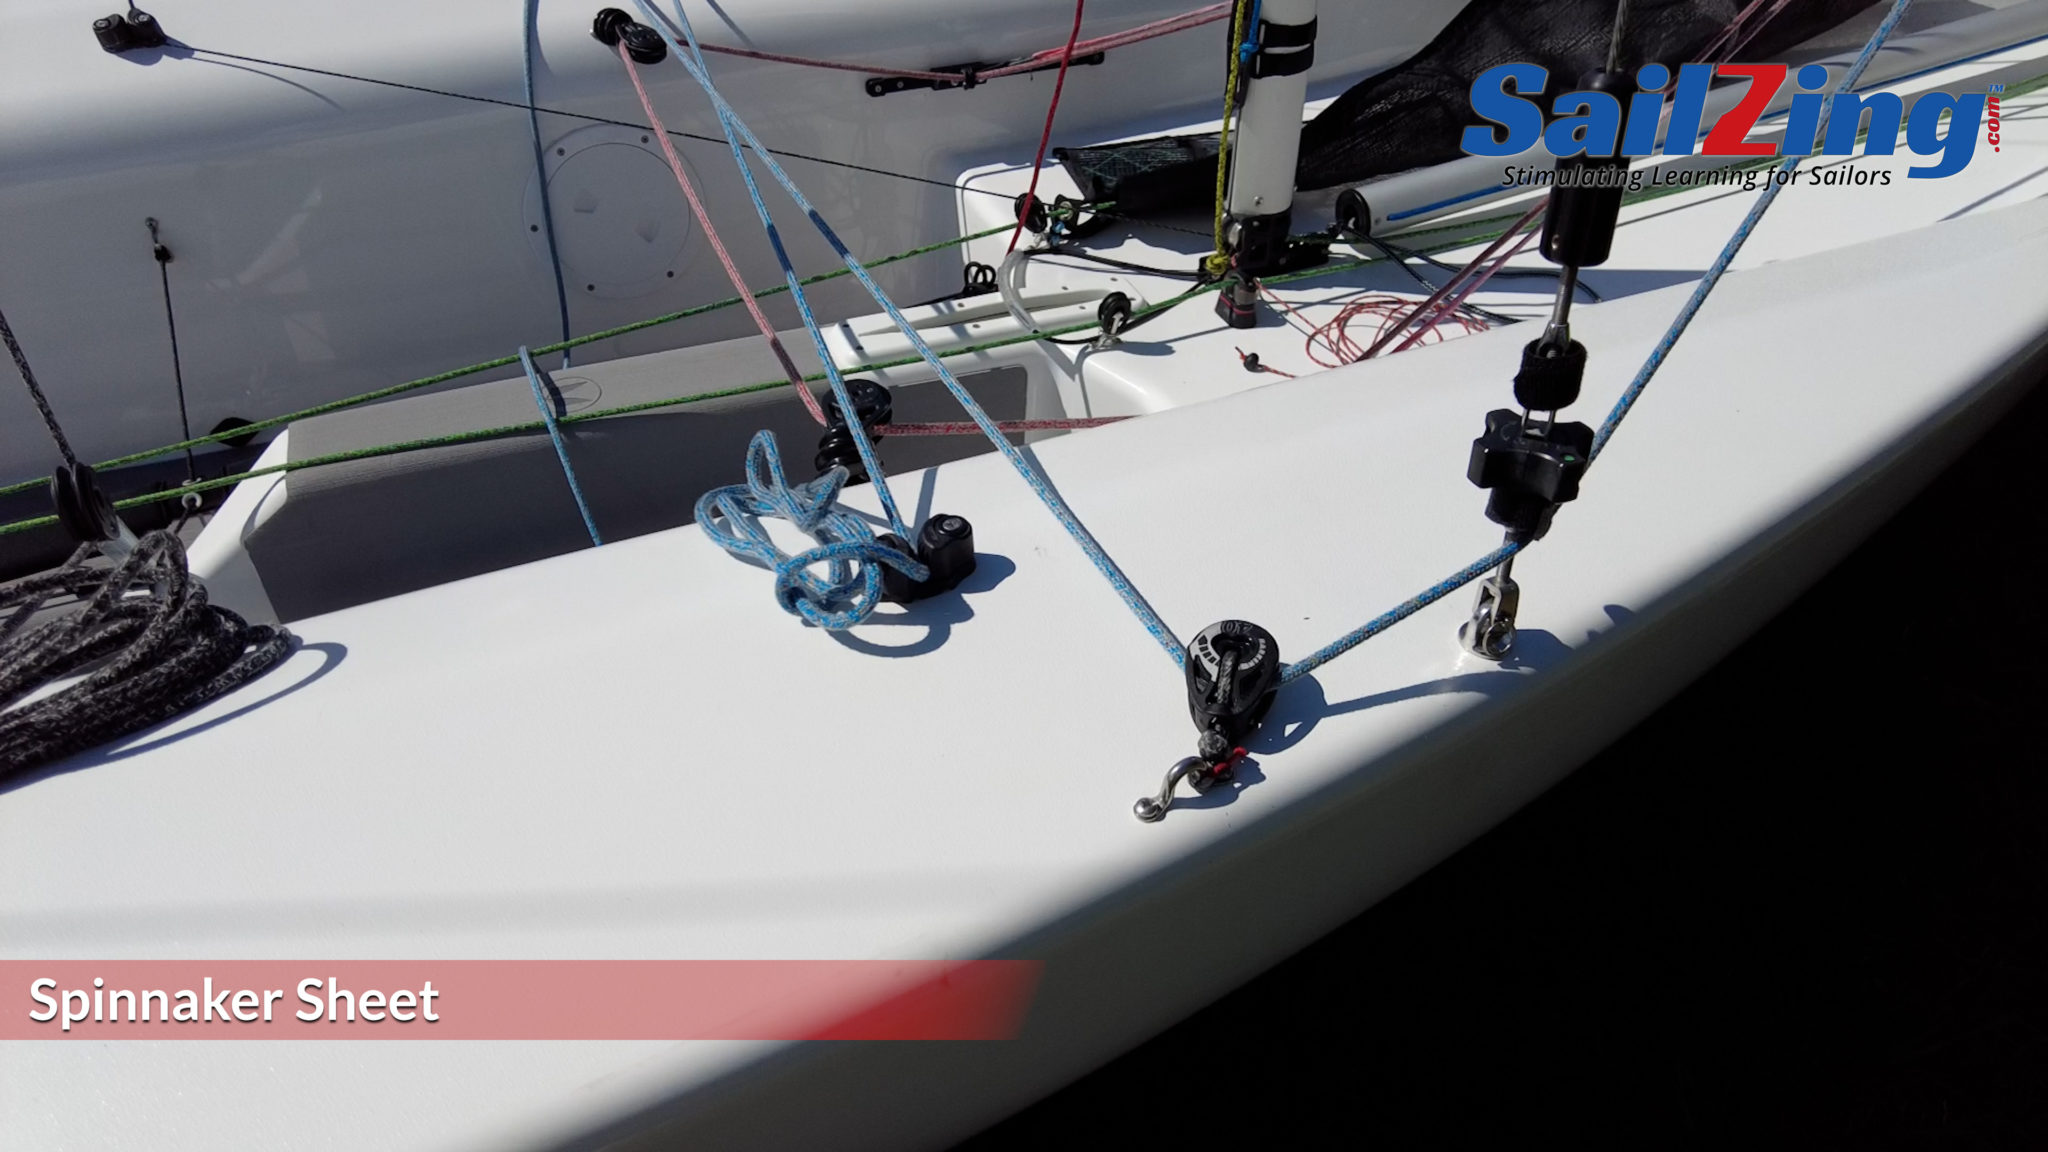
00:54:31 Spinnaker Sheet Path
00:54:52 Jib Sheet Path
00:55:34 Ratchet Blocks – Spinnaker & Jib
00:56:09 Downhaul / Cunningham Path
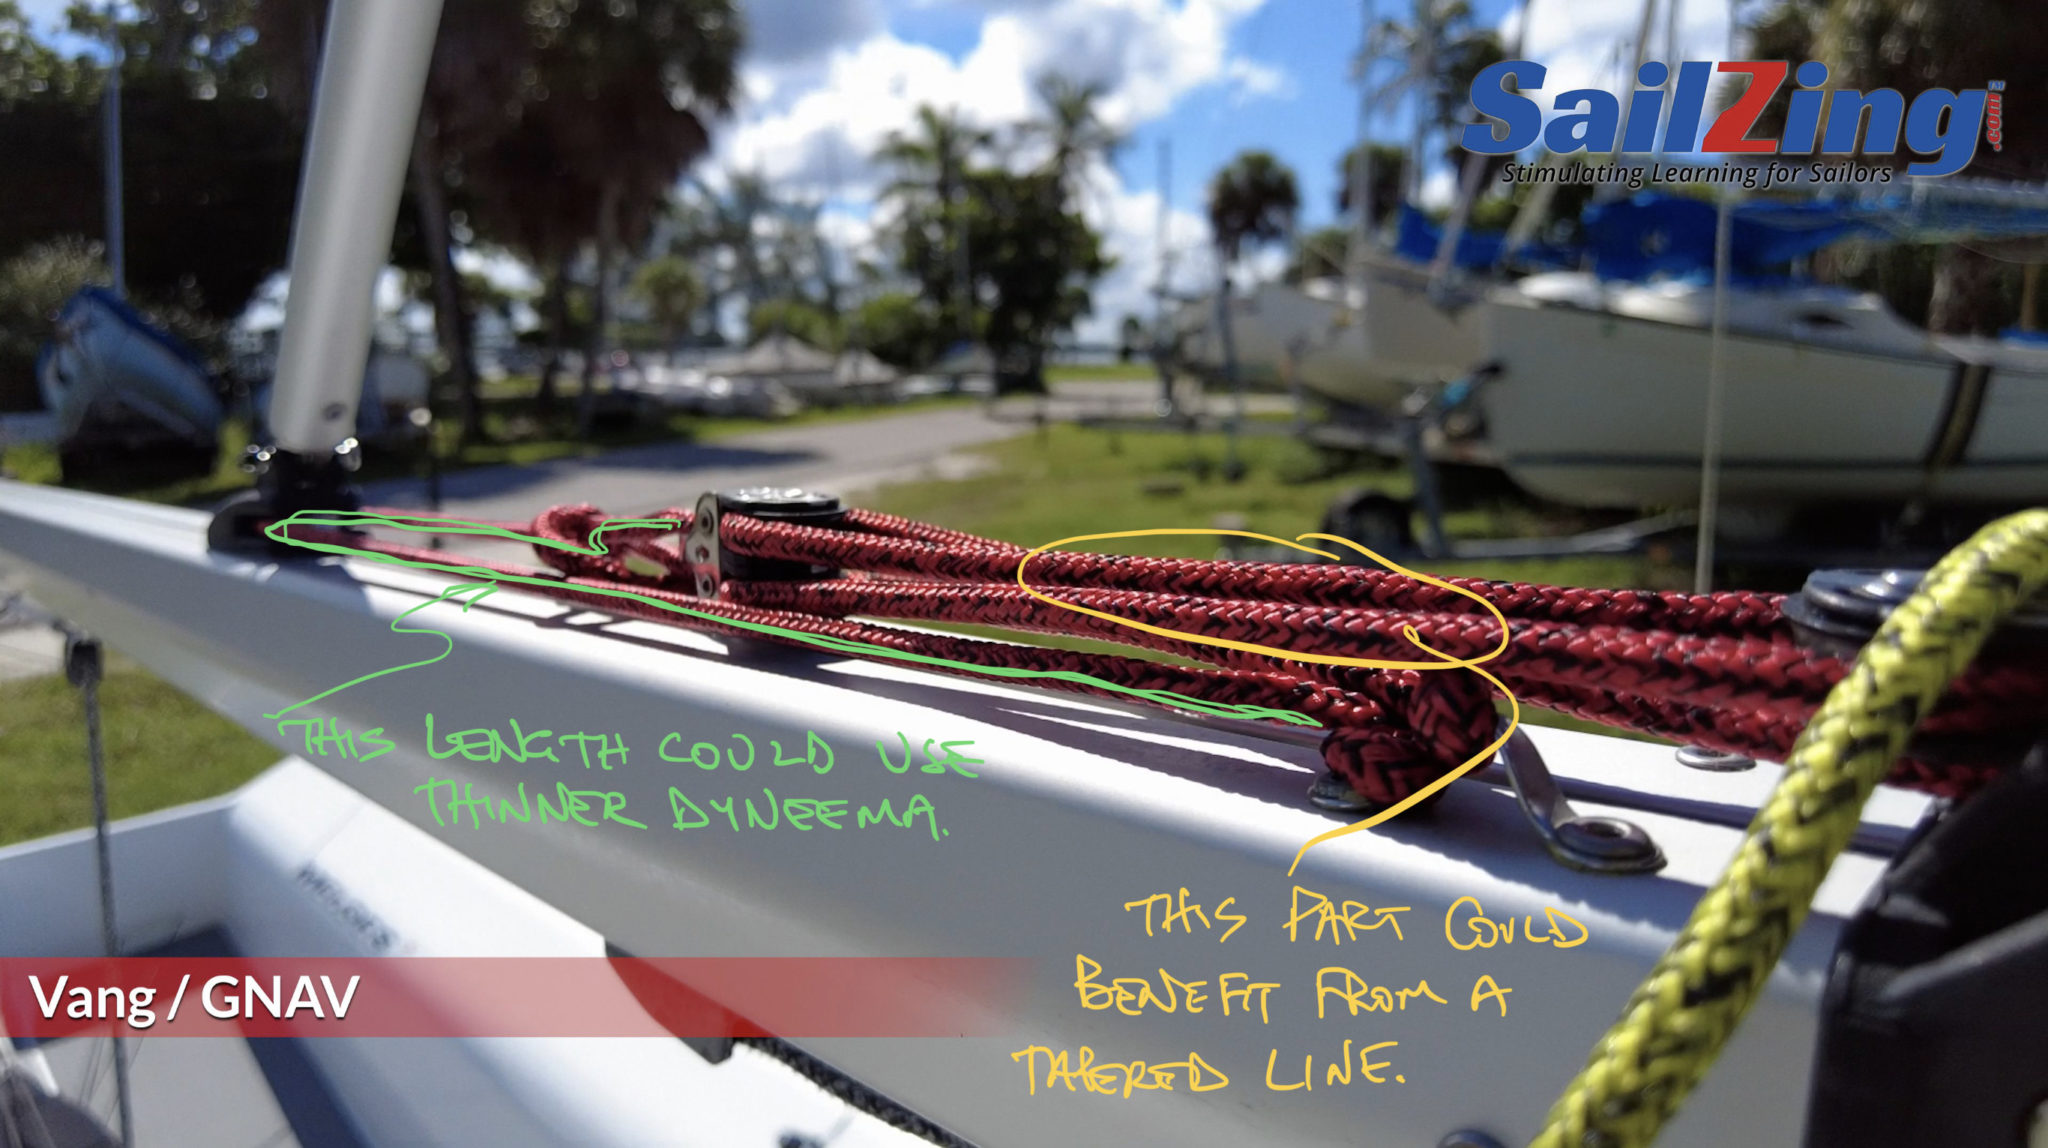
00:56:43 Vang Path
Upgrade: Use thinner Dyneema from the eye to the GNAV tube block to the dual block strap. Make a tapered vang line to run the dual block.
00:57:33 Jib Halyard Adjustment
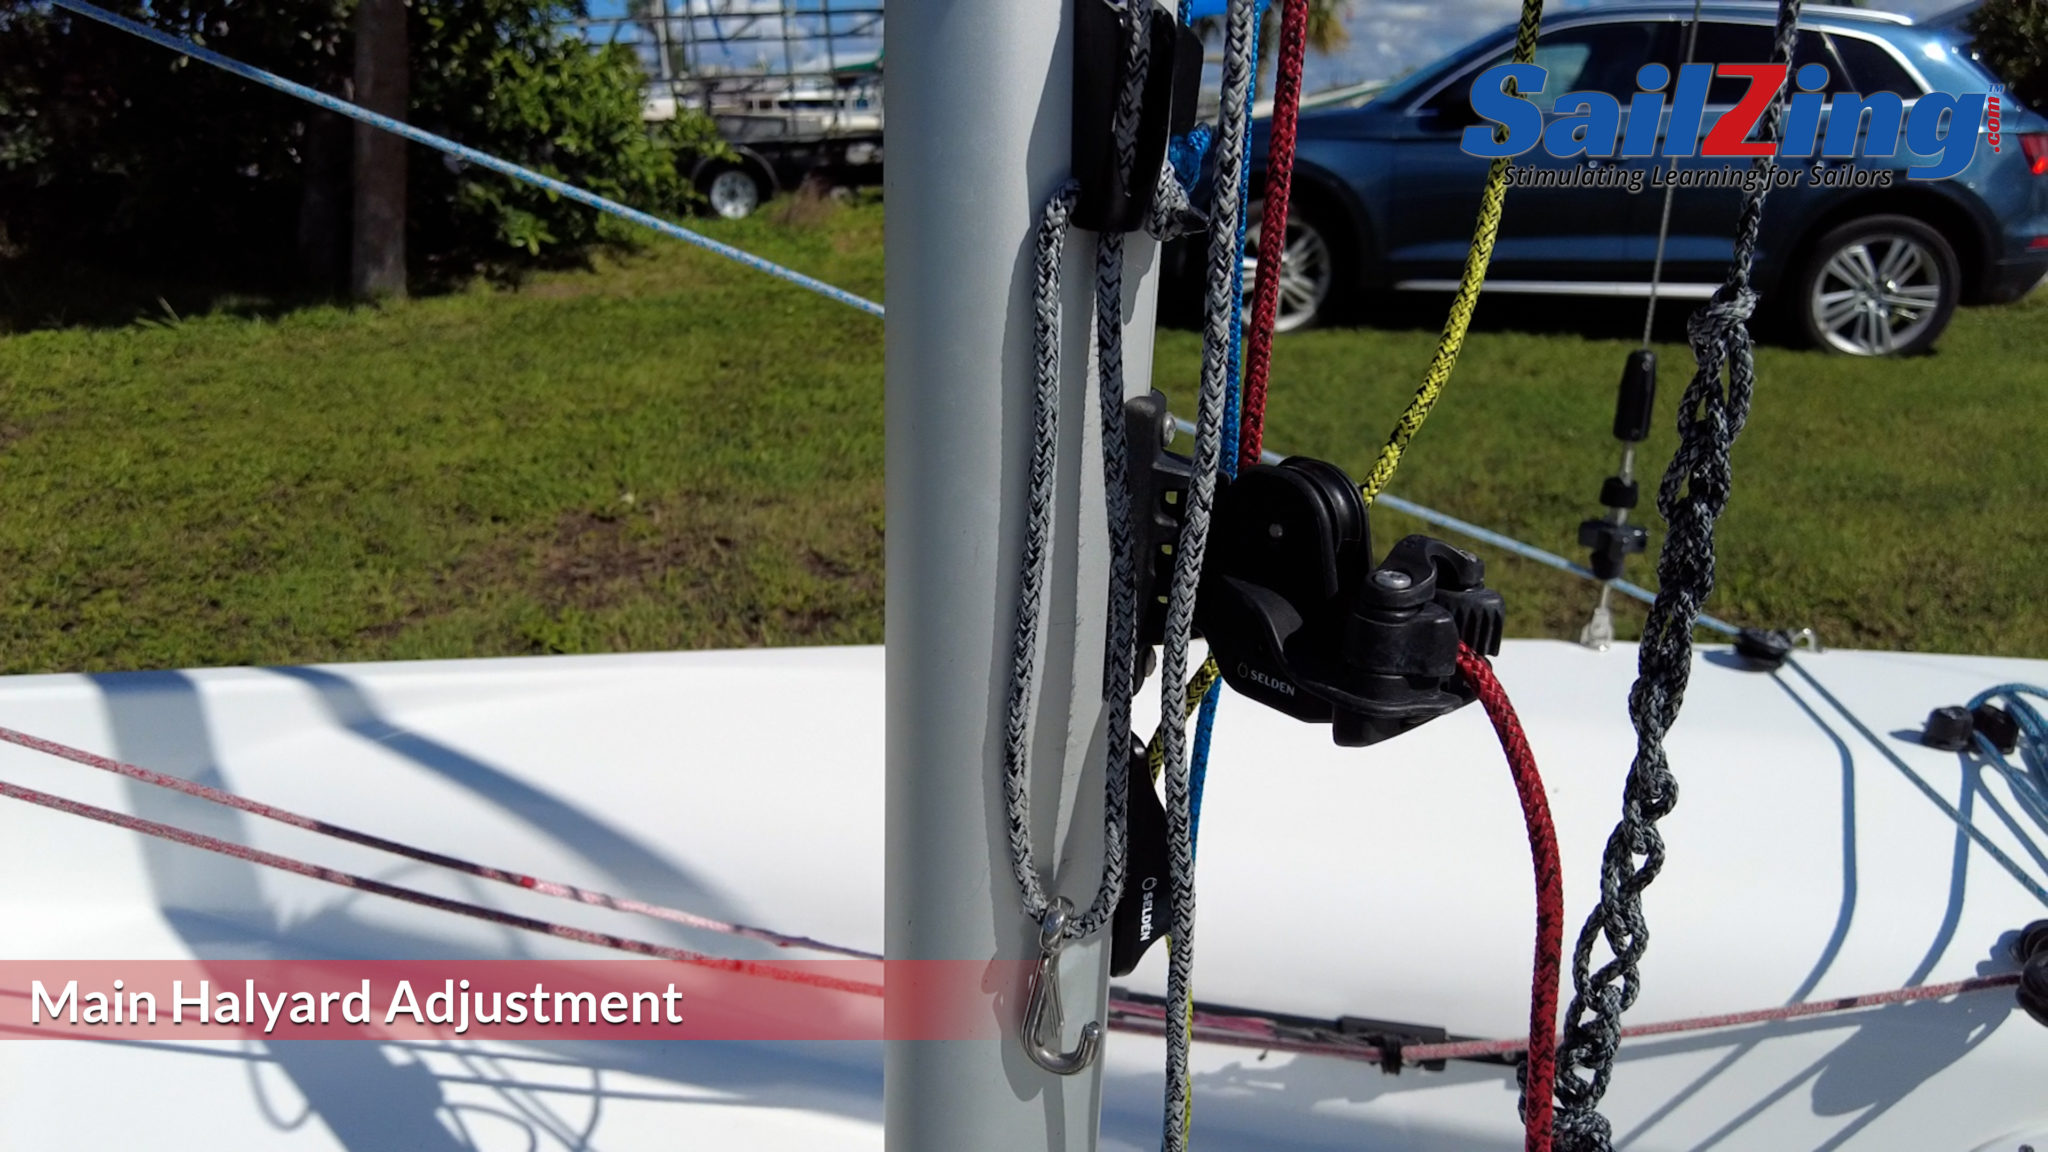
00:57:48 Main Halyard Adjustment
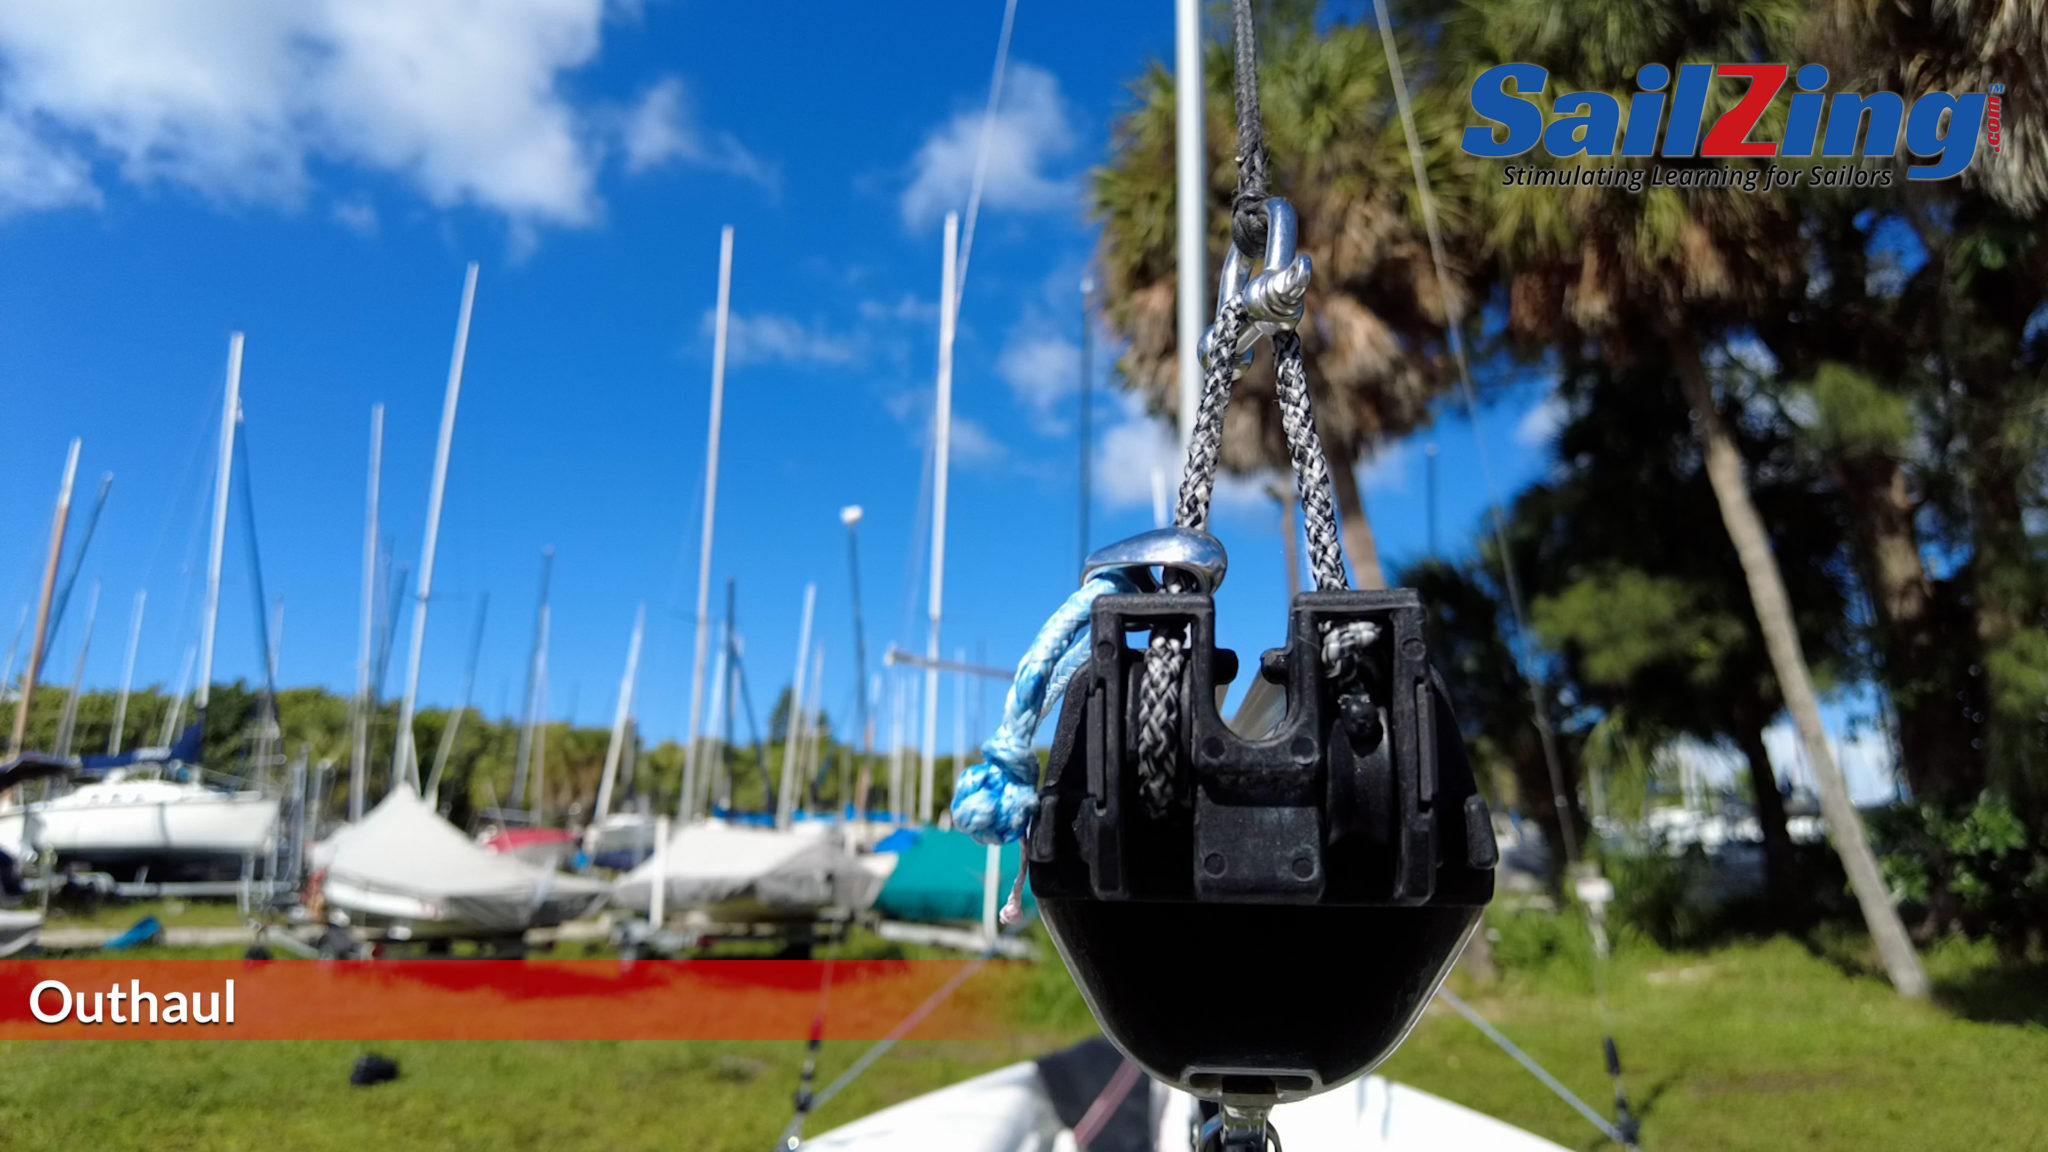
00:57:59 Outhaul Path
00:59:15 Scupper Flap / Drain Cover Operation
Upgrade: SailZing.com offers customized, Delrin scupper flaps. Order at https://SailZing.com/shop
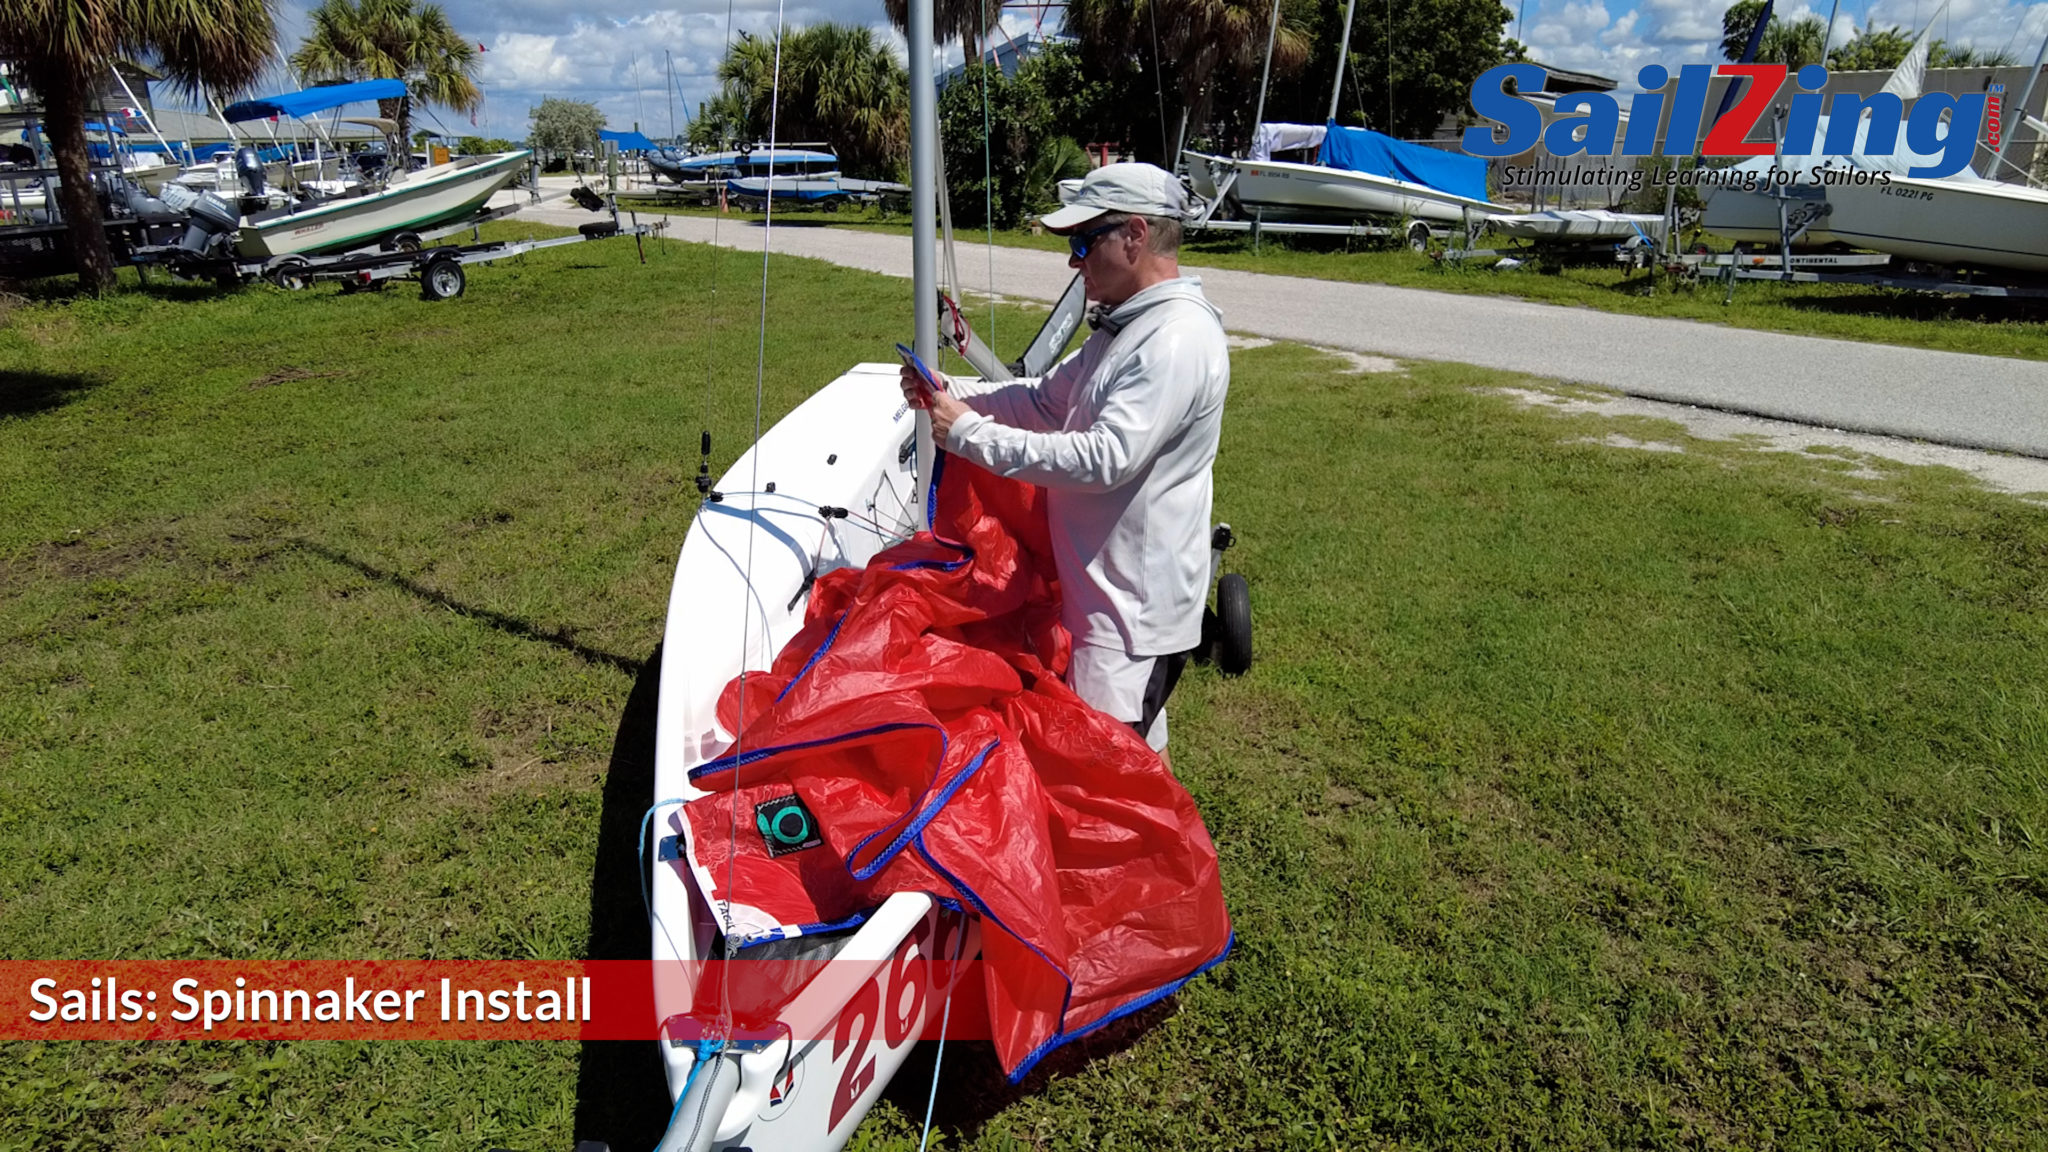
01:00:20 Sail Installation – Spinnaker
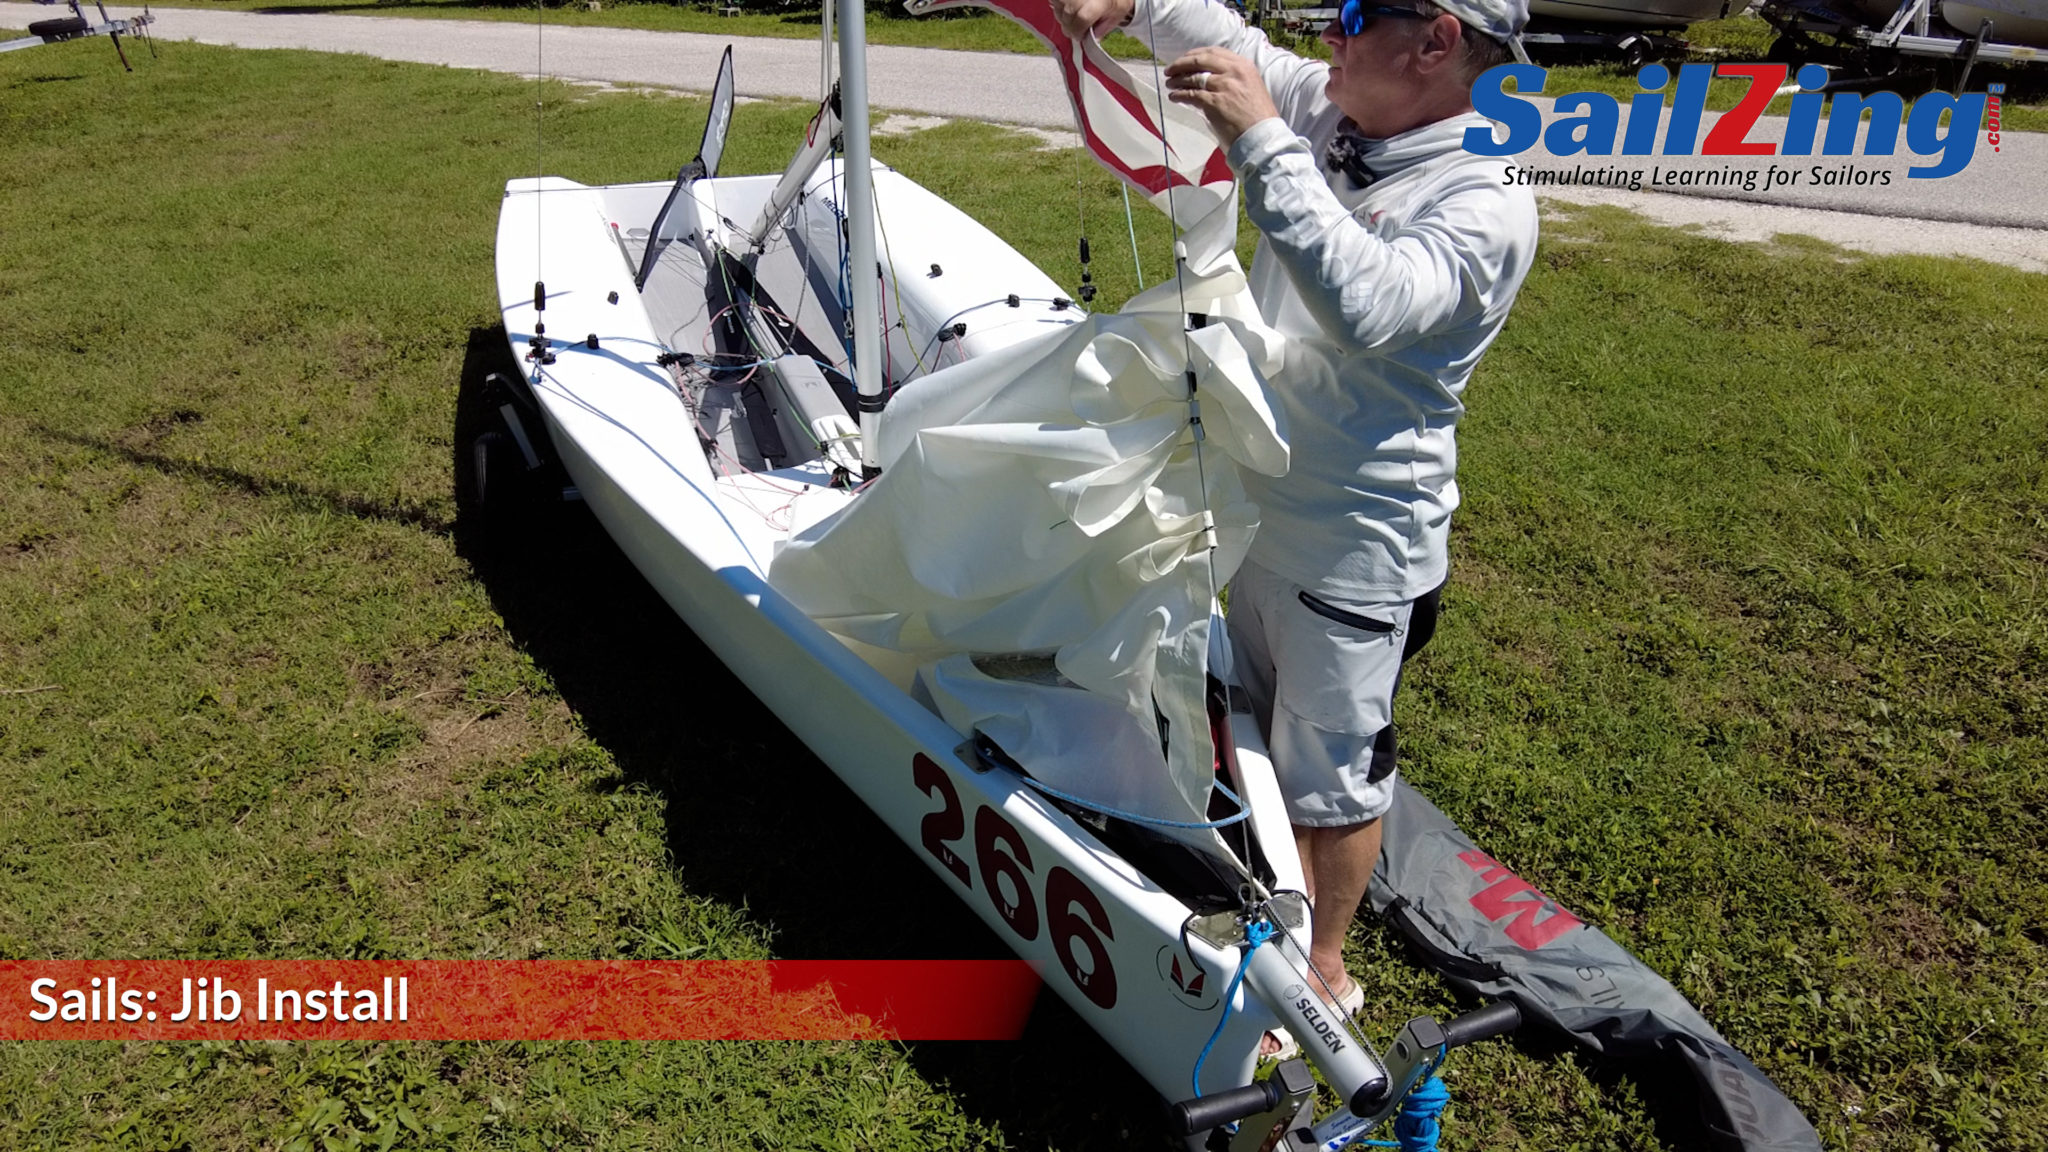
01:10:42 Sail Installation – Jib
01:16:12 Sail Installation – Main

We believe that information presented was accurate at the time of publishing the video. Updates may occur to the Melges 15 package over time.