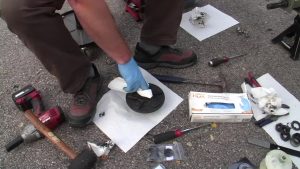
John Porter, a Lake Beulah Yacht Club member and A-Scow, E-Scow, C-Scow and MC-Scow sailor, took some time to walk us through how to change trailer wheel bearings. He shows how to detect failing bearings visually and through the movement of the trailer while towing. He lists the parts required and demonstrates the process from start to finish in this SailZing Tips video tutorial.
NOTICE: The content in this article and associated video are opinion and not certified as fact by SailZing, LLC or John Porter. Use your own discretion.
John is demonstrating how to change trailer wheel bearings on a custom-built C-Scow trailer, but the process would apply to trailers by Melges Boat Works and similar trailer designs.
It’s a messy job so he recommends having nitrile gloves and paper towels such as these:

![]()

![]()
Safety Procedures
Keep the trailer hitched to the car securely and parking brake set and on level ground.
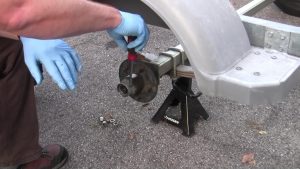
Put the axle up on a jack stand to keep the trailer from falling on you or damaging the axle as you change the trailer bearings.
AmazonBasics Steel Jack Stands with 2 Ton Capacity

![]()
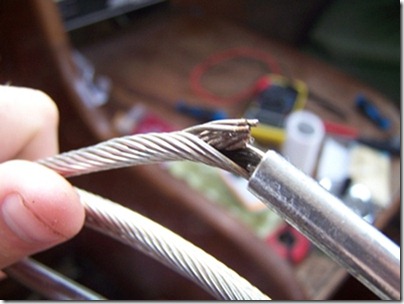
Now that the trailer wheel is raised off the ground, spin the wheel and listen for grumbling and inspect the tire tread for uneven wear. If there is uneven wear, it could be caused by a bent axle or failed bearings. Another sign of a wheel bearing problem is play in the wheel side-to-side.
While trailering your boat, you may see wobbling in the trailer behind you that could indicate a bearing or axle issue. If the wobbling occurs right from the start of your trailering, it may just mean that the boat is out of balance front to back, especially with stacked trailers. Individual scows tend to experience this problem less often due to the way that they are positioned with “bunks” / bolsters.
Removing the Wheel & Hub
If you’re using a lug wrench, you should put the wheel on the ground to loosen the lug nuts initially. With an impact wrench, you may be able to “break the lugs free” without lowering the wheel.
Cartman Telescoping Lug Wrench, Wheel Wrench – Standard Socket (4 sockets)

![]()
Remove the trailer bearing cap. You can pry it loose carefully with a screwdriver or tap it with a rubber mallet as you turn the hub. If you use a screwdriver, try not to gouge up the metal edges.
TEKTON 30503 Wood Handle Rubber Mallet, 16-Ounce

Craftsman 8 Piece Phillips and Slotted Set, 9-47136![]()

![]()
Tip: Lay out two paper towels to create two piles – one for greasy messes and one for parts.
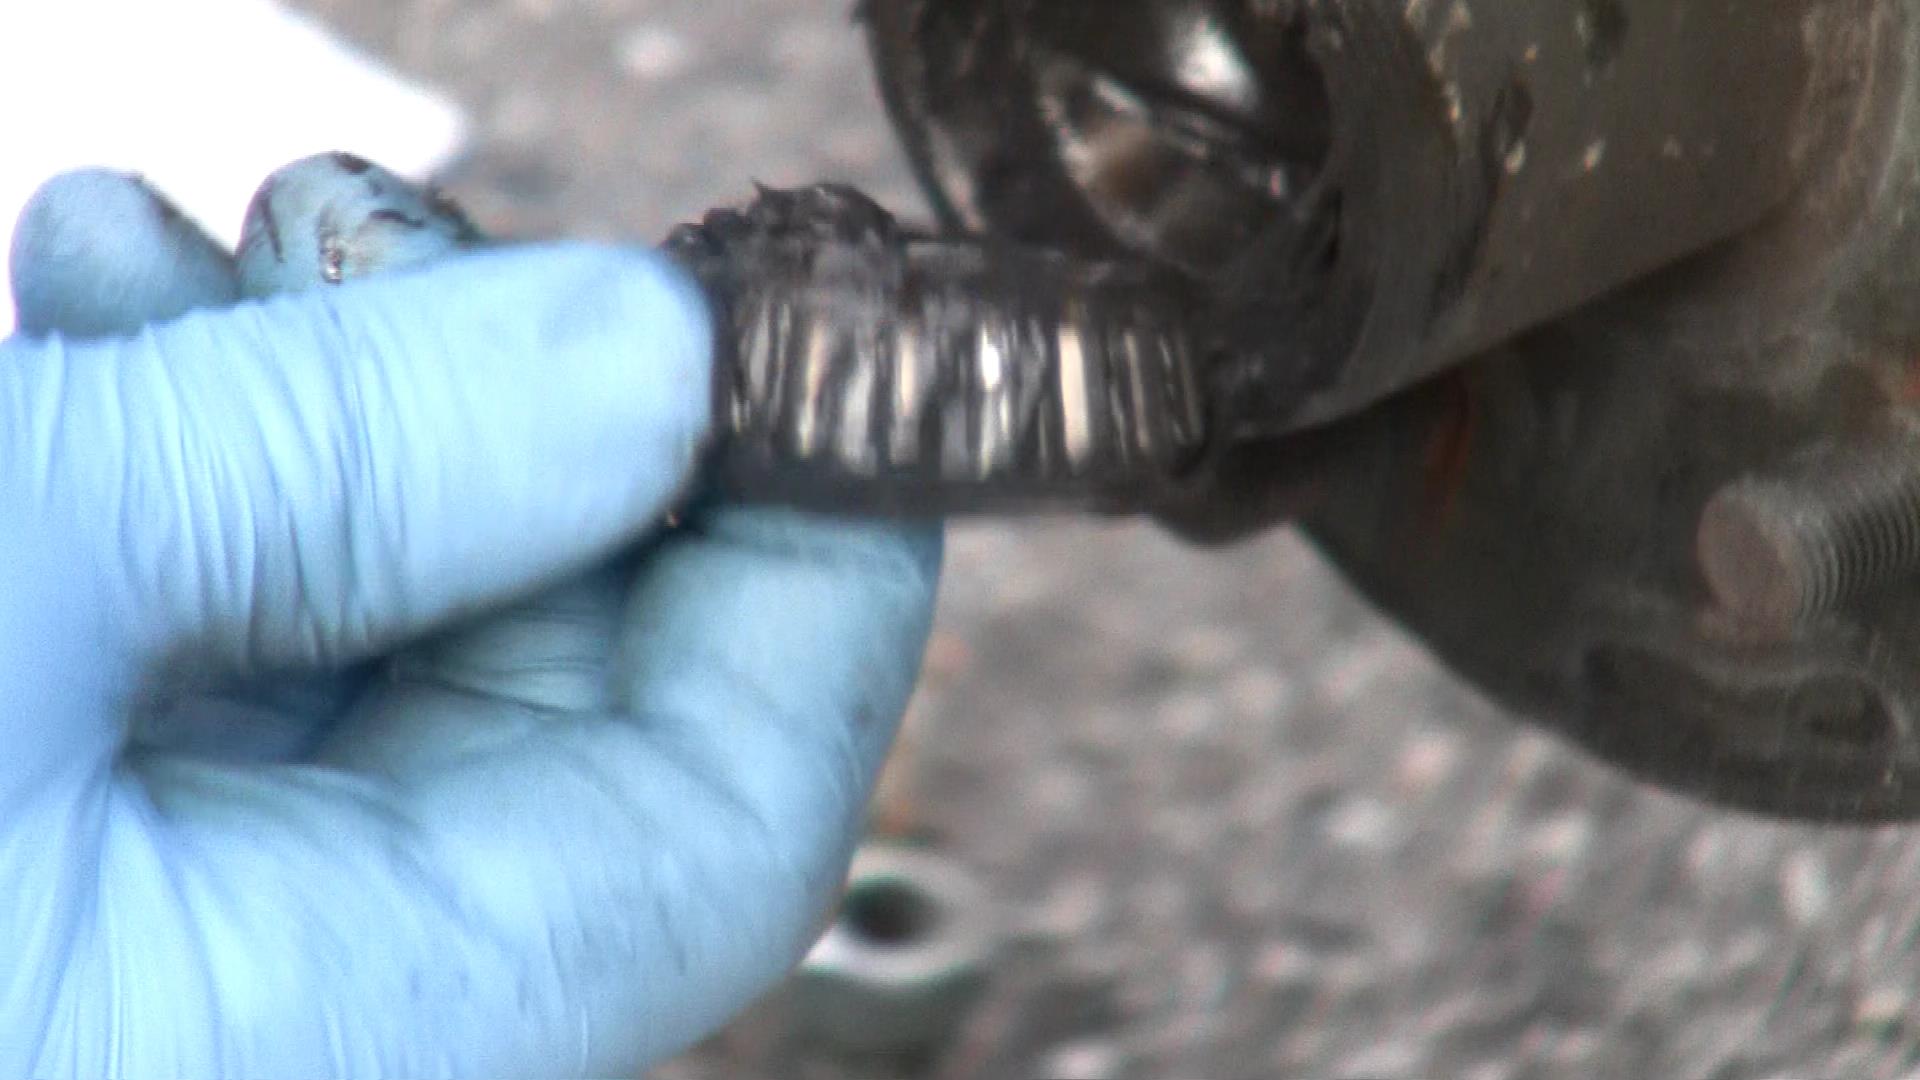
Use a paper towel to wipe the grease off the castle nut so that you can get to the cotter pin that locks the nut from spinning.
Remove the cotter pin and use a wrench or channel lock-style pliers to remove the castle nut.
Kobalt 5-piece Pliers Set – with channel lock-style pliers

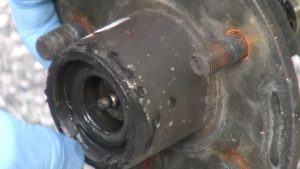
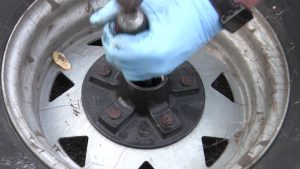
![]() Unseat / remove the wheel hub by pulling it straight off the axle. The outer bearing is loose and will probably fall right out of the hub. Clean the excess grease out of the hub.
Unseat / remove the wheel hub by pulling it straight off the axle. The outer bearing is loose and will probably fall right out of the hub. Clean the excess grease out of the hub.
Removing the Wheel Bearings
Use the bearing puller to pry the rear bearing seal out. You could pry out the seal with a screwdriver, but this is an inexpensive tool to do the job if you will be pulling bearings regularly.

Pull the second bearing.
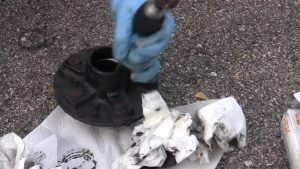
Now push a wadded paper towel through the hub to force the bulk of the grease out of the hub.
Preassembled Hub
As a spare for long trips or to avoid changing the trailer bearings incorrectly, you could buy a pressembled and greased hub. The quality of the bearings and grease may not be high quality. As John says “it’s way better than doing a bad job.”
C.E. SMITH Trailer Hub Kit Package 1-1/16″ Stud 5 x 4-1/2 / 13311 /

![]()
TIP: While on road trips, John will check his hub periodically by tapping it with the back of his hand to see if the hub is hot. It can get warm, but is unlikely to be hot unless there is a problem happening. During these stops, he also checks his tie downs.
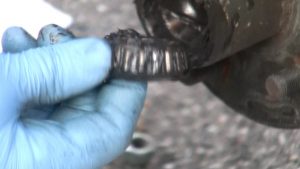
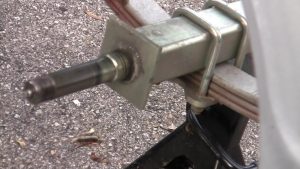
Clean the remaining grease from the hub spindle including the threads. Inspect the spindle for wear. If the axle needs to be replaced, it can be removed by unbolting the u-bolts.
Removing the Races
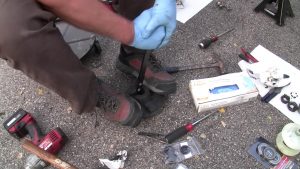
If replacing the races, drive the “races” out of the hub by using a screwdriver and a hammer to push out the race.
CAUTION: Wear eye protection for this procedure.
A screwdriver with a metal cap is preferred so that the hammer doesn’t hurt the handle of the screwdriver. This process may render the old race unusable. Start with the hub on the ground. Hit the race and rotate the hub to hit the race at another point. Hit and rotate the hub until the race is pressed to the ground. John then places the hub, race down, on the wheel and pounds the race completely out. Flip the hub and repeat for the other race.
Wiha 53010 Slotted Screwdriver with SoftFinish Handle and Solid Metal Cap, 3.5 x 75mm

![]()
Clean the Hub
Clean the hub of ALL grease. You want no old grease and/or contaminants in the hub.
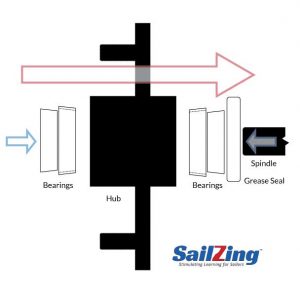
Install The New Wheel Bearings
The new trailer bearings have a cupped (“race”) side and an angled bearing side. The bearing side goes to the inside and outside of the hub so that as they get tightened they squeeze into the “races”.
The Timken bearings are preferred over cheaper alternatives. References online state that they are also manufactured in the USA. John considers them to be more consistent in quality.
BETTER – Timken SET4 Bearing Set – Each

You might be able to save some money with less expensive bearings, but they add a small amount of additional risk.
“Cheapie set” – CE Smith Bearing Kit-Replacement Parts and Accessories for your Ski Boat, Fishing Boat or Sailboat Trailer
Install The Races
Use a fresh set of gloves.
Install the races by hammering them in with the Bearing Race and Seal Driver.
This kit simplifies the process of driving in the bearing “races” and seals and provides some protection for the bearings from tool damage that could be caused by using a steel tool.
Astro 7824 Bearing Race and Seal Driver Master Set

![]()
Grease The Bearings
AMSOIL Synthetic Water Resistant Grease
John’s favorite trailer grease is AMSOIL Synthetic Water Resistant Grease. It’s a rich blue color and if it changes to black, you know that you have a problem.
Red “N” Tacky is John’s second choice.
LUCAS OIL 10574 RED “N” TACKY GREASE/12X1

![]()
You can pack the bearings with grease by hand, but this bearing packer makes the process faster.
Lisle 65250 Bearing Packer

![]()
Use a grease gun to pack the grease into the bearing. Watch for grease to come out of the bearing. Then remove it from the bearing packer and work some grease into the bearing with your palm from the outside. Spin the bearing. If you hear bubbles, then pack some more.
GreaseTek Premium Pistol Grip Grease Gun with 18″ Hose and Extension Pipe

![]()
Now put the hub on the ground with the lugs down. Drop the greased bearing (bearing rollers down) gently into the race.
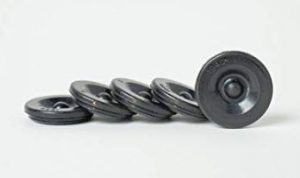
Install the Grease Seal
Take a grease seal and lube the backside (non-cupped) with grease because it will be rubbing up against the trailer. The cup side has a spring that holds it tight to the hub. Use the Seal Driver again to drive the grease seal onto the hub. Drive it in flush. The grease seal only goes on the trailer side of the hub.
Bearing Buddy 60005 1.98″ Diameter Spindle Seal Kit – Set of 2

CE Smith Trailer Grease Seals Straight for 1″-1 1/16″ Spindle

![]()
Mount the Hub
Now put additional grease along the grease seal and bearing. This side will be toward the trailer on the spindle. Grease up the spindle. Slide the hub onto the spindle and make sure that it seats fully on the spindle. Then fill the trailer wheel hub cavity with grease.
Pack the other bearing with the bearing packer. Pack more grease into this bearing with your palm. Insert the second bearing onto the spindle with the bearing rollers toward the trailer.
Put on the Castle Nut
Apply some grease on the castle nut. Screw the nut on. Be careful not to cross thread the threads. Tighten it and you will feel it start to compress the bearings. When it is on firmly, rotate the hub and ensure that it turns freely. If so, then tighten the castle nut down very firmly to seat the bearings until the hub is a bit hard to turn. Rotate the hub. Now loosen the castle nut to the next cotter pin hole. The hub should turn freely. If it is still firm, then back off the nut another hole. Insert the cotter pin.
CE Smith Trailer Nut 1″ Washers & Cotter Pins Spindle

Put On the Grease Cap
Wipe any grease off of the hub in front and behind.
Put on the grease cap. Grease caps keep the elements out from your bearings. Check the color of the grease behind them regularly. If it has become dark, then there is likely to have been a failure. Grease plugs have a tendency to crack over time, so keep a few on hand and inspect them regularly.
Water getting into the grease is one of the top reasons that your grease can fail.
Redline Ez Lube Grease Cap, 1.986″ OD

![]()
Dexter Ez Lube Axle Rubber Grease Plugs Hub Dust Cap – 5 Pack
![]()
A Bearing Buddy is an alternative to the dust cap. The Bearing Buddy is a “cap” that not only protects the bearings from the elements, but also has a fitting for pressurizing grease into the bearings. John is not a big fan of them.
Bearing Buddy Stainless Steel Bearing Protectors (1.980″ Diameter)

Test Drive
Now check your tire air pressure. Put your tire on the hub and finger tighten the lug nuts in a star pattern until the wheel is seated evenly. Lower your trailer so the wheels are on the ground and tighten your lug nuts.
Take the trailer for a test drive. Drive 5-10 minutes and try to get up to speed. Stop. Get out. Touch the hub to check if it’s hot. Give the wheel a shake to make sure that it’s firm. Spin the wheel to be sure that there’s no noise.
TIP: Be smooth in your driving. No weaving. Keep your eyes well ahead up the road. If you start to swerve or make more sudden corrections, the trailer will sway which can heat up your tires and put extra load on your bearings. That’s when things can go wrong.
Clean Up
Now, to clean off any grease on your hands, here are some effective hand cleaners by Gojo.
Gojo 957 Natural Orange Pumice Hand Cleaner – 14 oz. – 2 Pack

![]()
Gojo 0955 Natural Orange Pumice Hand Cleaner – 1 Gallon

![]()
NOTICE: The content in this article and associated video are opinion and not certified as fact by SailZing, LLC or John Porter. Use your own discretion.
Sailors Helping Sailors
Will you share your knowledge with your related Comments below?